Weeks before the launch of Diablo IV: Vessel of Hatred, Blizzard Entertainment PR reached out to invite the press and fansites to an NDA review. I downloaded the client and played for over 10 hours on Day One. I reached level 60 on Day 2 and played the expansion for 10 days.
This NDA version of the game had no restrictions. It is as if I was playing a candidate for release. This NDA version included the entire Campaign Story, cinematics, and cutscenes. Possibly most of the feature systems were in place.
In this review, you will read details about loot per activity, but there is a patch going out before the Launch that will make sweeping changes to loot, caches, and material costs to enhance your gameplay experience thanks to tester feedback.
I created a Necromancer to find out how it felt in the new expansion. As I obtained Legendary items from Goblins and other sources, I switched difficulty mode up to Expert. There are no more capstones. If you have Legendary Items equipped, you are good to go. Switch to Expert. Eventually, I felt so strong that I decided to tackle The Pit. You no longer have to do Pit Tier 1, then Tier 2, each up to Tier 20. The moment I unlocked The Pit, I got the Tier 20 pre-selected for me. I completed a Nightmare Dungeon to obtain the 3 runeshard requirements to enter The Pit. I completed the Pit without trouble, and that’s all the requirements to switch to Torment I difficulty. Easy peasy!
I reached level 60 in about two days of mostly doing the Campaign without the Seasonal event.
I recommend completing the Campaign in Hard Difficulty if you want to go through the story quickly in the Eternal Realm. If you want to do the Campaign with a Seasonal Level 1 character, then I recommend completing the Campaign in Normal or veteran mode … because let me tell you… that is a very challenging campaign with bosses that want to destroy you. I completed most of them in Expert mode, and those were 15-minute epic battles where my fingers were numb and aching.
As for the Season of Hatred Rising event, I don’t recommend the Realmwalker right away, much less alone. It can be overwhelming to low-level characters that have only unlocked 2-3 skills and equip low iLevel gear.
CAMPAIGN GAMEPLAY
Blizzard Entertainment recently released a Lore video about Akarat that you should watch, because you will hear a lot about Akarat throughout the Vessel of Hatred campaign. In fact, Altars of Lilith are replaced by 30/30 Tenets of Akarat in Nahantu. This official video is your primer to get a general understanding of what you will experience in-game.
Moving on to my Campaign review, I decided to offer no spoilers about what happens in the campaign. It’s that good. You have to experience it yourself as it happens.
The Diablo IV story ended with Prava and the Church following Inarius into the Burning Hells. Inarius left his flock alone to chase Lilith into the depths of Hell, and eventually, Lilith killed Inarius. Prava and her army were decimated. A few survivors made it back to Sanctuary, including Prava. (read more)
That group of survivors is at the center of Vessel of Hatred, and they want Lorath and Neyrelle brought to justice for what happened in the Burning Hells. Neyrelle is the holder of Mephisto’s soulstone, after all. She was last seen taking a boat in Gea Kul.
After experiencing the Vessel of Hatred campaign, I can say there are a lot of plot twists that you won’t ever see coming. Not even as the plot unfolds before your eyes. I’m a lore guy, and I had expectations for what might happen in the expansion with all the info the original campaign provided. Throw all your expectations out of the window. The narrative team is going to shock and awe you with great storytelling and pacing, and they drive the story to very unexpected outcomes.
The final cinematic of the campaign has 2-parts. It almost feels like watching a Marvel Cinematic Universe (MCU) film, with that post-credit scene that hints at what comes next in an upcoming Marvel film. This Diablo IV: Vessel of Hatred cinematic’s second part will leave you with a massive cliffhanger for the next expansion, and it will chill your heart.
It felt like Diablo IV: Vessel of Hatred is World of Warcraft: The War Within — the first of a three-part Worldsoul Saga. There is far more to tell after Vessel of Hatred, and experiencing that final cinematic seems to tell you, in the back of your mind, that the developers want you to know they are here and sticking around to deliver multiple expansions to tell that long and encompassing story.
What happens at the end of the campaign opens a Pandora’s box of possibilities, and I was left wondering what will happen next. I was also left with an afterthought: “What an awesome campaign story Vessel of Hatred is.”
The boss fights are intense and well-designed. Many of those who participated in the NDA hands-on gameplay, asked the developers to put at least two of these fights as Tormented bosses. We don’t have a definitive answer, but the developers are listening.
Two new types of content can be compared to The Pit and the Infernal Hordes — content that was added over a few Seasons. The Undercity of Kurast can be played in normal mode with a countdown timer that can be extended by killing enemies that show up with a sand clock icon in the minimap and map. At the end of this feature, you are rewarded a cache. That same feature can be played in a more enhanced version by placing a Tribute and a Bargain on the UI before starting the event. The Tribute adds a Time Penalty where you earn less Time Bonus from certain marked enemies, and you have to be quick about going through Floor 1-3 to reach the boss room. The Boss Room disables the countdown.
The second type of content requires at least two players, up to four. The Dark Citadel can’t be compared to anything we have seen in Diablo 4 or past Diablo games. The only thing that has a semblance in my mind is Torghast from World of Warcraft: Shadowlands in terms of different rooms, portals, and puzzles. Torghast also had a lobby area with portals to different floors and events. The Dark Citadel has an instanced lobby known as the Ancient Nexus. There you have service NPCs such as blacksmith, occultist, jewelcrafter, but you also have a Citadel vendor, and there are three portals for different dungeon wings. You have to beat all 3 wings to earn a Weekly Challenger’s Cache. I will provide more details about these two types of content as you continue reading.
Diablo IV: Vessel of Hatred introduces many quality of life improvements, changes to the difficulty modes, requirements to those difficulty modes, summoning materials for Uber Bosses have changed, the Infernal Hordes now capped at 4 Tiers. Infernal Hordes now scales in Torment I – IV difficulty. Nightmare Dungeons no longer require different Nightmare Sigil tiers. Nightmare Dungeons now scale with your character Level and the Difficulty mode.
The Pit is now a facsimile capstone dungeon replacement to unlock Torment I, up to Torment IV. Paragon Glyph is upgraded at The Pit. No longer in Nightmare Dungeons. The obducite (Masterworking material) is no longer looted at The Pit. It is now looted in Nightmare Dungeons, giving players a reason to explore and clear the map.
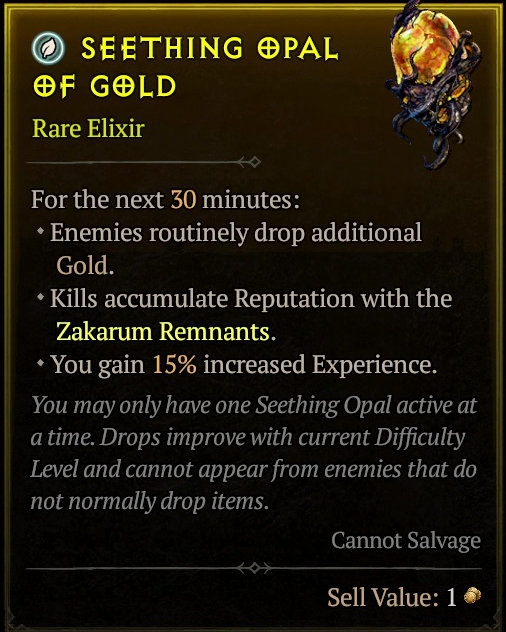
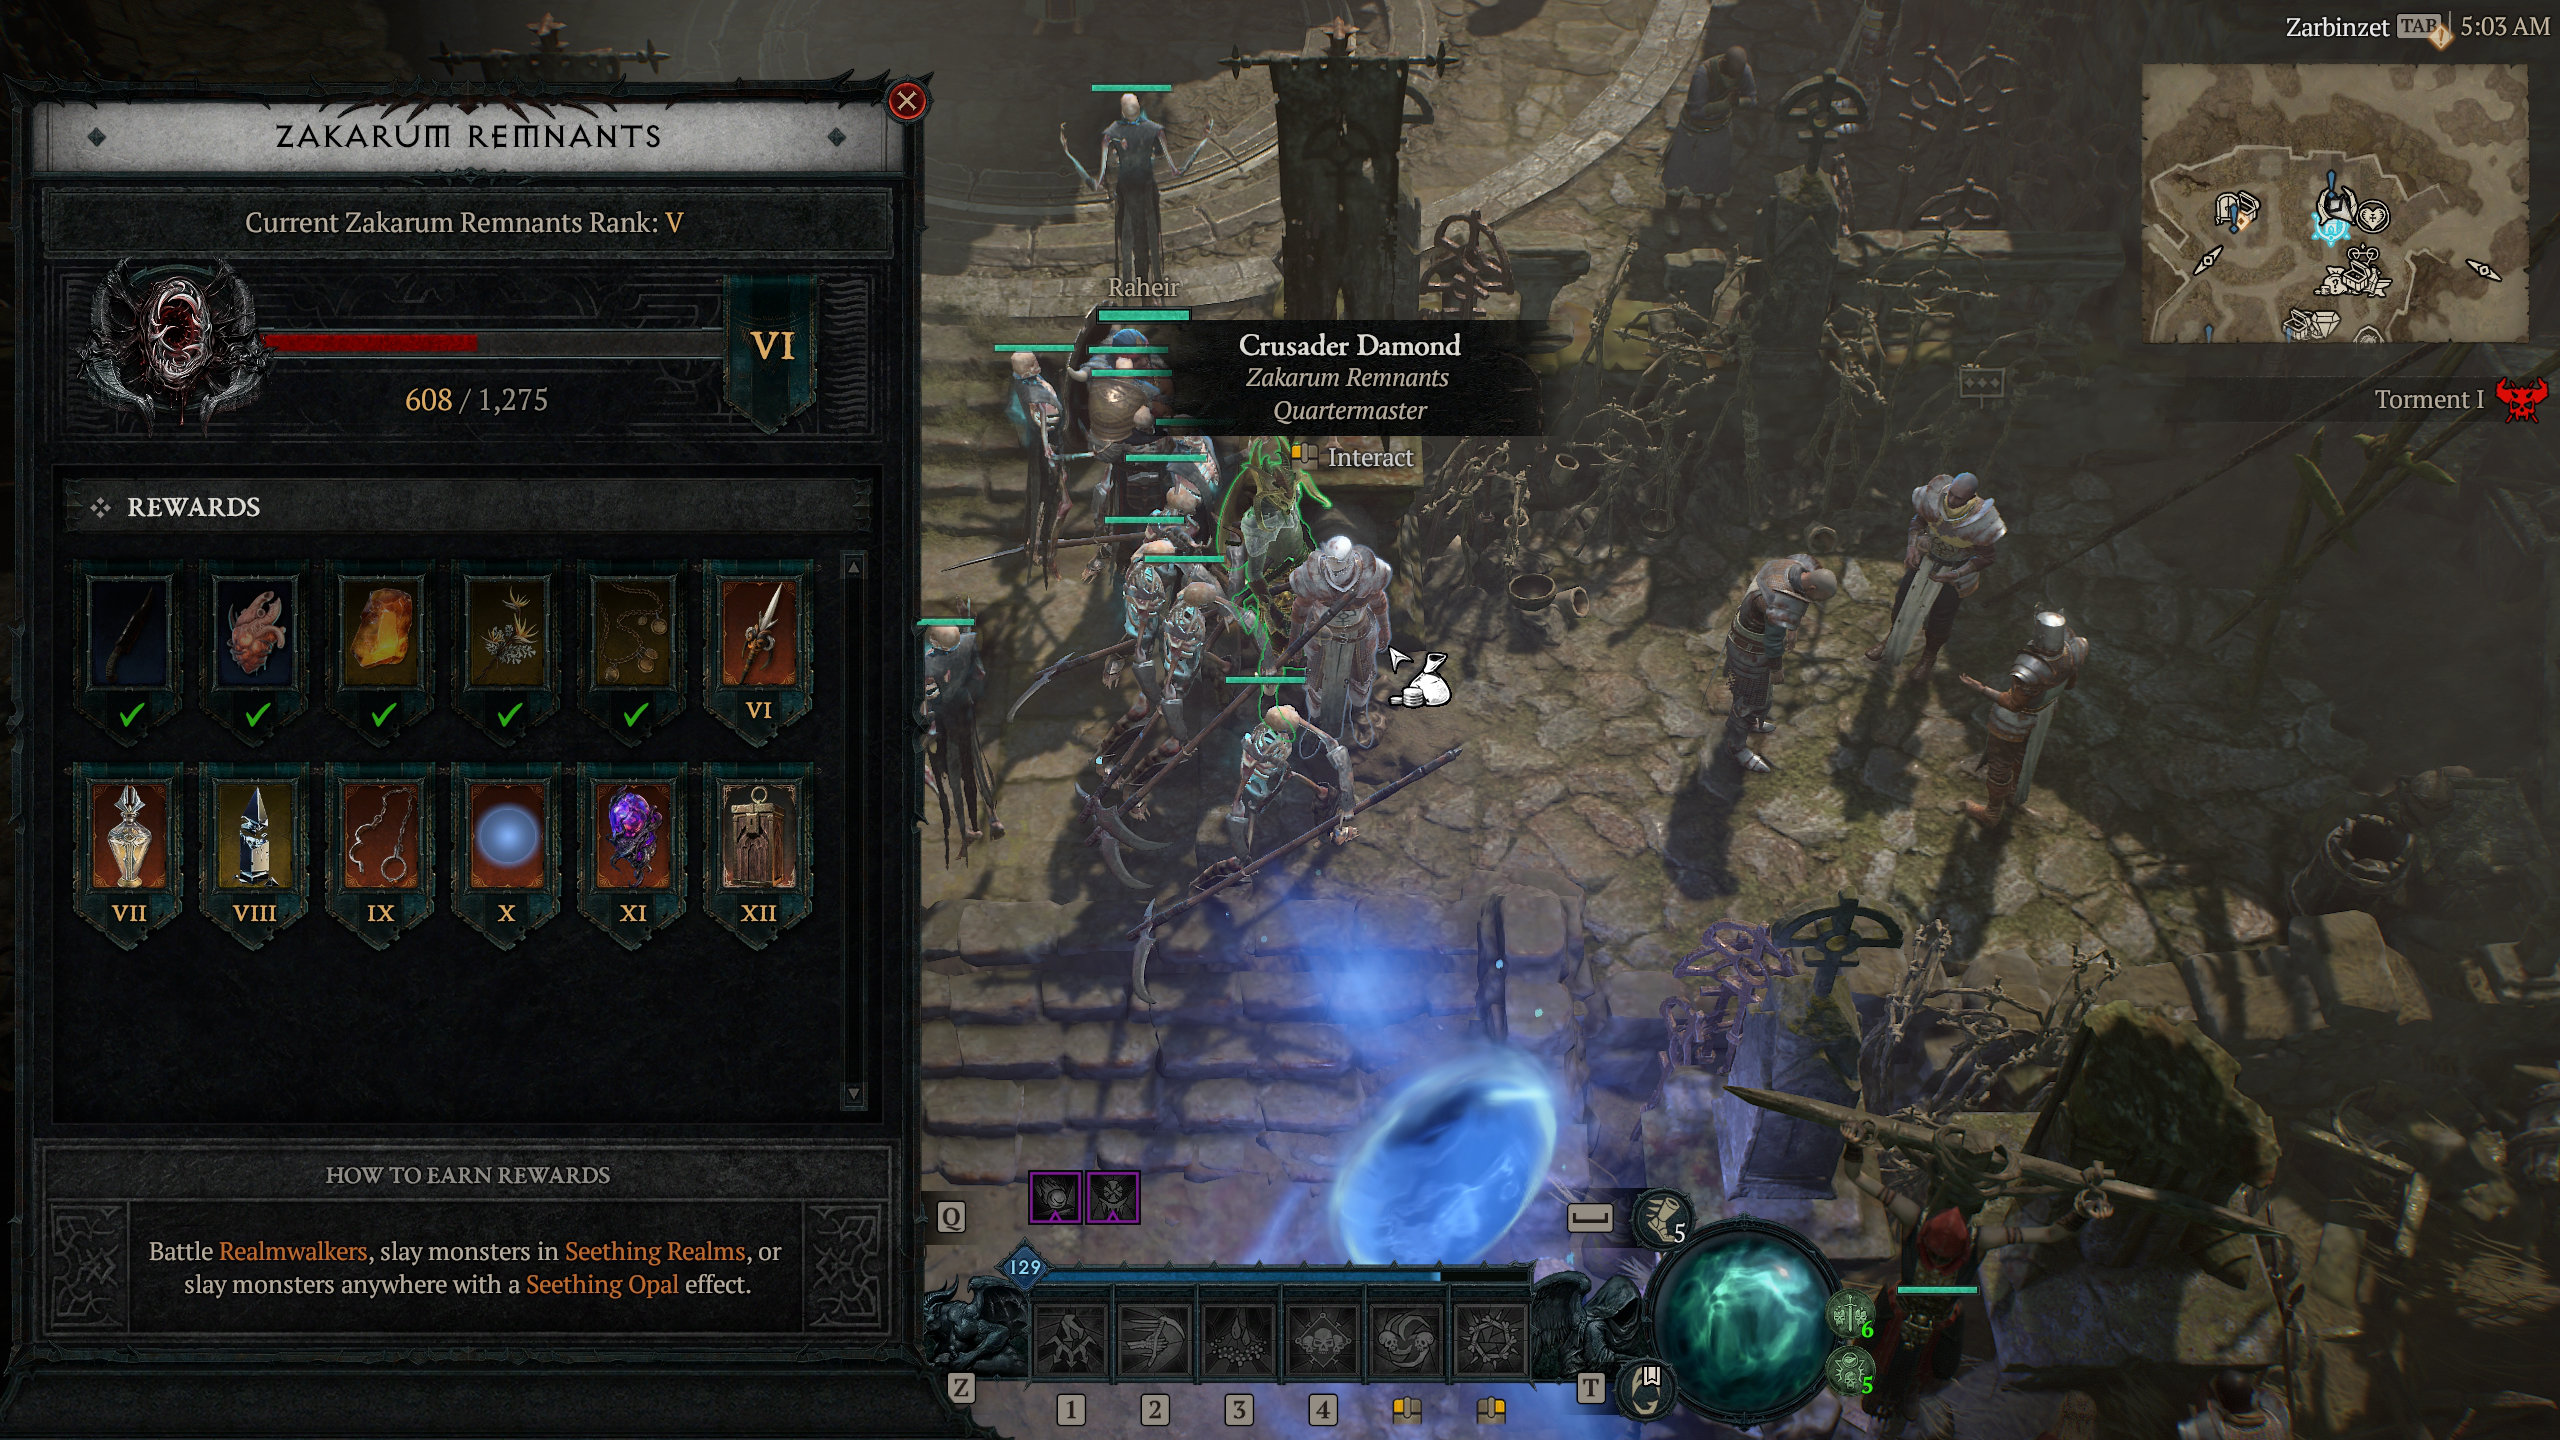
Season 6: Hatred Rising introduces an old Crusader NPC in Zarbinzet who requests your help for the Zakarum Remnants. His quest unlocks methods to increase your renown with the Zakarum Remnants by killing seasonal enemies, completing the Realmwalker event, and delving into the Seething realm after defeating the Realmwalker. You obtain a lot of Tempering and Masterworking materials, legendary and unique items as you unlock Seasonal caches per Rank. When you finish those Seething Realms, you also loot Opal items. These are Seasonal Rare Elixirs that can be used alongside normal Elixirs. Opals provide a +15% Experience buff for 30 minutes and this also increases your Mercenary and Reinforcement’s Rapport up to Rank 10.
There is a lot to unpack in this review. I played Diablo IV: Vessel of Hatred for about 10 days. Special thanks to the Diablo IV Team and the Public Relations Team (Melanie and Brad) for inviting me. Take a few snacks and a large drink because this article surpasses 7000 words and at least 48 images. Let’s roll!
MERCENARIES
Finally, since Diablo II, players can hire a Mercenary in Diablo IV: Vessel of Hatred. One Mercenary of your choice comes with you everywhere and fights for you. Four Mercenaries are part of a group named The Pale Hand.
- Raheir – A shieldbearer
- Aldkin – a cursed child
- Varyana – a berserker crone
- Subo – a bounty hunter that throws alchemy jars and wields a bow.
The first Mercenary, Raheir, is part of the campaign story. You find him in Gea Kul, and he comes with you to Nahantu. He talks about his team back in the old days and takes you to The Den. Once settled there, you can pick 3 quests within The Den to search for the other 3 Mercenaries. Each has their own questline before they come to The Den to serve you.
Of all of them, I think the most striking questline of the four Mercenaries is the Berserker Crone’s. You can unlock her after you conquer The Temple of Rot stronghold in Dry Steppes. You will see a very good cutscene featuring Varyana. A lot of detail was put into making it, and the voice acting is very good as well. Be warned: as a former cannibal of a Barbarian tribe, she is disturbing to listen to, with questionable methods to dispense her notion of justice.
When you interact with any of the four Mercenaries, they have two options:
- Hire Mercenary
- Enlist Reinforcement
When you select “Hire Mercenary,” a screen pops up with that Mercenary’s Talent Tree. You can access the Mercenary’s Talent Tree from your Character UI. It is next to the Class Skill Tree/Paragon tab. This is Raheir’s. As you kill enemies, your Mercenary levels up and earns a Skill Point. You can assign the path of the Talent Tree. But make each point choice count, because you only get 5 Skill Points. However, you can refund Skill Points to choose a different path at no cost.
**Note: You may right-click any images in this review to choose open image in new tab (to view the original image size).
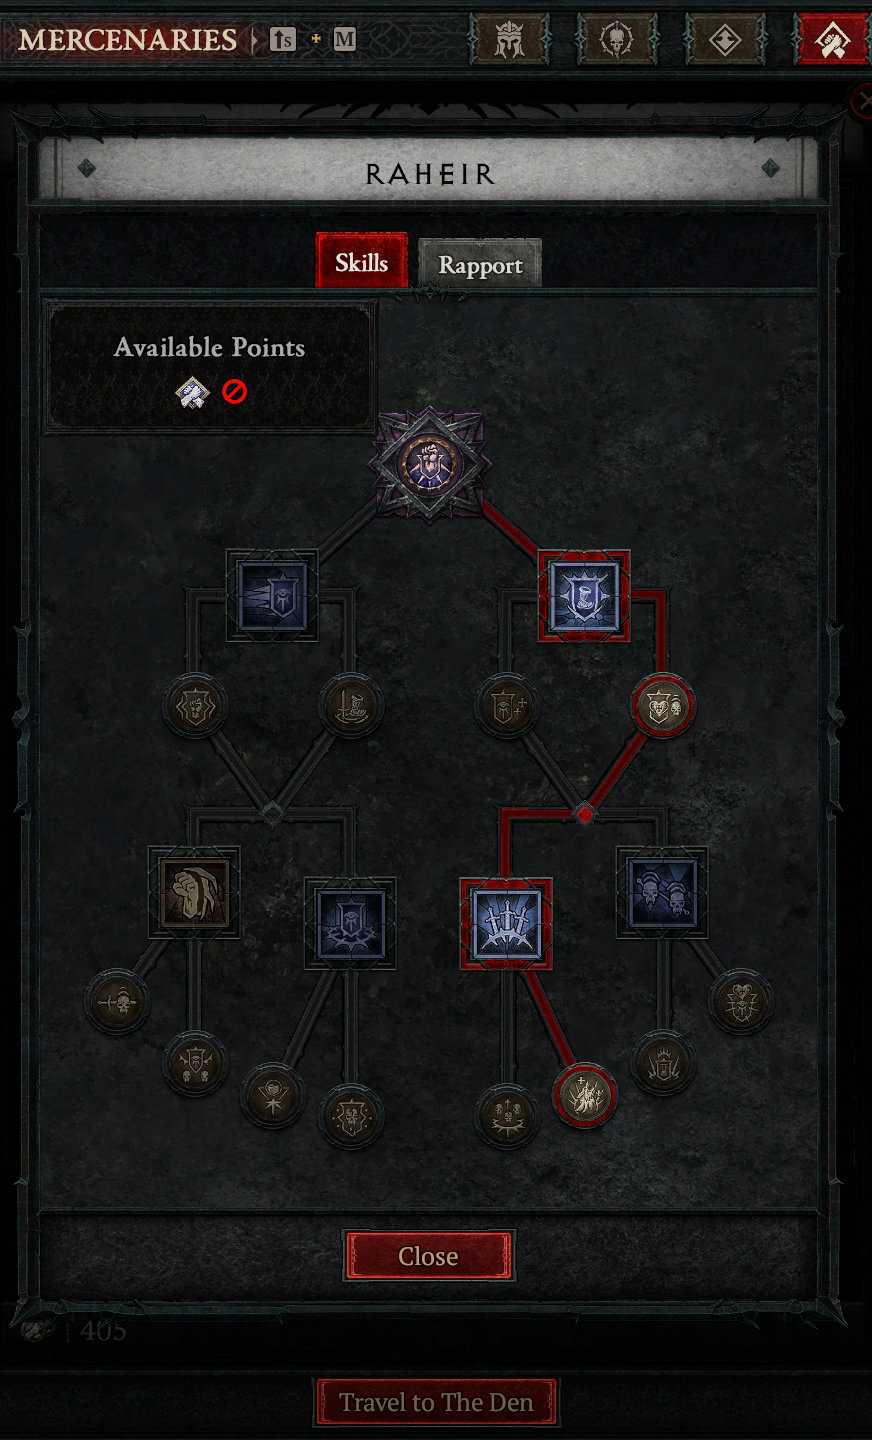
RAHEIR’S TALENT TREE
| Valiance (Mercenary Perk): When you would be damaged for at least 15% of your current Life at once, Raheir comes to your aid to negate the damage, Knock Down close enemies for 2 seconds, and grant you Unstoppable for 0.5 seconds. Cooldown: 30 sec. |  |
| GROUND SLAM (Core): Raheir brutalizes the ground, dealing 2,787 [160%] Physical damage and Slowing enemies by 30% for 6 seconds. Targets in the center of the slam are Slowed by 60% instead. Selecting a Mercenary Core Skill alters their wielded Weapon and Basic Attack. Weapon: Round Shield Basic Attack: Shield Strike Raheir swings a round shield at enemies, dealing 1,481 [85%] Physical damage. Every 3 swings, Raheir Heals you for 5% of your Maximum Life. |
|
| SHIELD CHARGE (Core): Raheir rushes forward aggressively, dealing 1,916 (110%) Physical damage and Taunting nearby enemies for 4 seconds. Selecting a Mercenary Core Skill alters their wielded Weapon and Basic Attack. Weapon: Tower Shield Basic Attack: Shield Bash Raheir bashes enemies with a tower shield, dealing 1,393 [80%] Physical damage and Fortifying you for 5% of your Maximum Life. Cooldown: 11 sec. |
|
| AHEIR'S GUARD: Raheir grants you 15%[+] Armor. | |
| VANGUARD: Raheir Slows surrounding enemies by 40%. | |
| RAHEIR'S AEGIS: Raheir grants you 15% Resistance to All Elements. | |
| DRAW FIRE: When you use a Healing Potion, Raheir Taunts enemies around him for 4 seconds. Can only occur once every 20 seconds. | |
| PROVOKE: Raheir Taunts enemies around you for 5 seconds. You gain 5% Damage Reduction for each target, up to 20%. Cooldown: 25 sec. | |
| CRATER: Raheir strikes the ground 3 times, each burst dealing 522 [30%] Physical damage and Pulling in enemies. The final burst deals 696 [40%] more Physical damage and additionally Stuns enemies for 2 sec. Cooldown: 22 sec. | |
| BASTION: Raheir takes a protective position for 5 seconds, redirecting 90% of the damage that would be dealt to surrounding allies to himself for 5 seconds. Bastion's initial cast also grants surrounding allies Unstoppable for 1.0 seconds. Cooldown: 30 sec. | |
| SHIELD THROW: Raheir throws his shield, dealing 3,920 [225%] Physical damage and Taunting enemies for 3 seconds. The shield bounces up to 3 times and cannot bounce to the same target twice. Cooldown: 22 sec. | |
| MOCKING LURE: You deal 15%[x] increased damage to enemies Taunted by Raheir. | |
| IRON WOLF'S WARD: When Raheir's Valiance is triggered, he Knocks Back close enemies and Taunts distant enemies for 4 seconds. Raheir's Valiance Cooldown is reduced by 25%. | |
| IRONWOLF'S CALL: When Raheir's Valiance is triggered, your next 4 Core Skills within 10 seconds deal 25%[x] increased damage and cost no Resource. Raheir's Valiance Cooldown is reduced by 25%. | |
| SUNDERING SHIELD: Raheir's final Crater burst inflicts Vulnerable on enemies for 4 seconds. | |
| INSPIRATION: Enemies affected by Raheir's Ground Slam take 15%[x] increased damage. Allies affected by Raheir's Bastion deal 25%[x] increased damage. | |
| IRON WOLF'S VIRTUE: When Raheir's Valiance is triggered, he Heals for 25% of your Maximum Life. Raheir's Valiance Cooldown is reduced by 25%. | |
| IRON WOLF'S ARRIVAL: When Raheir's Valiance is triggered, he also casts Ground Slam and Shield Throw. Raheir's Valiance's Cooldown is reduced by 25%. | |
| CONSECRATED SHIELD: Raheir's Shield Throw Consecrates enemies for 6 seconds. Directly damaging a Consecrated enemy Heals you for 6% of your Maximum Life, once per target. | |
ALDKIN’S TALENT TREE
| BLASPHEMOUS FATE: Aldkin occasionally loses control of his curse, transforming into a ferocious demon for 22 seconds. This grants Aldkin powerful new abilities, but the unleashed evil curses you for its duration. Curse of Darkness: You and nearby enemies become Vulnerable. Curse of Flames: Your direct damage Burns enemies for 633 [30%] damage over 3 seconds, but you lose 10% of your Maximum Resource per second. |  |
| HAUNT: Aldkin emits 3 ghostly souls at enemies each Haunting their victims and dealing 1901 [90%] Shadow damage over 10 seconds. If a target dies while being Haunted, its soul jumps to another target. Alkin's Mercenary Core Skill alters his Fate and Basic Attack. Fate: Forsaken. Basic Attack: Shadow Strike. Aldkin shoots a burst of darkness at an enemy, dealing 522 [30%] Shadow damage. Cooldown: 14 sec. |
|
| FLAME SURGE: Aldkin channels a cone of flame for 4 seconds, repeatedly dealing 1,393 [80%] Fire damage. Aldkin's Mercenary Core Skill alters his Fate and Basic Attack. Fate: Aflame Basic Attack: Fire Shot. Aldkin hurls a flaming bolt at an enemy, dealing 696 [40%] Fire damage and 1,161 [55%] Burning damage over 4 seconds. Cooldown: 11 sec. |
|
| TERRIFY: Hits of Aldkin's Haunt have a 30% chance to inflict Vulnerable on enemies for 4 seconds. | |
| EXHAUSTION: Aldkin's Shadow damage has a 5% chance to Daze enemies for 2 seconds. | |
| COVERED IN ASH: Hits of Aldkin's Flame Surge Slow enemies by 20% and deal an additional 1,267 [60%] Burning damage over 3 seconds. | |
| RAGING VIOLENCE: Allies gain 15%[+] Critical Strike Chance against enemies affected by Flame Surge. | |
| FIELD OF LANGUISH: Aldkin dessicates an area for 6 seconds, Slowing enemies within by 40% and reducing their damage dealt by 20%. Cooldown: 20 sec. |
|
| CHAIN OF SOULS: Aldkin chains up to 10 enemies to himself, Tethering to them and dealing 1,774 [84%] Shadow damage over 3 seconds. When the chains expire, they deal 609 [35%] Shadow damage and Stun their victims for 2.5 seconds. Cooldown: 21 sec. |
|
| STORM OF FIRE: Aldkin rains a Fire Storm down from the sky that deals 5,227 [300%] Fire damage on impact and remains on the ground for 10 seconds. Every second, the Fire Storm Burns enemies within for 1,161 [55%] damage over 3 seconds. Enemies hit by Fire Storm's impact or aftershocks have a 30% chance to be Stunned for 1.0 seconds. Cooldown: 20 sec. |
|
| WAVE OF FLAME: Aldkin conjures a mass of flames forward, repeatedly dealing 5,227 [300%] Fire damage, Knocking Back enemies, and destroying small missiles. Cooldown: 25 sec. |
|
| PARANOIA: Languishing enemies take 15%[x] increased damage from you. Lucky Hit: Attacks against Languishing enemies have up to a 20% chance to Daze them for 1.0 seconds. |
|
| CONDEMNED: You instantly kill Languishing enemies with less than 40% Life. Does not work on Elites. | |
| AMPLIFIED SUFFERING: Damaging a Soul Chained enemy detonates the chain early, dealing 871 [50%] Shadow damage around them. | |
| SHARED PAIN: Aldkin's Chain of Souls Cooldown is reduced by 2 seconds when a chained target dies. | |
| ERADICATION: Enemies killed within Aldkin's Fire Storm explode for heavy Fire damage. | |
| EMBER'S GIFT: You restore 33% of your Primary Resource per second while inside Aldkin's Fire Storm. | |
| BURNING CHAOS: Aldkin's Wave of Flame Cooldown resets when you cast an Ultimate Skill. | |
| RAGING HAVOC: Enemies damaged by Aldkin's Wave of Flame have 15%[x] increased Damage Over Time for 4 seconds. | |
VARYANA’S TALENT TREE
| MASSACRE: You and Varyana stack Massacre together on kills. Certain stack thresholds grant Movement Speed: 10 Stacks: 5%[+] Movement Speed. 25 Stacks: 10%[+] Movement Speed. 50 Stacks: 15%[+] Movement Speed. 100 Stacks: 20%[+] Movement Speed. Massacre resets after 7 seconds of not killing an enemy. |  |
| CLEAVE: Varyana swings two axes in an arc in front of her, dealing 1,045 [60%] Physical damage and 563 [24%] Bleeding damage over 4 seconds. Selecting a Mercenary Core Skill alters their wielded Weapon and Basic Attack. Weapon: Dual Axes. Basic Attack: Double Strike. Cooldown: 11 sec. |
|
| SHOCKWAVE: Varyana slams the ground for a brutal shockwave in front of her, dealing 1,393 [80%] Physical damage and Knocking Down enemies for 2 seconds. Selecting a Mercenary Core Skill alters their wielded Weapon and Basic Attack. Weapon: Two-Handed Mace. Basic Attack: Heavy Strike. Varyana batters enemies wiht a mace, dealing 1,393 [80%] Physical damage with 20%[+] increased Critical Strike Chance. Cooldown: 11 sec. |
|
| HYSTERIA: You gain 1.0%[+] Attack Speed for 5 seconds whenever Varyana damages an enemy, up to 10.0%[+]. | |
| RECKLESSNESS: Varyana's Cleave inflicts Vulnerable on enemies for 3 seconds. | |
| CRUSHING FORCE: When Varyana deals damage to an enemy, she has a 30% chance to Knock them Down for 2 seconds. | |
| REPRISAL: If you become Crowd Controlled, Varyana leaps towards the enemy that inflicted it, dealing 2,230 [128%] Physical damage and Knocking Down surrounding enemies for 2 seconds on impact. Can only occur once every 12 seconds. | |
| BLOODTHIRST: Varyana enters Bloodthirst, gaining 30%[+] Attack Speed, 200%[+] Movement Speed, and Unstoppable for 7 seconds. Varyana's Bloodthirst grants 10%[+] Attack Speed to you for the same duration. Cooldown: 22 sec. |
|
| WHIRLWIND: Varyana spins violently in a line, repeatedly dealing 1,132 [65%] Physical damage and 633 [30%] Bleeding damage over 5 seconds. Cooldown: 11 sec. |
|
| EARTH BREAKER: Varyana crushes the ground wiht her mace, leaving a tremor that deals 3,136 [180%] Physical damage over 3 seconds and Knocks enemies Down repeatedly. Cooldown: 17 sec. |
|
| ANCIENT HARPOONS: Varyana launches three harpoons ahead of her, piercing enemies for 2,439 [140%] Physical damage. She then rips them back, Pulling in and Stunning enemies for 2 seconds. Cooldown: 17 sec. |
|
| INTIMIDATED: While Varyana has Bloodthirst, enemies around her deal 10% reduced damage. | |
| BLOODLUST: Varyana's Bloodthirst further increases your Attack Speed by 5%[+]. | |
| NO ESCAPE: Varyana's Whirlwind Pulls in enemies every 1.5 seconds and gains 60% size. | |
| TASTE OF FLESH: When you or Varyana deal direct damage to an enemy inflicted wiht any of her Bleeding effects, you Heal for 1% of your Maximum Life (1). | |
| RAMPAGE: You deal 15%[x] increased damage to enemies afflicted by any of Varyana's Crowd Control effects. | |
| DISMEMBERING: Enemies damaged by Varyana's Earth Breaker are left exposed, causing your next hit against htem within 3 seconds to be a guaranteed Overpower. This may only occur on the same target once every 5 seconds. | |
| ANNIHILATOR: Varyana's Ancinet Harpoons additionally Slow enemies by 40% for 3 seconds. During this time, you gain 30%[x] Lucky Hit Chance against those targets. | |
| IRON GRIP: Varyana's Ancient Harpoons travel 33% farther and reduce enemies' Impairment Resistance by 50% for 5 seconds. | |
SUBO’S TALENT TREE
| SEEKER: Passive: Subo reveals all enemies and materials in the area. Active: Subo calls out an enemy target, marking them for 10 seconds. Killing a marked enemy restores 50% of your Maximum Resource and reduces Subo's Seeker Cooldown by 10 seconds. Cooldown: 20 sec. |  |
| WIRE TAP: Subo places a concussive trap that arms after 0.8 seconds. When an enemy moves within range, it explodes for 1,393 [80%] Physical damage and Stuns enemies for 2.0 seconds. Selecting a Mercenary Core Skill alters their wielded Weapon and Basic Attack. Weapon: Bow.Basic Attack: Heavy Shot. Subo fires a toughened arrow at an enemy, dealing 1,393 [80%] Physical damage with a 30% chance to Stun for 1.0 seconds. Cooldown: 10 sec. |
|
| MOLOTOV: Subo tosses an incendiary at an enemy, dealing 174 [10%] Physical damage and Stunning them for 1.0 seconds before exploding into flames. For the next 5 seconds, enemies within the area repeatedly take 760 [36%] Burning damage over 3 seconds. Selecting a Mercenary Core Skill alters their wielded Weapon and Basic Attack. Weapon: Crossbow. Basic Attack: Salvo. Subo launches 5 bolts at an enemy, each dealing 522 [30%] Physical damage. The final bolt explodes, Slowing enemies by 50% for 2 seconds. Cooldown: 11 sec. |
|
| PIERCING ARROWS: Subo's Heavy Shot now pierces through enemies. | |
| READY AT HAND: Direct damage to an Elite grants you 20%[+] Movement Speed for 2 seconds. | |
| SCORCHED EARTH: Subo's initial Molotov explosions cause enemies to take 30%[x] increased Damage Over Time from you for 3 seconds. | |
| SHARE A DRINK: When one of Subo's Molotovs explodes, it has a 50% chance to drop a Healing Potion for you. | |
| COVER FIRE: Subo charges a countless volley of arrows, then unleashes it over your position for 2,439 [140%] Physical damage that Slows enemies for 50% for 4 seconds. Cooldown: 20 sec. |
|
| TRIP MINES: Subo scatters 3 explosive traps that each arm after 1.0 seconds. When an enemy moves within range of one, it explodes for 5,227 [300%] Physical damage and Knocks Down enemies for 1.5 seconds. Cooldown: 18 sec. |
|
| SNIPE: Subo charges a massive percing bolt, then unleashes it forwards for 5,227 [300%] Physical damage that Knocks Back enemies. Cooldown: 20 sec. |
|
| EXPLOSIVE CHARGE: Subo fires 4 Explosive Charges that stick to enemies. Each explodes after 7 seconds, dealing 1,045 [60%] Physical damage. Explosive Charges detonate early if their target dies or takes Overpower damage. Cooldown: 22 sec. |
|
| PIN CUSHION: Subo's Cover Fire also immobilizes enemies for 2 seconds. | |
| OPENING FIRE: You deal 25%[x] increased Critical Strike Damage to enemies hit by Subo's Cover Fire for 4 seconds. | |
| LOADED MUNITIONS: Subo's Wire Traps and Trip Mines inflict Vulnerable on enemies for 5 seconds. | |
| MASTERMIND: Subo's Wire Trap and Trip Mines gain 60% Size. You and Subo gain 15%[+] Crowd Control Duration. |
|
| INCENDIARY BOLT: If Subo's Snipe hits the target he originally aimed at, a Molotov explodes on them. | |
| AMBUSHER: You gain 20%[x] Lucky Hit Chance against enemies damaged by Subo's Salvo within the last 3 seconds. | |
| THRILLSEEKER: Your active Cooldowns are reduced by 0.5 seconds when an Explosive Charge explodes. Explosive Charges now detonate after only 3 seconds. |
|
| BARGANING CHIPS: Targets stuck with Explosive Charges take 2%[x] increased Overpower Damage per Explosive Charge stuck. Each Explosive Charge can be detonated by an additional 2 Overpower before expiring. |
|
REINFORCEMENT
The second Mercenary of your choice is a reinforcement.
The Reinforcement has two skills at first, and as you level up that Reinforcement character through killing stuff in Sanctuary, you unlock up to six skills. However, you can only choose one of the six skills.
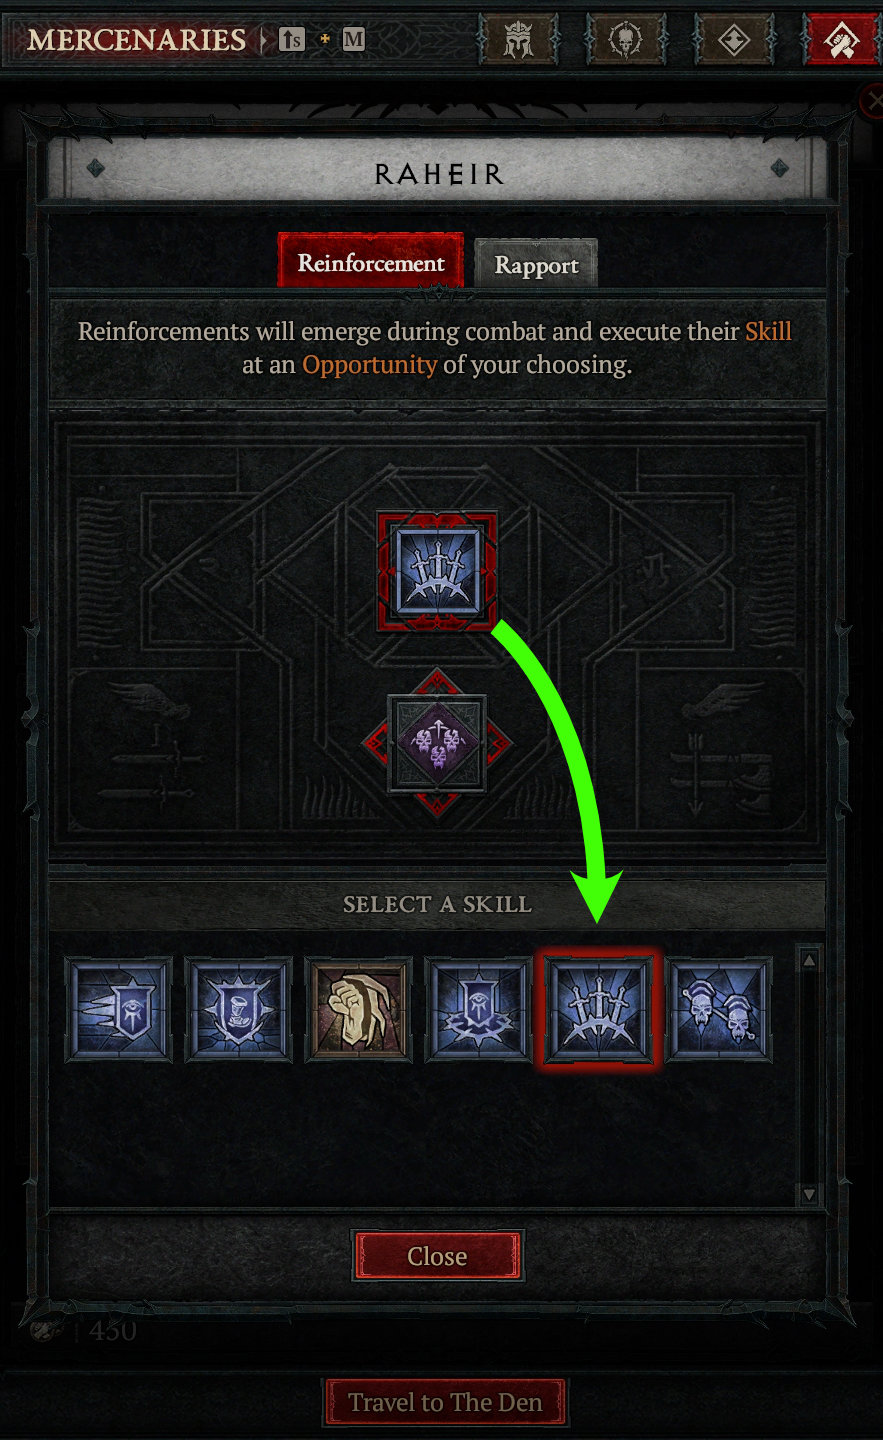
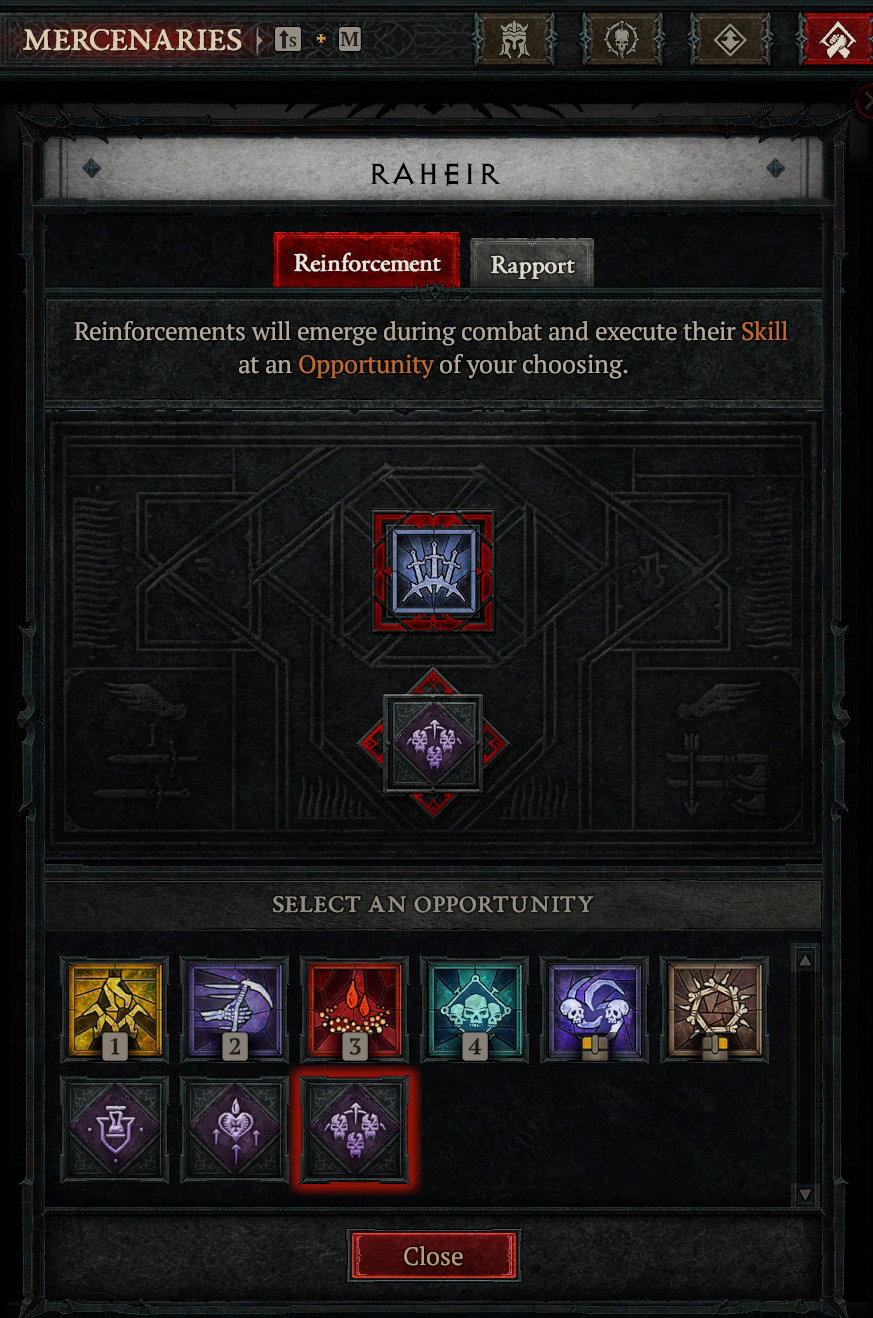
Once the Reinforcement skill is chosen, you must choose the Class Skill you want to be associated with that Reinforcement Skill as a trigger. It’s a very simple process. The developers give you additional options if you don’t want to associate one of your Skillbar skills. These 3 purple buttons at the bottom of the Skillbar, if you wish, you can choose one of these three options instead of a specific Class Skill:
- Cast when the player casts any skill in combat.
- Cast when the player becomes Injured.
- Cast when the player is hit with a Control Impairing Effect.
SPIRIT BRAZIER: UNDERCITY
As you progress through the campaign, you unlock access to the Spirit Brazier — which is located in Upper Kurast. It is the next system in the evolution of Diablo 4. Akin to the Infernal Hordes or The Pit, but with intriguing mechanics.
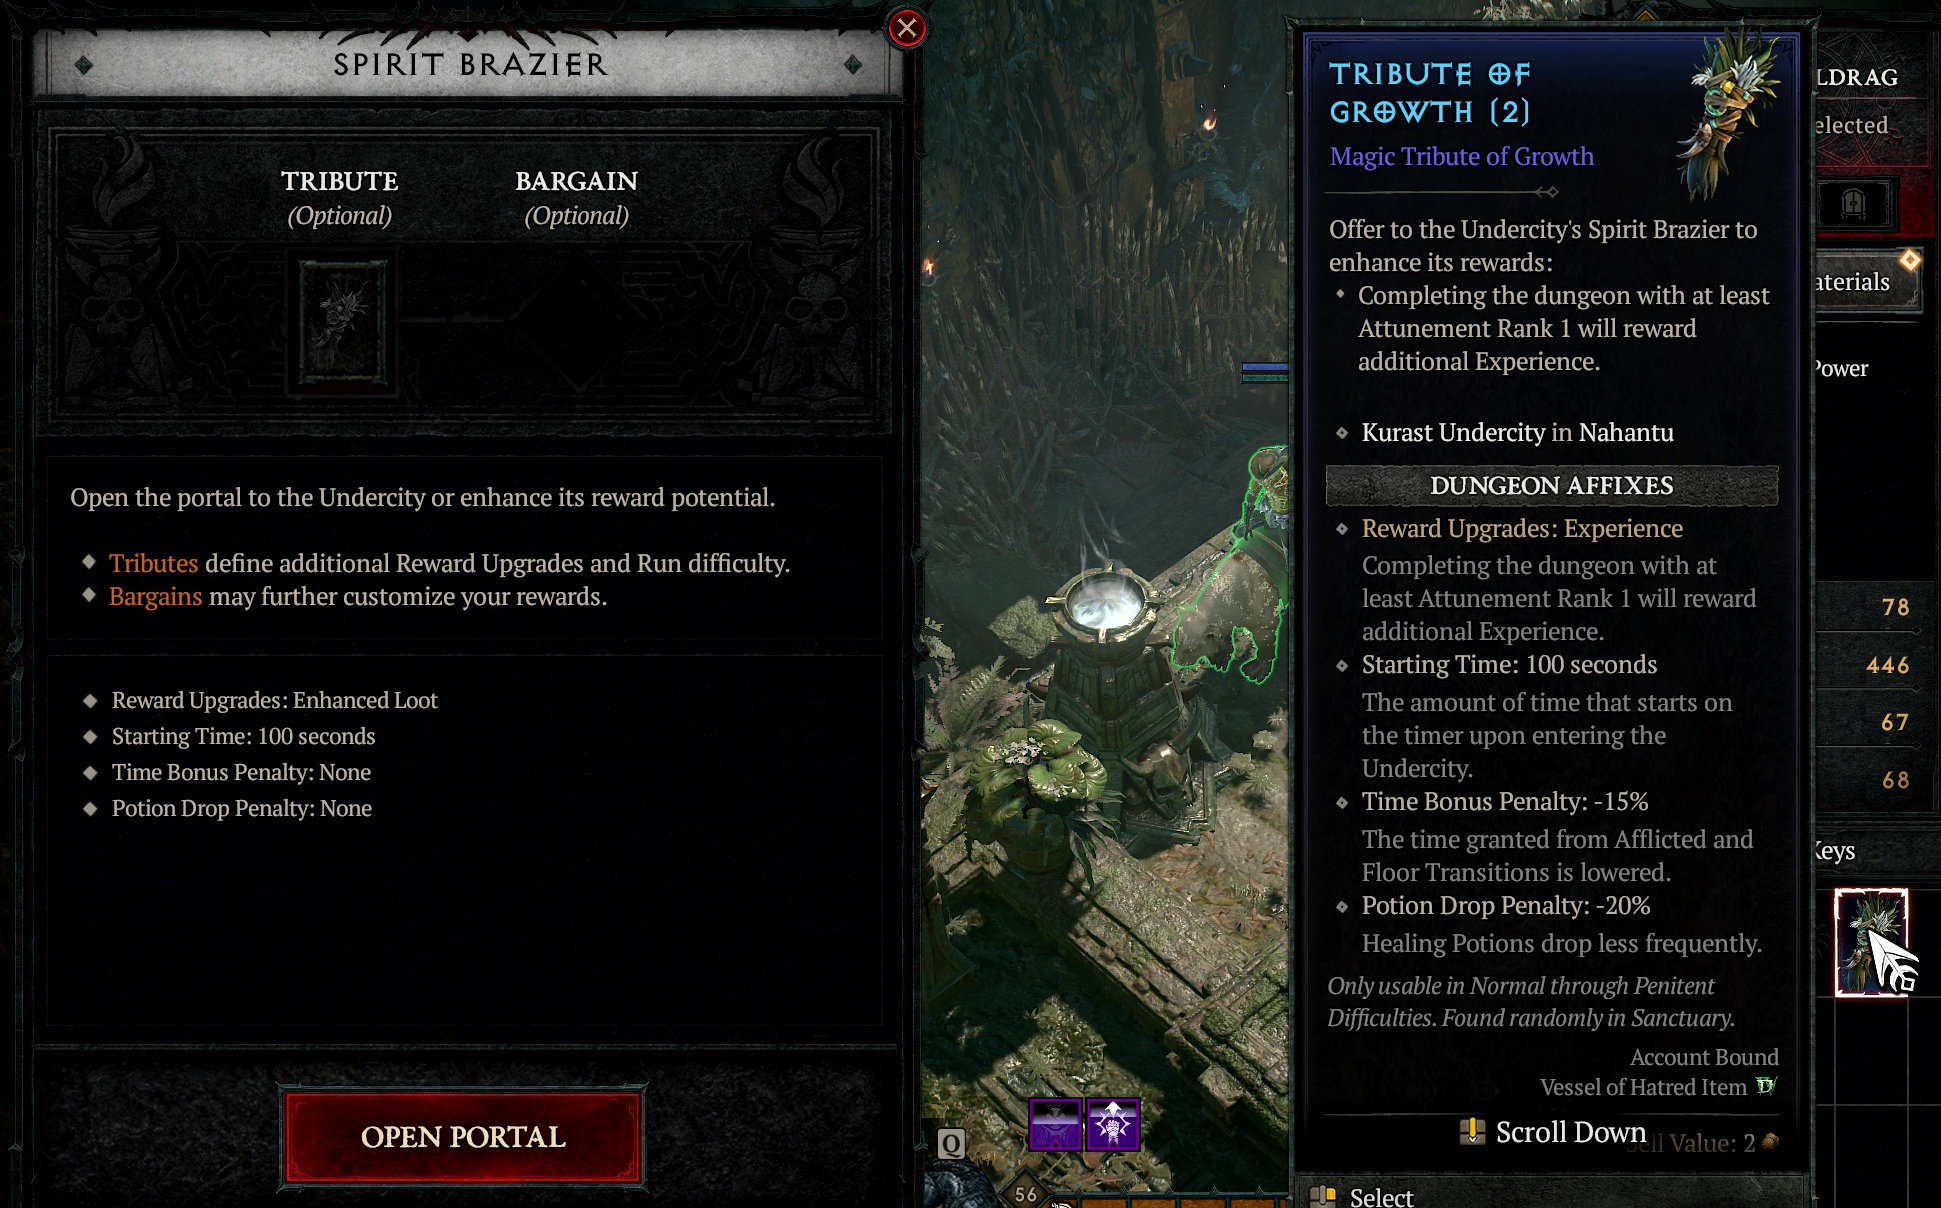
You can create a portal that sends you to one of the random Undercity maps. The Undercity rewards you with Enhanced Loot, but it has a starting time of 100 seconds that countdowns to 0. If the timer reaches 0, you are expelled from the Undercity. You have to start the event again. Depending on some adjustments you make to the Spirit Brazier, there might be a Time Bonus Penalty or a Potion Drop Penalty that modifies your run difficulty.
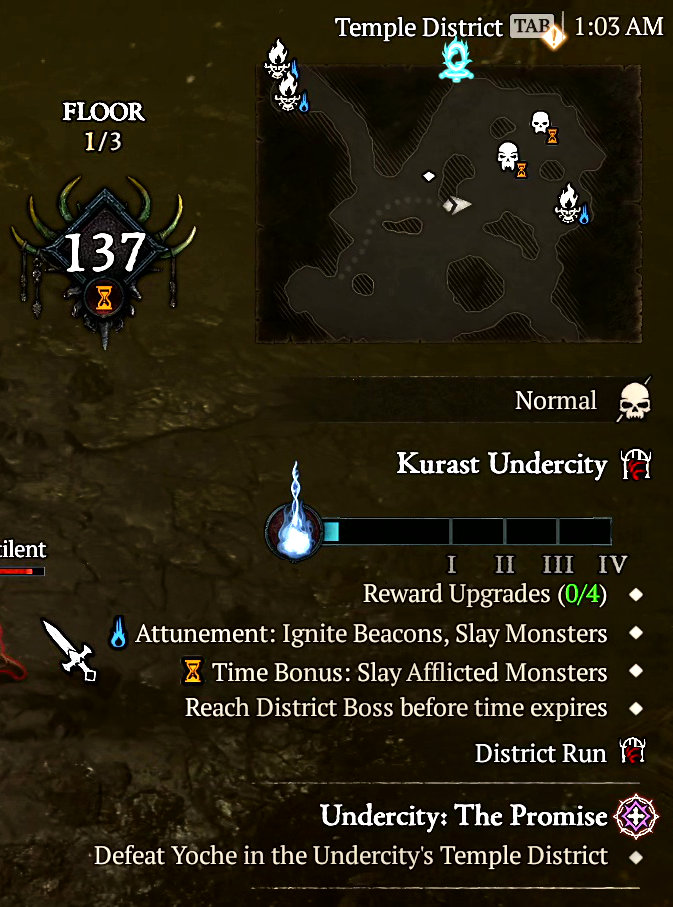
When you start an Undercity run, and open the map, you will see text describing details about the run — similar to how Nightmare Dungeon affixes data is shown.
Reward Upgrades: Enhanced Loot
- Completing the dungeon with at least Attunement Rank 1 will reward Enhanced Loot drops.
Starting Time: 100 seconds.
- The amount of time that starts on the timer upon entering the Undercity.
Time Bonus Penalty: None
- The time granted from Afflicted and Floor Transitions is normal.
Potion Drop Penalty: None
- Healing Potions drop as normal.
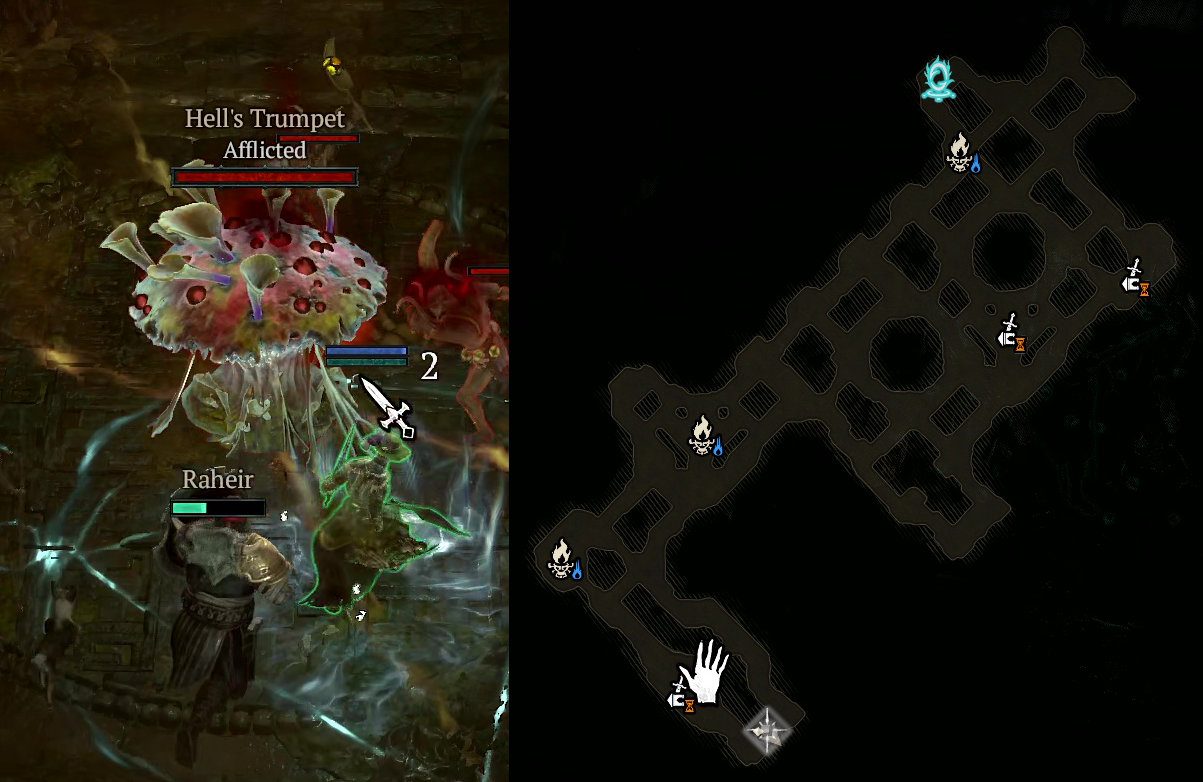
In the Undercity minimap, you will see skulls with an orange sand clock icon. These are known as Lesser Afflicted and grant +8 Bonus Time (smaller skull icon) or +14 Bonus Time (larger skull icon). When an afflicted enemy dies, you can see floating orange text onscreen that tells you how much Bonus Time their demise granted.
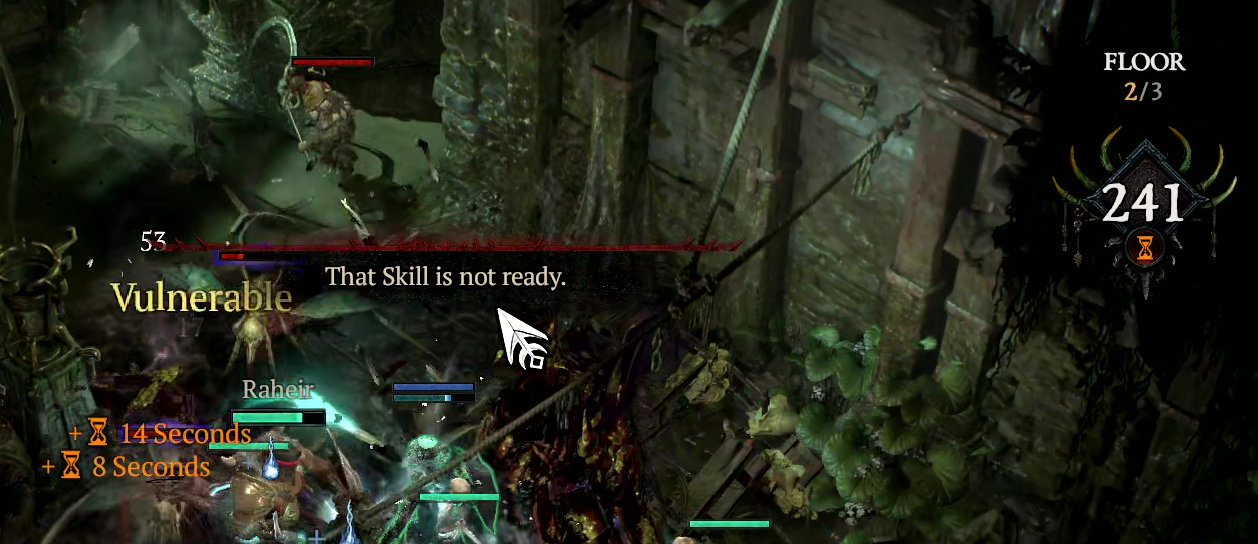
There are at least two Greater Afflicted enemies per Floor (these have a more elaborate 5-horned skull icon) and grant +30 Bonus time. They only appear in the minimap, not in the map. You will have to explore a bit as you make your way to each Beacon.
When you click a Beacon and kill the enemies that spawn, you gain Undercity Empowered (with a message onscreen that says: “The spirits empower you”).
Both types of Afflicted enemies provide Bonus Time to increase the time of your countdown. This allows you to quickly progress through toward Floor 3 where you can reach the final boss. The boss area cancels out the countdown and you can freely dispense some justice at your leisure.
There is another named Herald of the Affliction and these have a boss health bar. You gain 30 Bonus Time seconds after killing them.
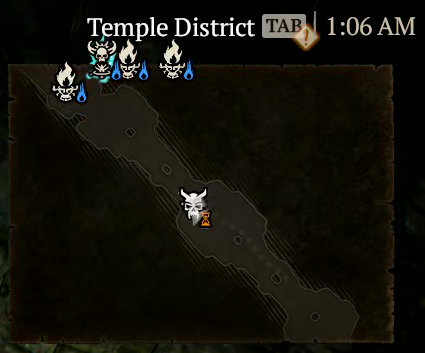
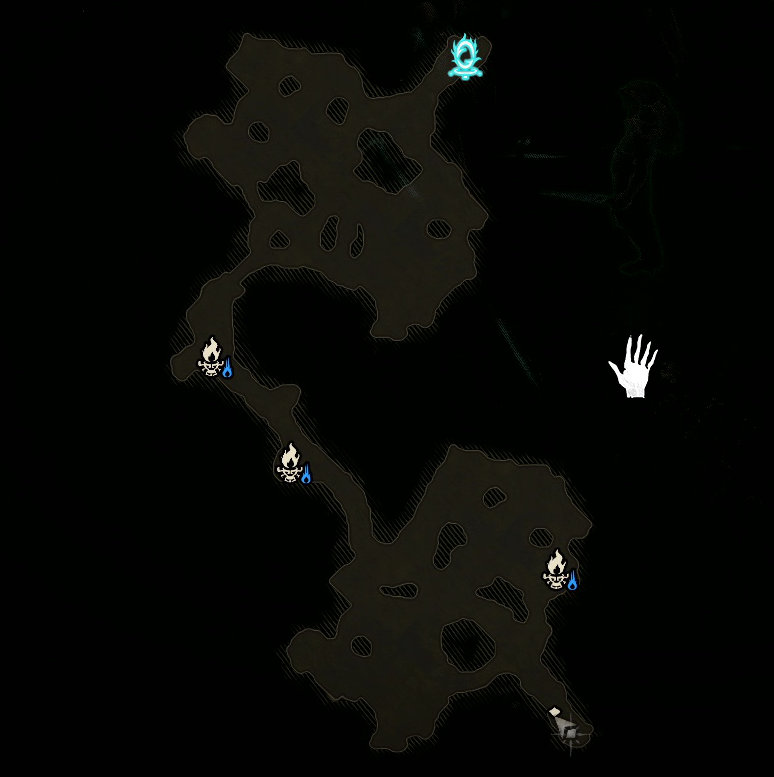
The brazier icon is known as a Beacon and grants Attunement. These are located wherever you see a Brazier with a blue flame icon on the map with no fog of war and the minimap. When you click a Beacon, multiple enemies spawn around you. The gateway icon is the exit to reach Floor 2 or Floor 3.
Another Afflicted type I encountered in the Undercity shows as a sword icon visible on the map and minimap. These are known as Hell’s Trumpet (Afflicted) and grant +15 Bonus Time. However, the sword icon is shared among other types of Afflicted. It could be an Egg Cluster, and there might be more variants.
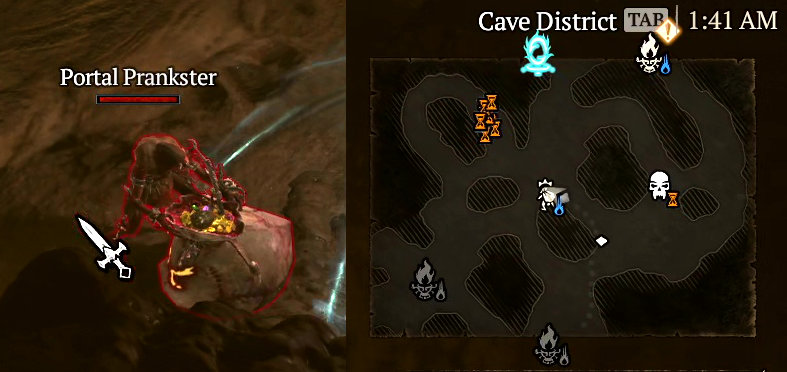
If you are the type of player that goes straight for the Beacons (Brazier icons) and skips exploring every empty room or hallway because nothing is showing up there on the map, I suggest reconsidering. There is a chance for a Portal Prankster to spawn. They show up in the minimap as a Goblin icon. The fact that they don’t explode as a piñata where they die shouldn’t discourage you. At the end of the run, a special something is awaiting.
As you progress deeper into the Undercity floors, you will find a Grand Beacon that grants Attunement. It starts a regular outdoor event with an objective. When all enemies spawned by the Grand Beacon die, they drop multiple white essence orbs. Collect these and the blue progress bar beneath the minimap grows by a lot — this act enhances your reward upgrades at the end of the Undercity run.
After you reach the gateway at the end of Floor 3, you enter the boss room. It looks like The Pit’s last boss room. The boss has 3-stagger points in its Health bar. After the boss dies, the Stash appears inside the boss room. and a Magnificent Coffer (Tier 4) spawns. Among the rewards I saw:
- Over 28,000 Gold
- 11 pieces of gear (7 Rare and 4 Legendary items). Possibly a chance for a Unique or better item.
- A Tempering Manual
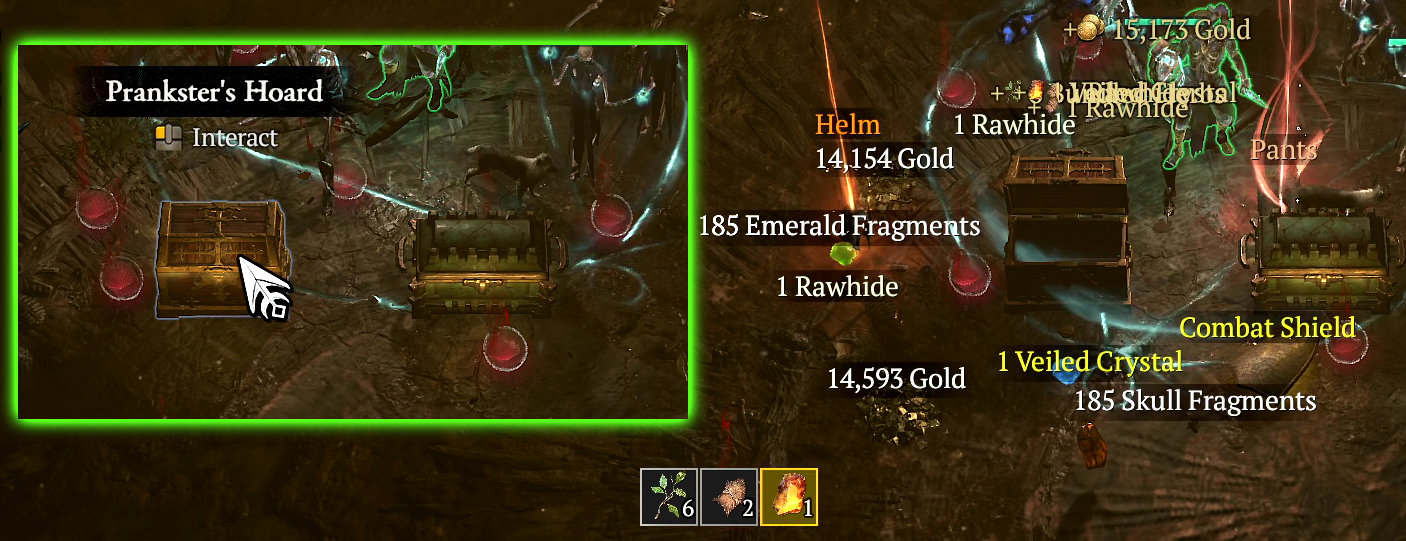
In addition to the potential loot, if you killed a Portal Prankster, that special something spawns along with the Magnificent Coffer. A Prankster’s Hoard (coffer). This is what dropped in my run:
- Over 45,000 Gold.
- Bundled Herbs x 6
- Veiled Crystal x 2
- Rawhide x 3
- Gem Fragments x 185,000 (3 types)
- Elixir x 2
- Some rare, Legendary items and a Unique item (Tassets of the Dawning Sky).
NOTE: The developers told the press invitees that there is a planned build coming at Launch Day that enhances the loot rewards we experienced in Undercity. Keep that in mind.
That was a normal Undercity run without any modifier to obtain Enhanced Loot. Some activities throughout Sanctuary have a chance to drop a Spirit Brazier Tribute.
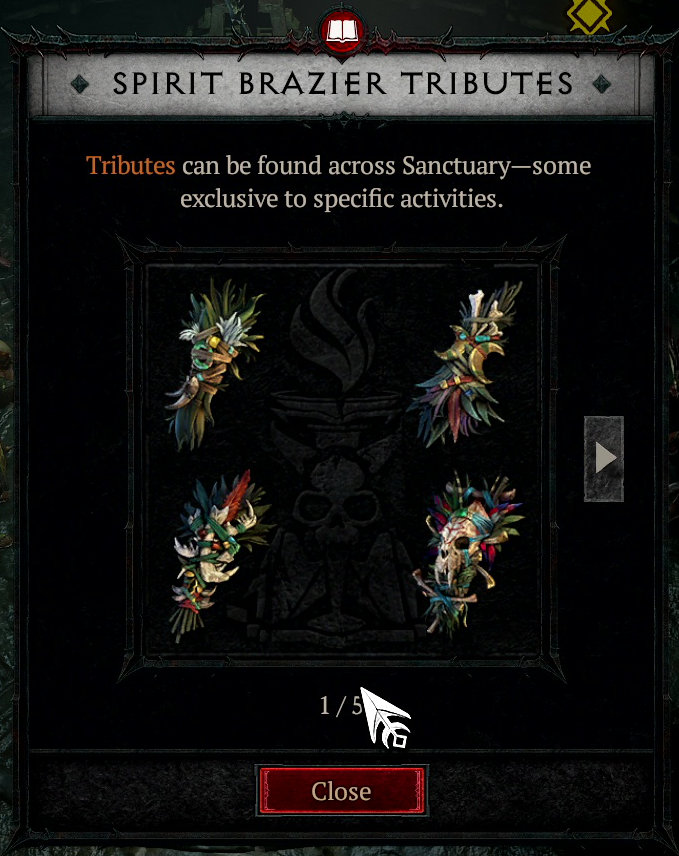
Add a Spirit Brazier Tribute to the Spirit Brazier — located in the town’s Upper Kurast district, to define the Reward Upgrades you are interested in with at least Attunement Rank 1. You earn Attunement when you light up the Beacons within the Undercity run. You can run a normal Undercity or you can modify it into an enhanced Undercity by socketing a Tribute to enhance the rewards you earn at the end. Think of the Tribute as the coffers spawning at the end of the Infernal Hordes where you choose the type of rewards you are interested in.
You don’t have to wait until the Undercity boss dies to choose the type of rewards you want. You can do this straight from the Spirit Brazier in Upper Kurast.
There is another bit of info about Tributes that I must share. You will find Tributes of different qualities throughout Sanctuary: Rare, Legendary, and Unique Tributes.
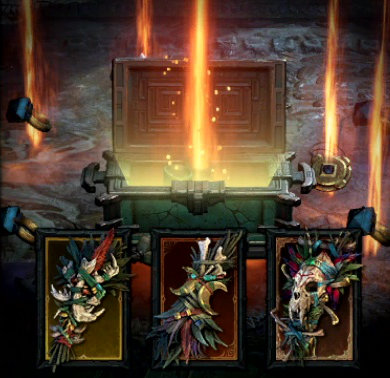
Here is how Tributes work. You open the Spirit Brazier in Upper Kurast, and you will notice two sockets at the top of the UI: One for the Tribute, and one for the Bargain.
The Tribute is placed within the Sigil tab in your inventory and looks a lot like a Nightmare Dungeon sigil.
Don’t think for a second that the Undercity feature is an Infernal Hordes copycat. No, it isn’t. When you socket a Tribute in place, you can click on the Bargain slot and the UI opens up with multiple Bargain choices. The developers are giving you a lot of agency on the type of rewards you may choose. You must select only one Bargain choice.
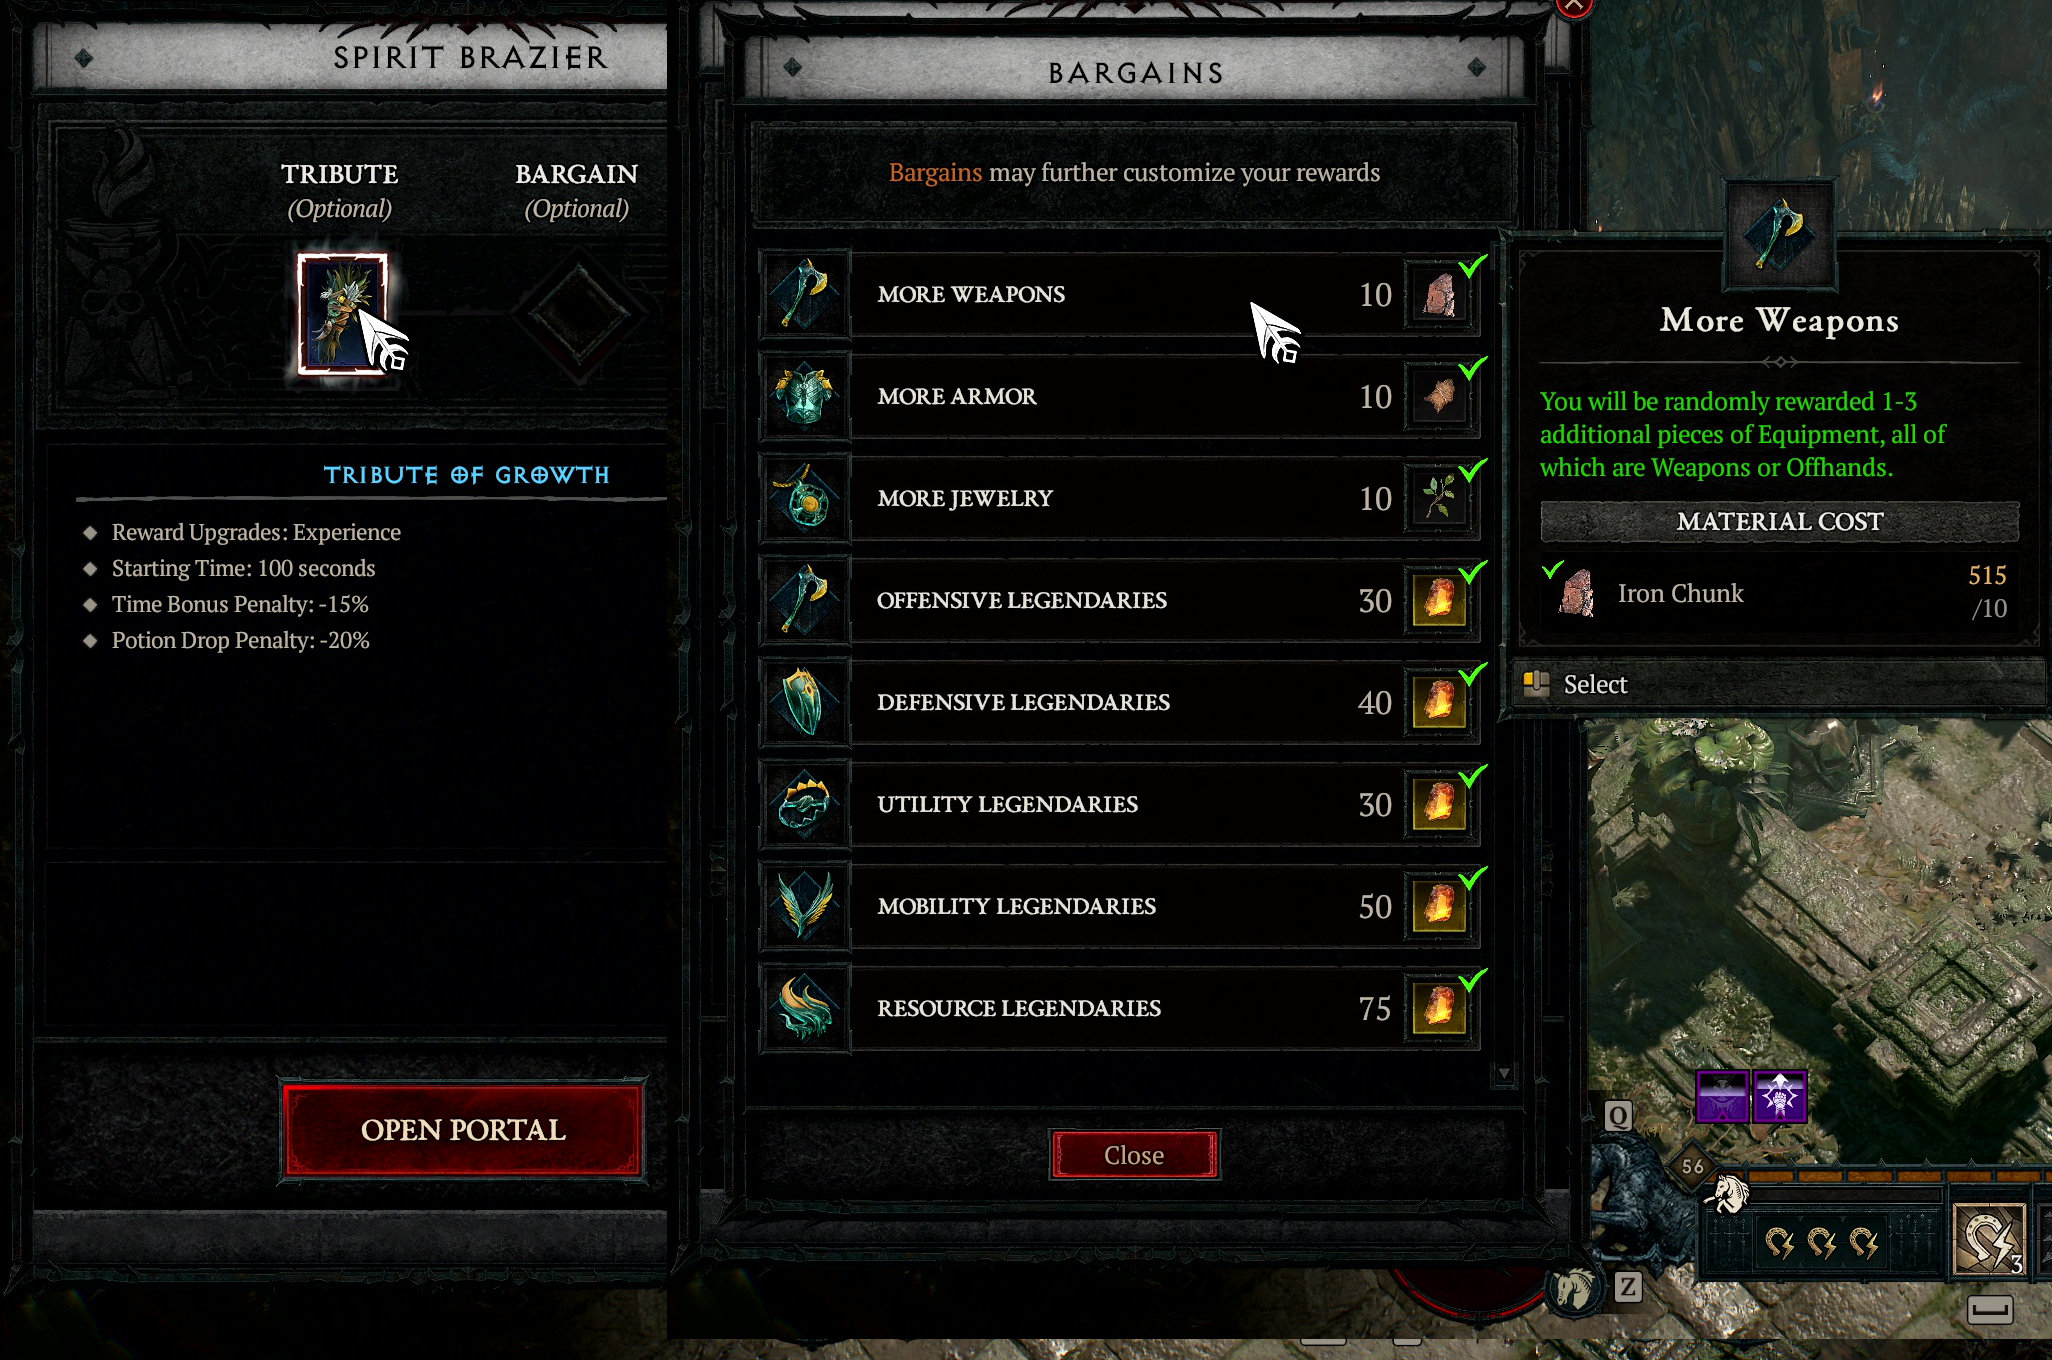
There is a tiny setback for Bargains. They cost materials as a requirement. Some Bargains require Iron Chunk. Some require a lot of Veiled Crystals. Some require a bundle of Herbs. Considering how limited these resources drop in Vessel of Hatred, this might be a bump in your progress. I recommend using Obols instead, as these can be replenished by completing Events and don’t affect your materials for Masterworking, Tempering, Alchemy, and Enchanting.
| BARGAINS |
| More Weapons: You will be randomly rewarded 1-3 additional pieces of Equipment, all of which are Weapons or Offhands. |
| More Armor: You will be randomly reward 1-3 additional pieces of Equipment, all of which are Helm, Chest Armor, Gloves, Pants, or Boots. |
| More Jewelry: You will be randomly reward 1-3 additional pieces of Equipment, all of which are Rings or Amulets. |
| Offensive Legendaries: Legendary equipment will possess an Offensive Aspect when possible. |
| Defensive Legendaries: Legendary equipment will possess a Defensive Aspect when possible. |
| Utility Legendaries: Legendary equipment will possess a Utility Aspect when possible. |
| Mobility Legendaries: Legendary equipment will possess a Mobility Aspect when possible. |
| Resources Legendaries: Legendary equipment will possess a Resource Aspect when possible. |
After socketing a Tribute in an Undercity run, that 15% Time Penalty can be felt deeply, as the Afflicted enemies that provide Bonus Time give less amounts of time per kill. You will have to open the Map and trace a pathing that gets you to the gateway portal to the next Floor more efficiently and extend that countdown the best you can. You might probably want to do only one Attunement per floor. Head straight to the Attunement Beacon, get the empowered buff to kill Time-Bonus enemies, and dash for the gateway to the next Floor.
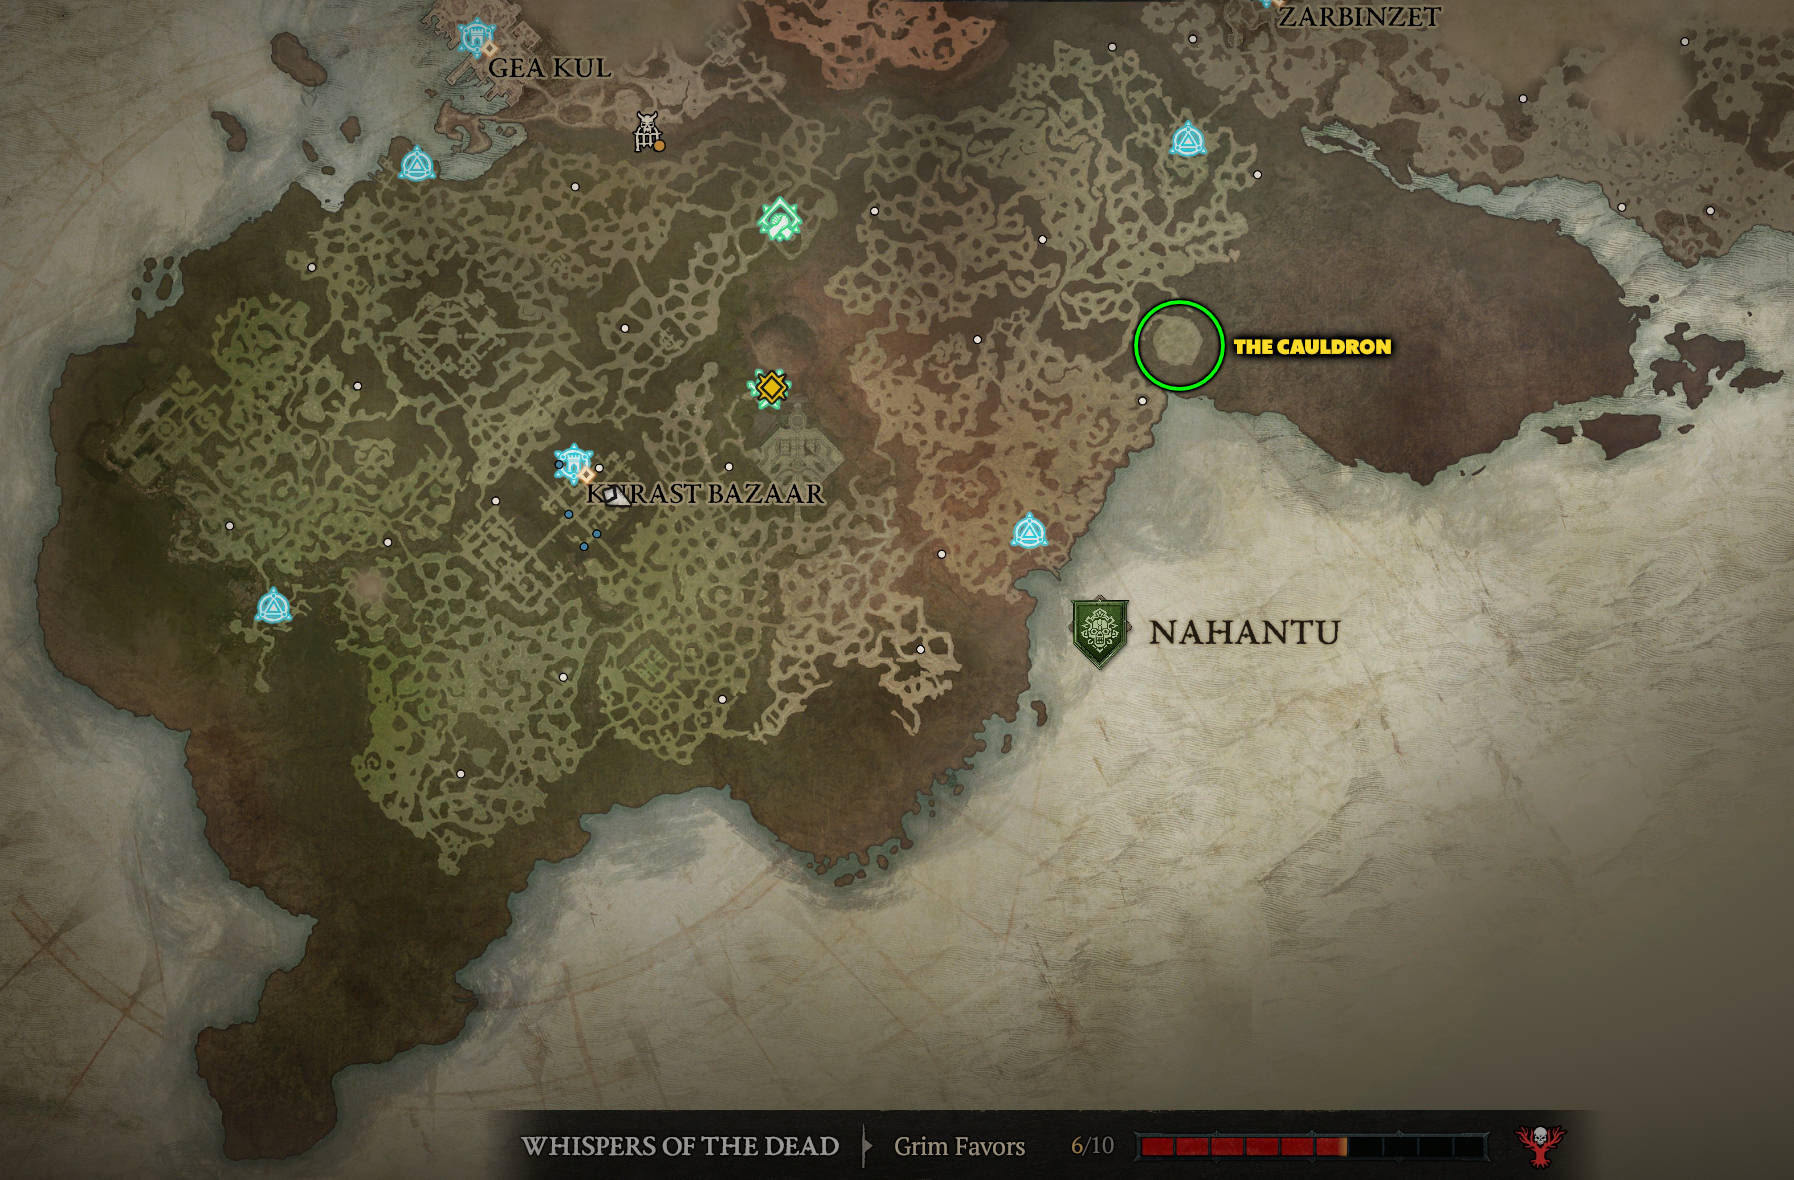
DARK CITADEL ACTIVITY
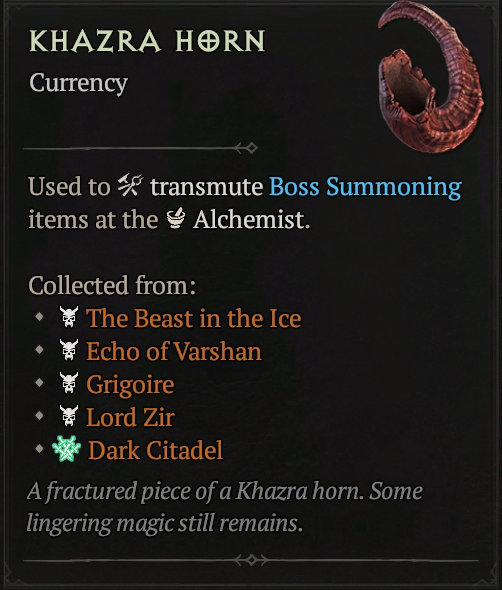
The Dark Citadel is unlocked during the Vessel of Hatred Campaign and you reach Level 60. However, you can participate after switching to Torment I Difficulty Mode. A new activity that requires at least 2-4 players. Use the Party Finder to find allies and face the many trials within. Among the rewards you can earn in this activity: Khazra Horn, Herbs, Gold, Items, Citadel Coins (for the Dark Citadel Vendor), Forgotten Souls, Shattered Prisms, and Caches.
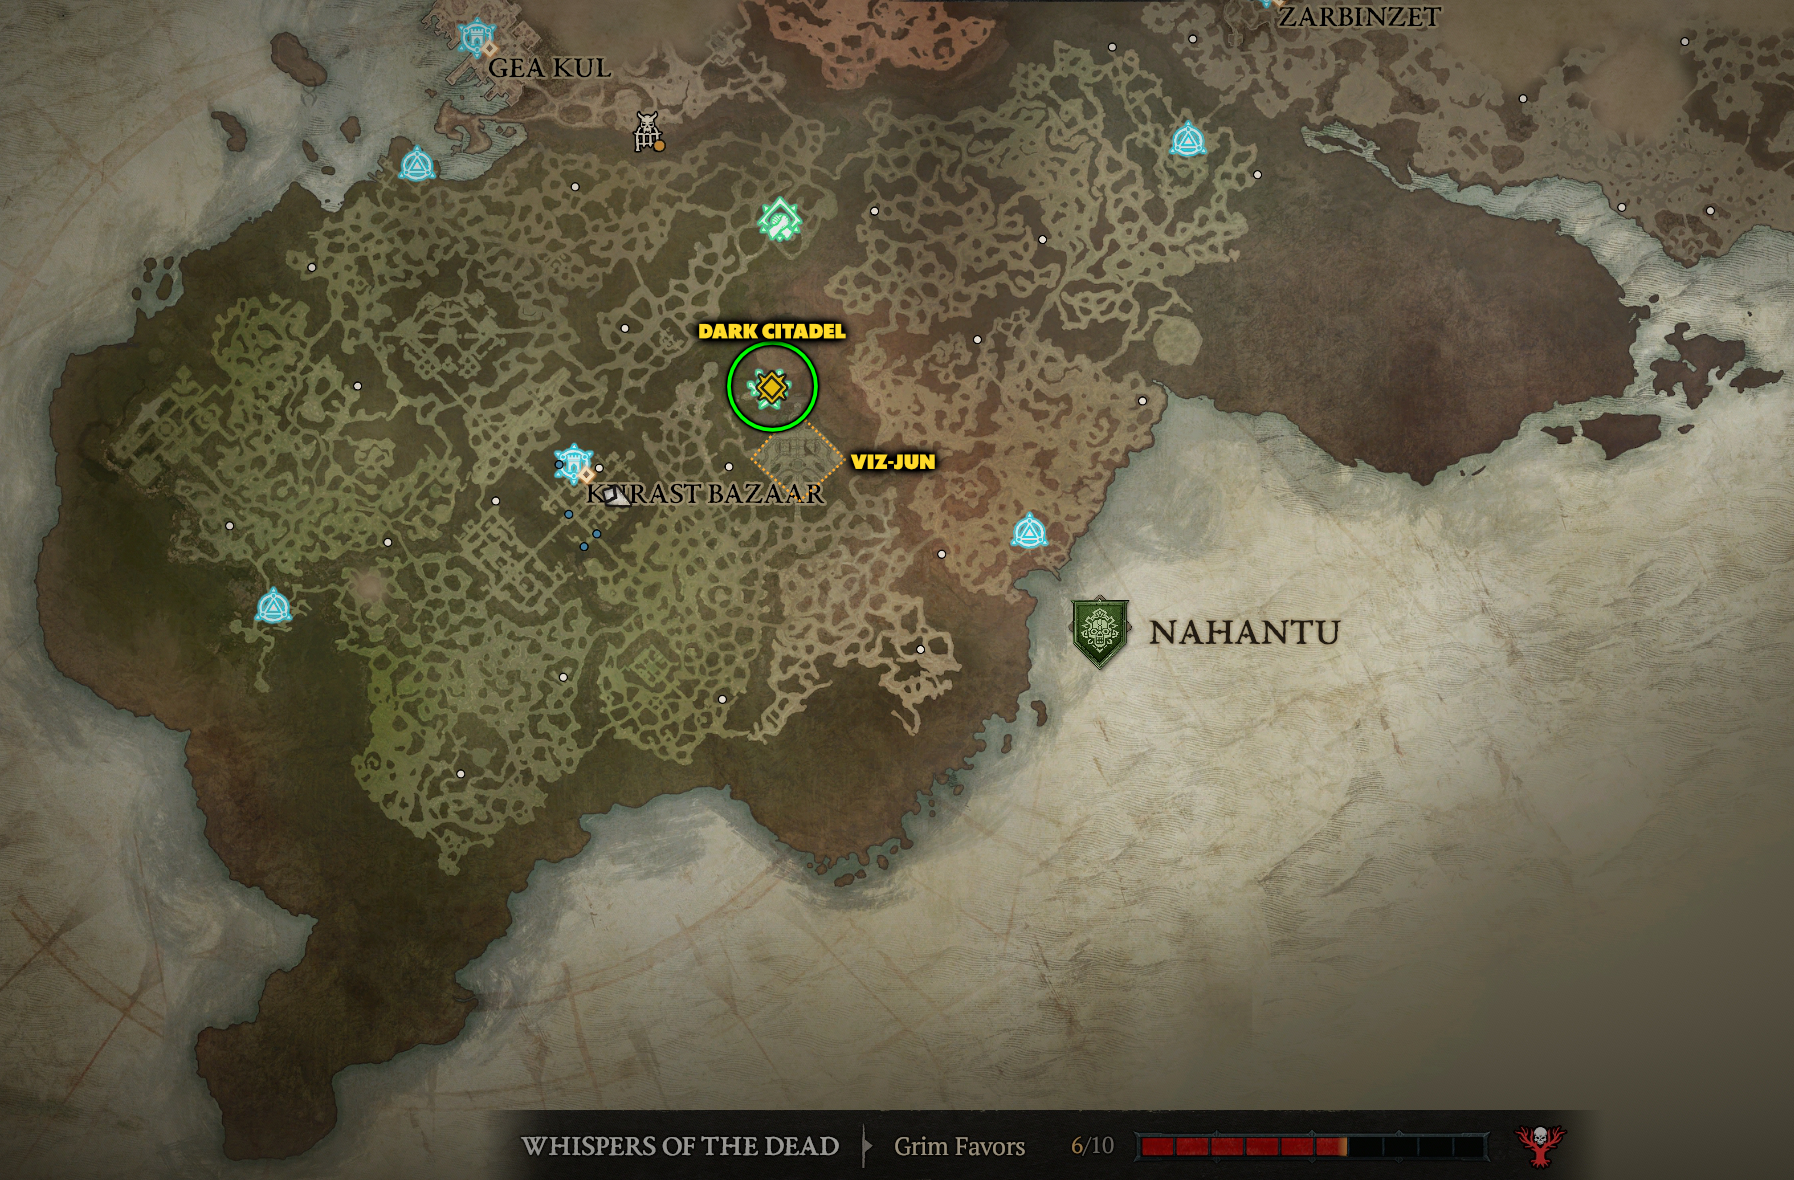
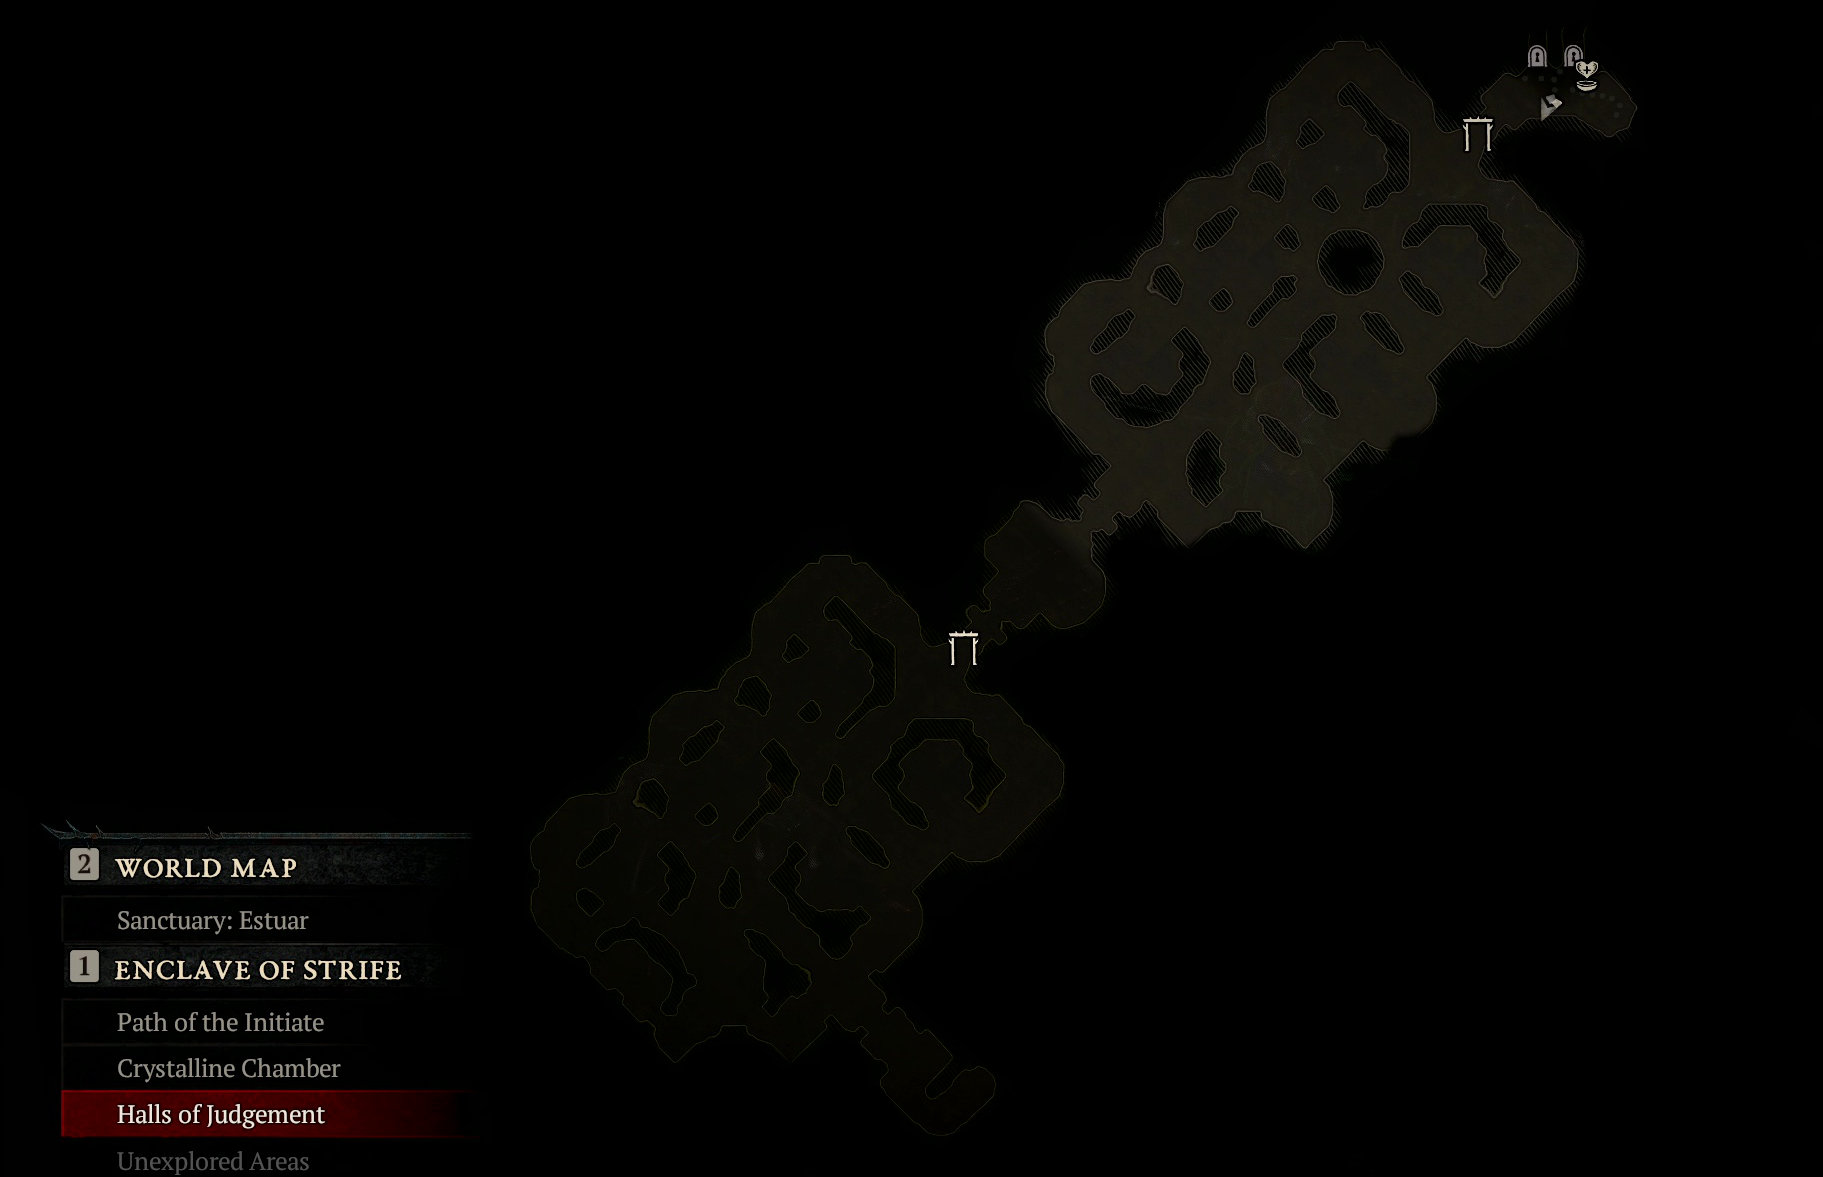
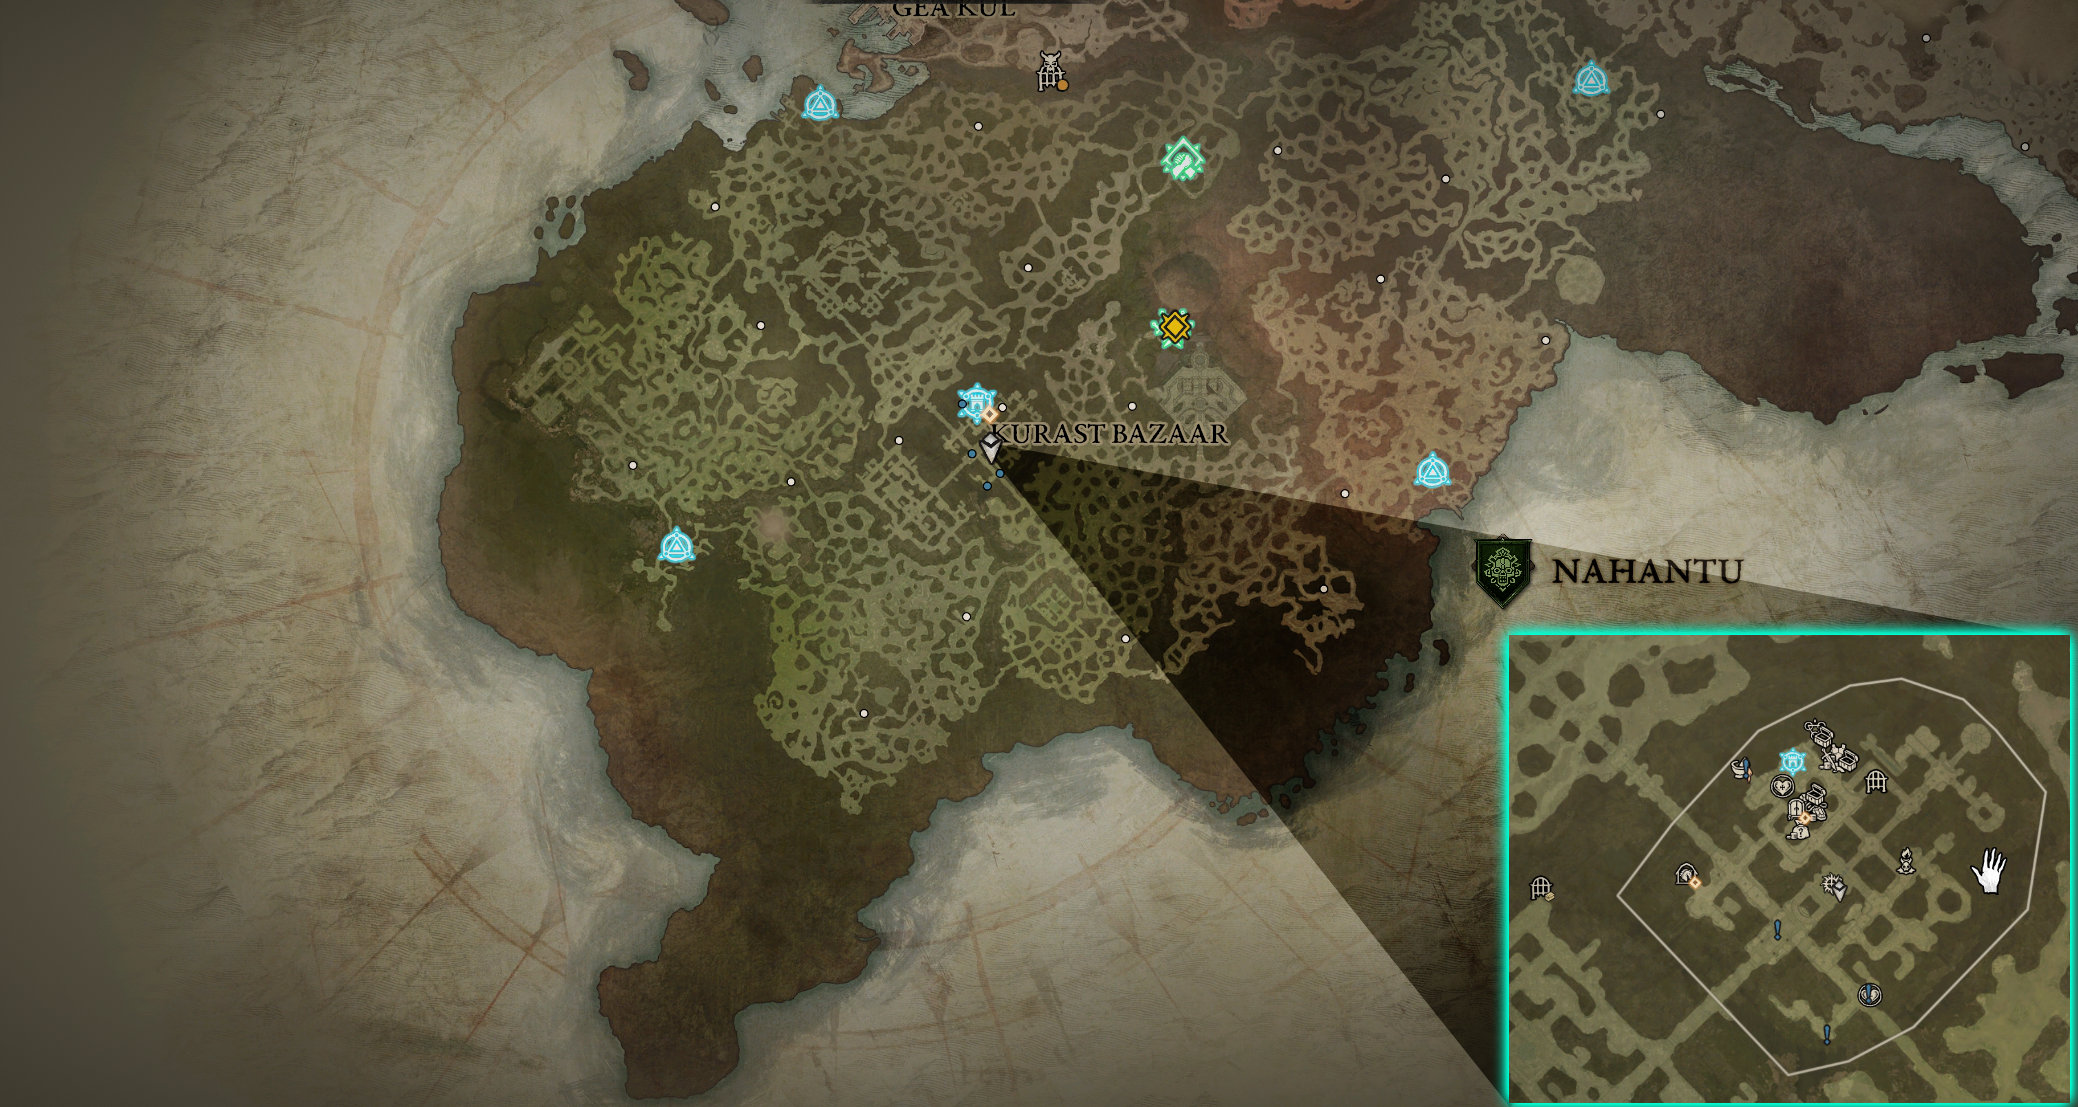
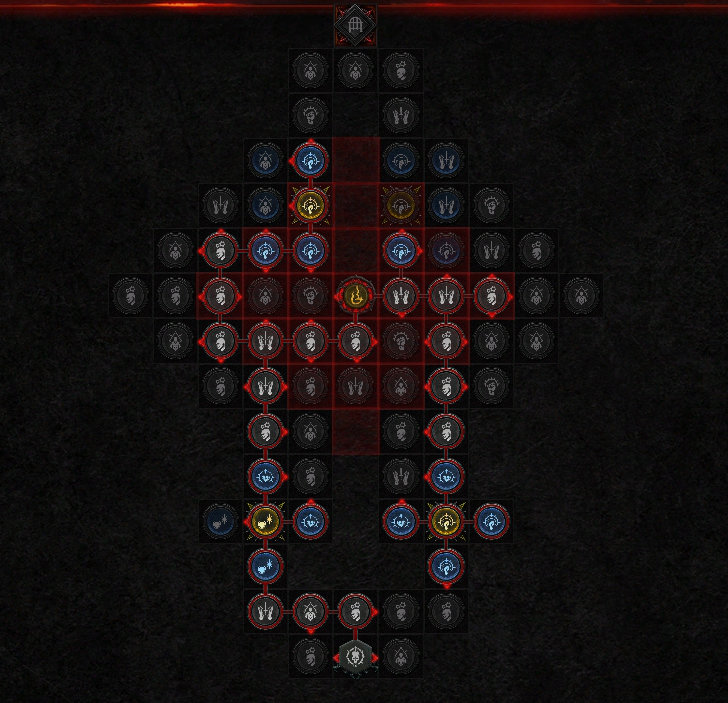
The Dark Citadel is located northeast of Kurast, and it’s part of Viz-Jun (the big diamond-shaped area shown in the map below).
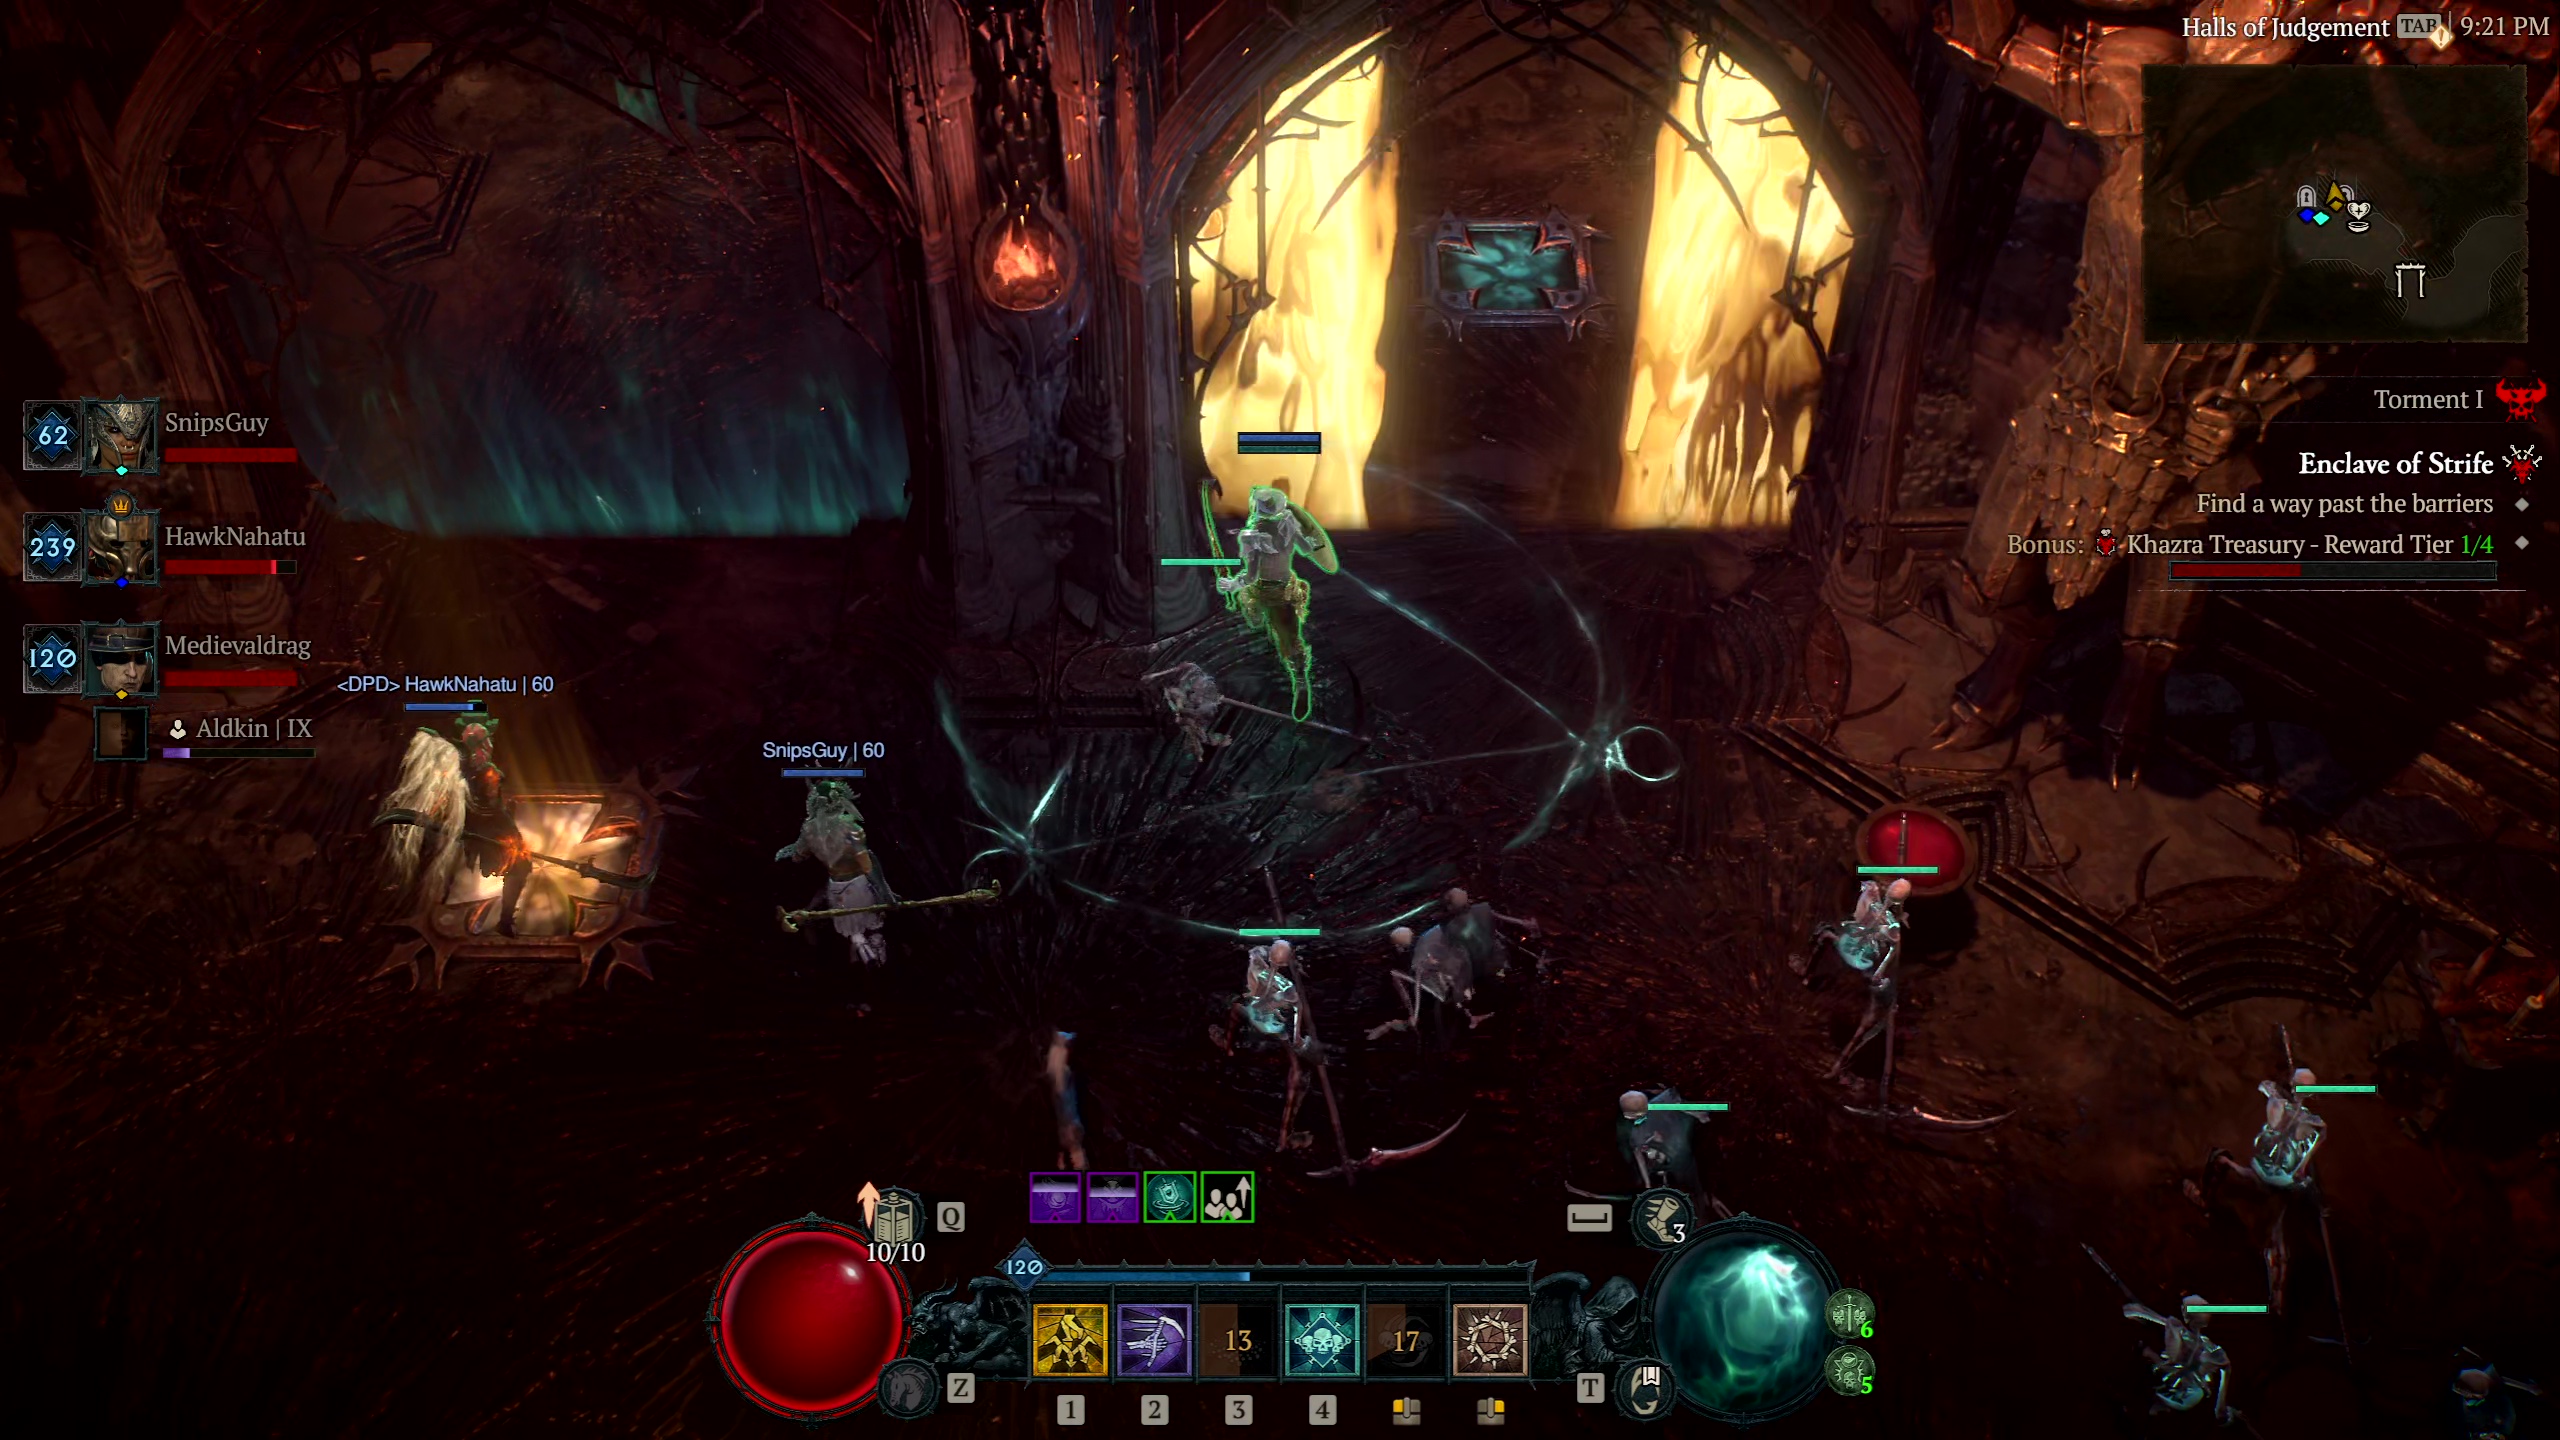
At Level 60, the moment I switched to Torment I Difficulty, I ventured into the Dark Citadel. There are massive rooms divided by gates. Past the second gate, the third gate requires more than one player. At that juncture, the gate has a barrier that can only be dissipated when a player stands on a trigger mechanism, while the other player goes past the barrier to step on another trigger mechanism to allow the first player to get past the second barrier.
The Dark Citadel also rewards Khazra Horn — a new Summoning Material that replaces the Stygian material for Tormented Bosses.
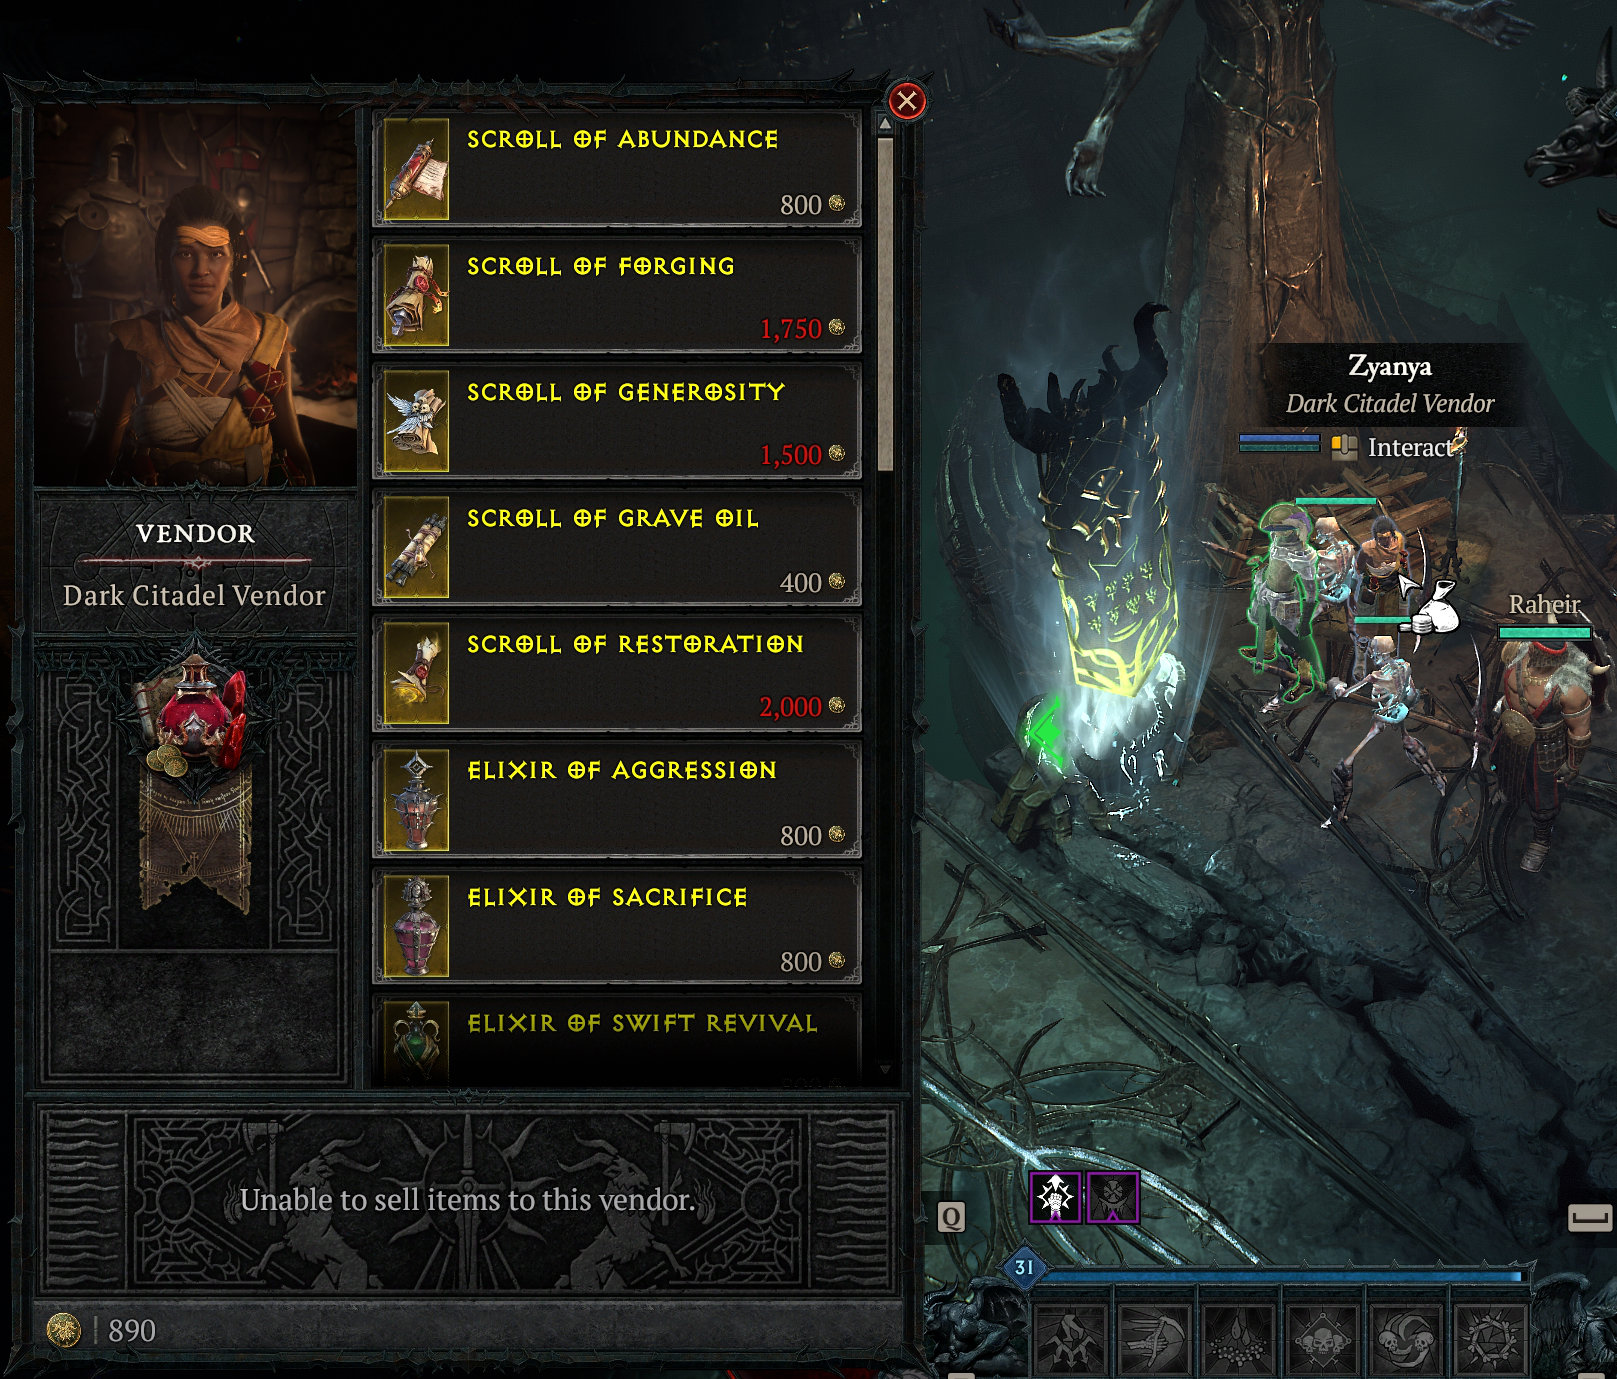
The Dark Citadel Vendor has very unique items for sale that require Citadel Coins currency. Zyanya sells Scrolls, Elixirs, and Incense. In addition, she sells 3 caches for Gear, Crafting Materials, and Gems. The most expensive choices are Weapon Transmog items. You can’t sell anything to this vendor.
Important info about the incense below: “This is a Type II incense. Only one incense of a type may be active at a time. Experience Bonus does not stack with other Incenses.”
- Scroll of Abundance: Use to restore 30% Health and drop Health potions for Nearby Players. (800 Citadel Coins.)
- Scroll of Forging: Use to summon an Anvil that can be used by 4 players to repair their gear. (1750 Citadel Coins.)
- Scroll of Generosity: Use to revive up to 3 Nearby Players. (1500 Citadel Coins.)
- Scroll of Grave Oil: Use to prevent Durability loss on your next 3 deaths. (400 Citadel Coins.)
- Scroll of Restoration: Use to restore all Tempering Charges on an item. (2000 Citadel Coins.)
- Elixir of Aggression: For the next 30 minutes: Increases Damage Reduction by 10%. After killing 20 enemies, your next Core Skill Taunts nearby enemies. Experience gained is increased by 8%. (800 Citadel Coins.)
- Elixir of Sacrifice: For the next 30 minutes: Every 10 sec, your next Core Skill heals you and Nearby allies for 10% of their max Health. Restore an additional 5% max Health for each nearby ally, up to 25%. Experience gained is increased by 8%. (800 Citadel Coins.)
- Elixir of Swift Revival: For the next 30 minutes: Increase healing by 15% and Revive speed by 25%. After Reviving a player, gain +10 Movement Speed for 5 sec. Experience gained is increased by 8%. (800 Citadel Coins.)
- Elixir of Tailwind: For the next 30 minutes: Increase Movement Speed by +15%. You leave behind a trail that grants players +15% Movement Speed for 5 sec. Experience gained is increased by 8%. (800 Citadel Coins.)
- Incense of Capacity: For the next 20 minutes: Increases Potion Capacity by +3 and Healing Received by +10% for all nearby players. Increases experience by 5%. (1600 Citadel Coins.)
- Incense of Fortitude: For the next 20 minutes: Increases Damage by 5% for all nearby players. For each Nearby dead player, gain 5% Damage, up to 15%. Increases Experience by 5%. (1600 Citadel Coins.)
- Incense of Khazra Power: For the next 20 minutes: Increases All Stats by +30 for all nearby players. After killing an enemy, gain +2 to All Stats for 5 sec. Increases Experience by 5%. (1600 Citadel Coins.)
- Incense of Rushing Wind: For the next 20 minutes: Increases Movement Speed by +15% for all nearby players. For each nearby player with this buff, gain +5% Movement Speed, up to +30%. Increases Experience by 5%. (1600 Citadel Coins.)
- Dark Citadel Gear Cache: Contains random gear, with a chance for Uniques. Use this cache to receive your rewards. (1200 Citadel Coins.)
- Dark Citadel Crafting Cache: Contains random crafting materials. Use this cache to receive your rewards. (900 Citadel Coins.)
- Dark Citadel Gem Cache: Contains random Gems and Gem Fragments. Use this cache to receive your rewards. (1100 Citadel Coins.)
- Doom Mace: Use this item to unlock a new look in the Wardrobe. (15000 Citadel Coins.)
- Hooked Piercer: Use this item to unlock a new look in the Wardrobe. (15000 Citadel Coins.)
- Ritual Impaler: Use this item to unlock a new look in the Wardrobe. (20000 Citadel Coins.)
- Sculpted Quarterstaff: Use this item to unlock a new look in the Wardrobe. (20000 Citadel Coins.)
- Twisted Spirit Ward: Use this item to unlock a new look in the Wardrobe. (15000 Citadel Coins.)
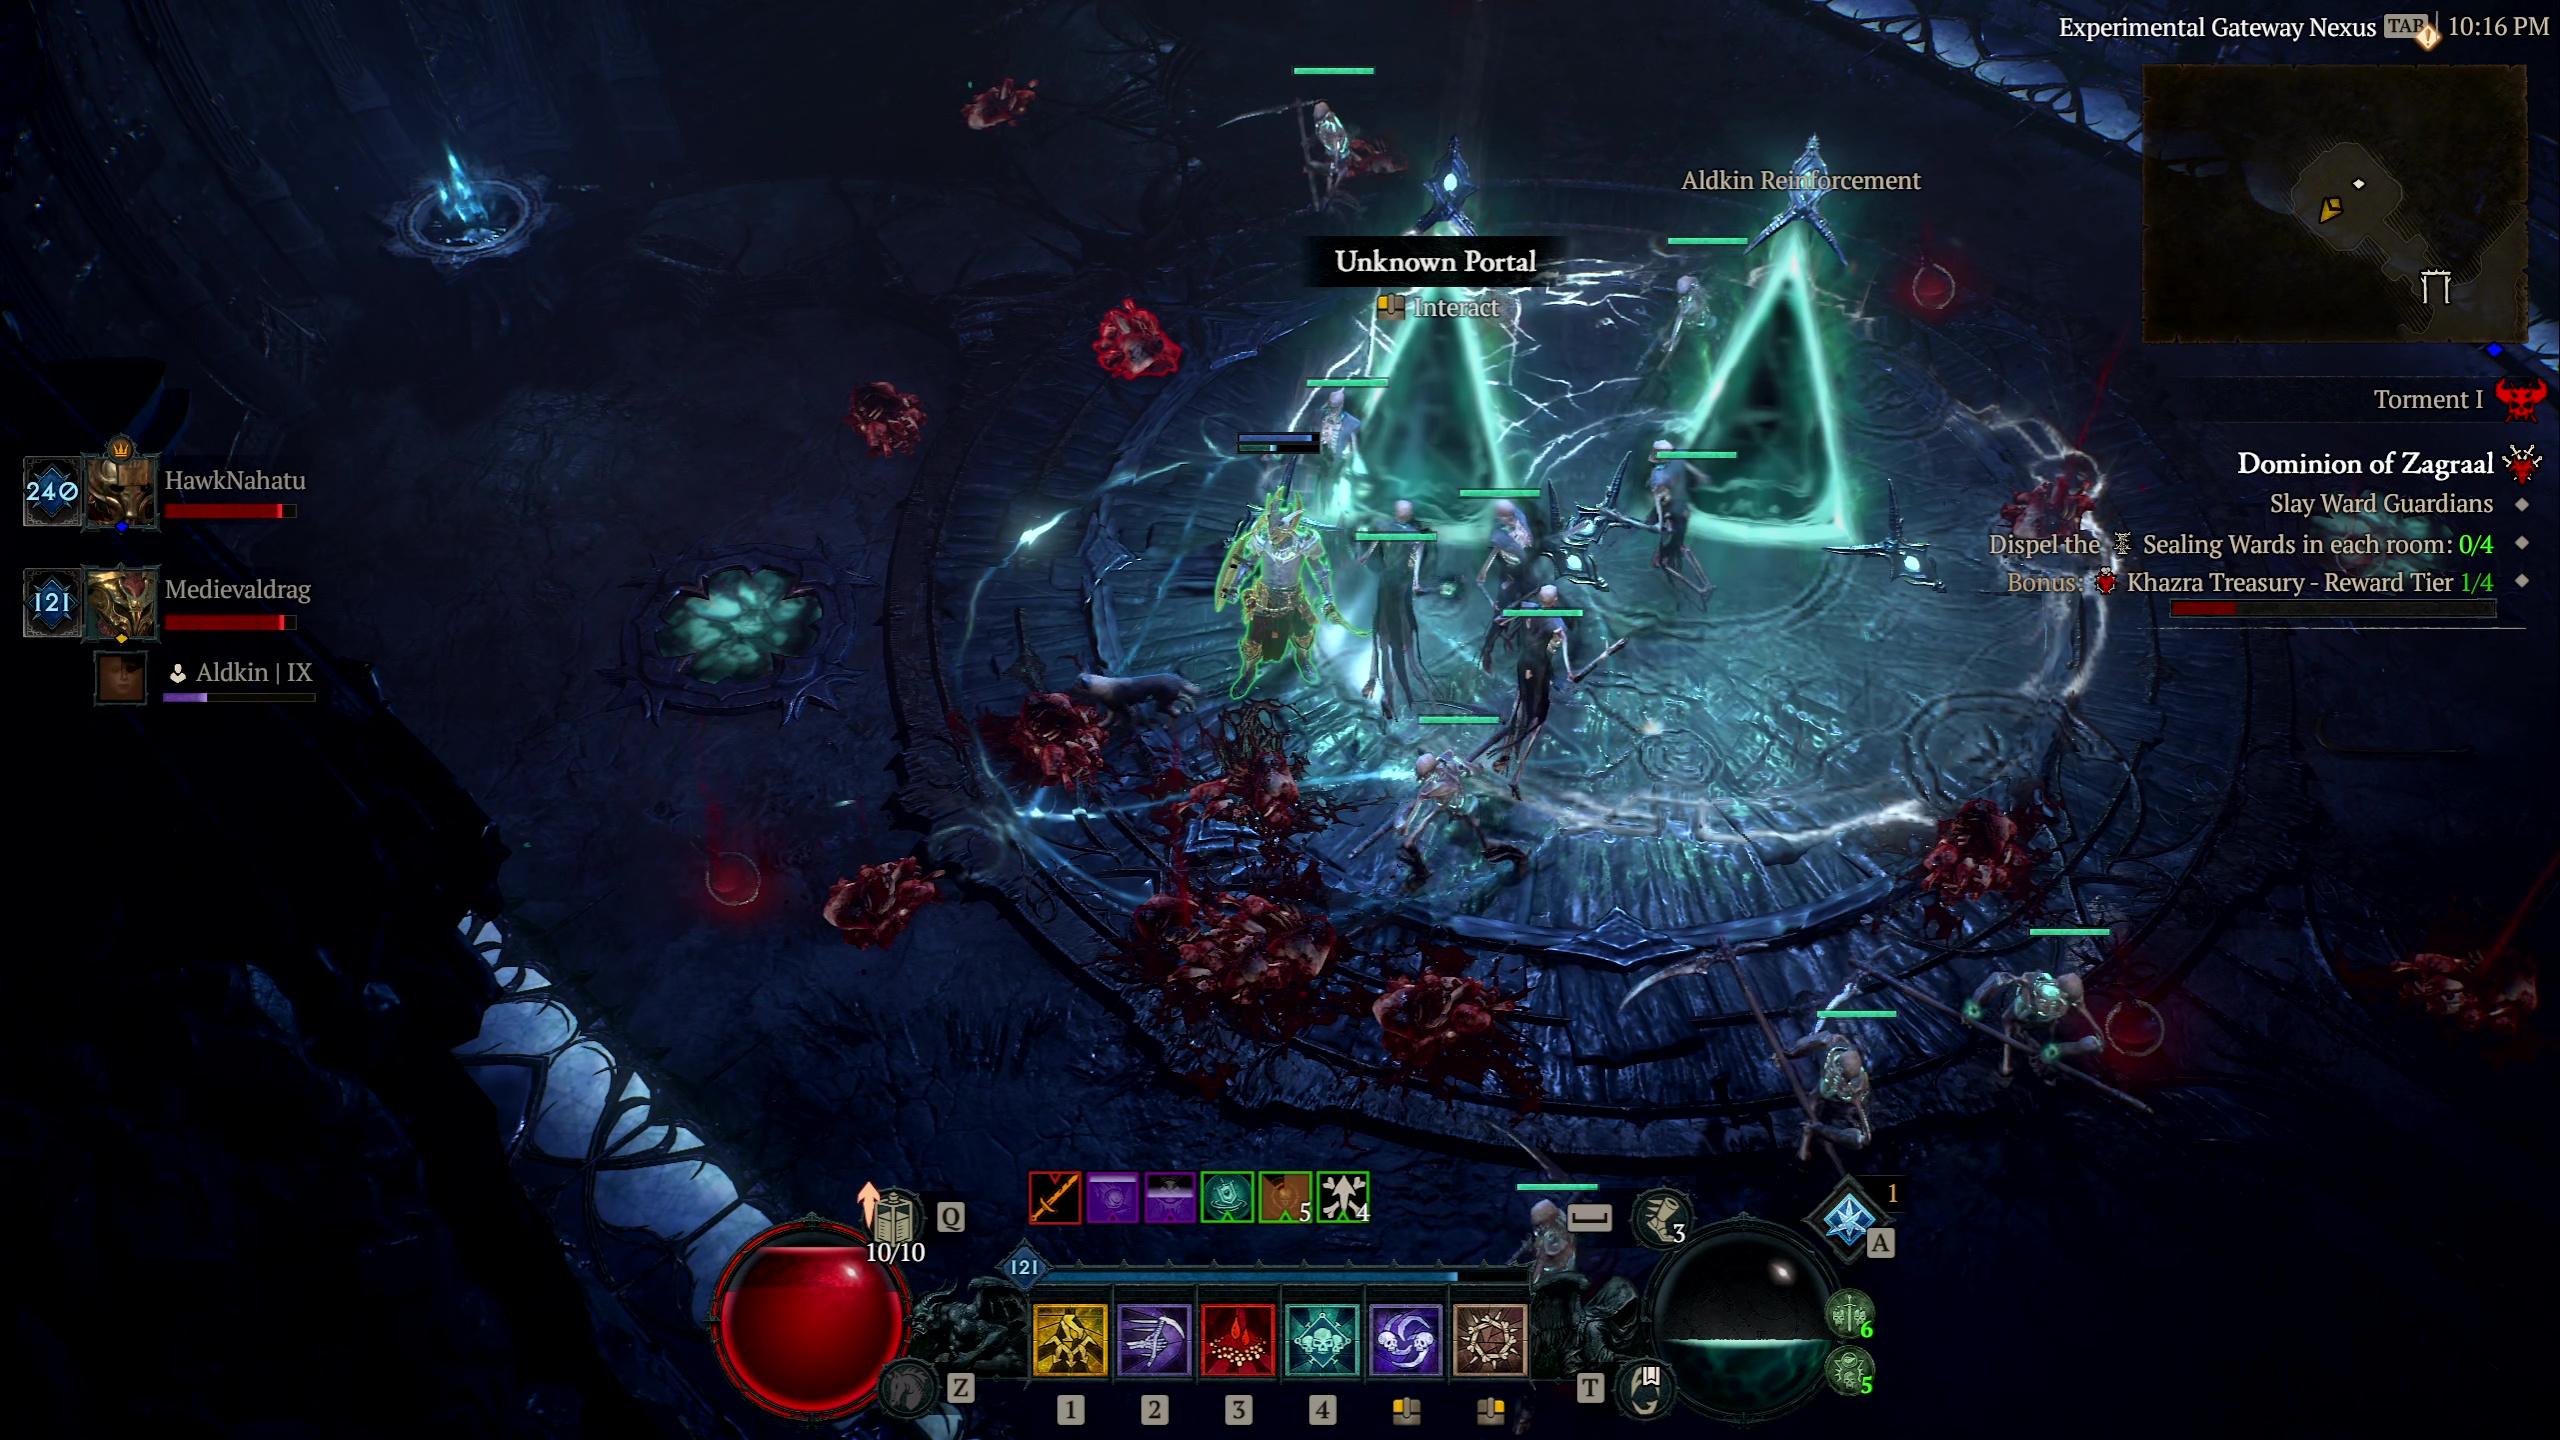
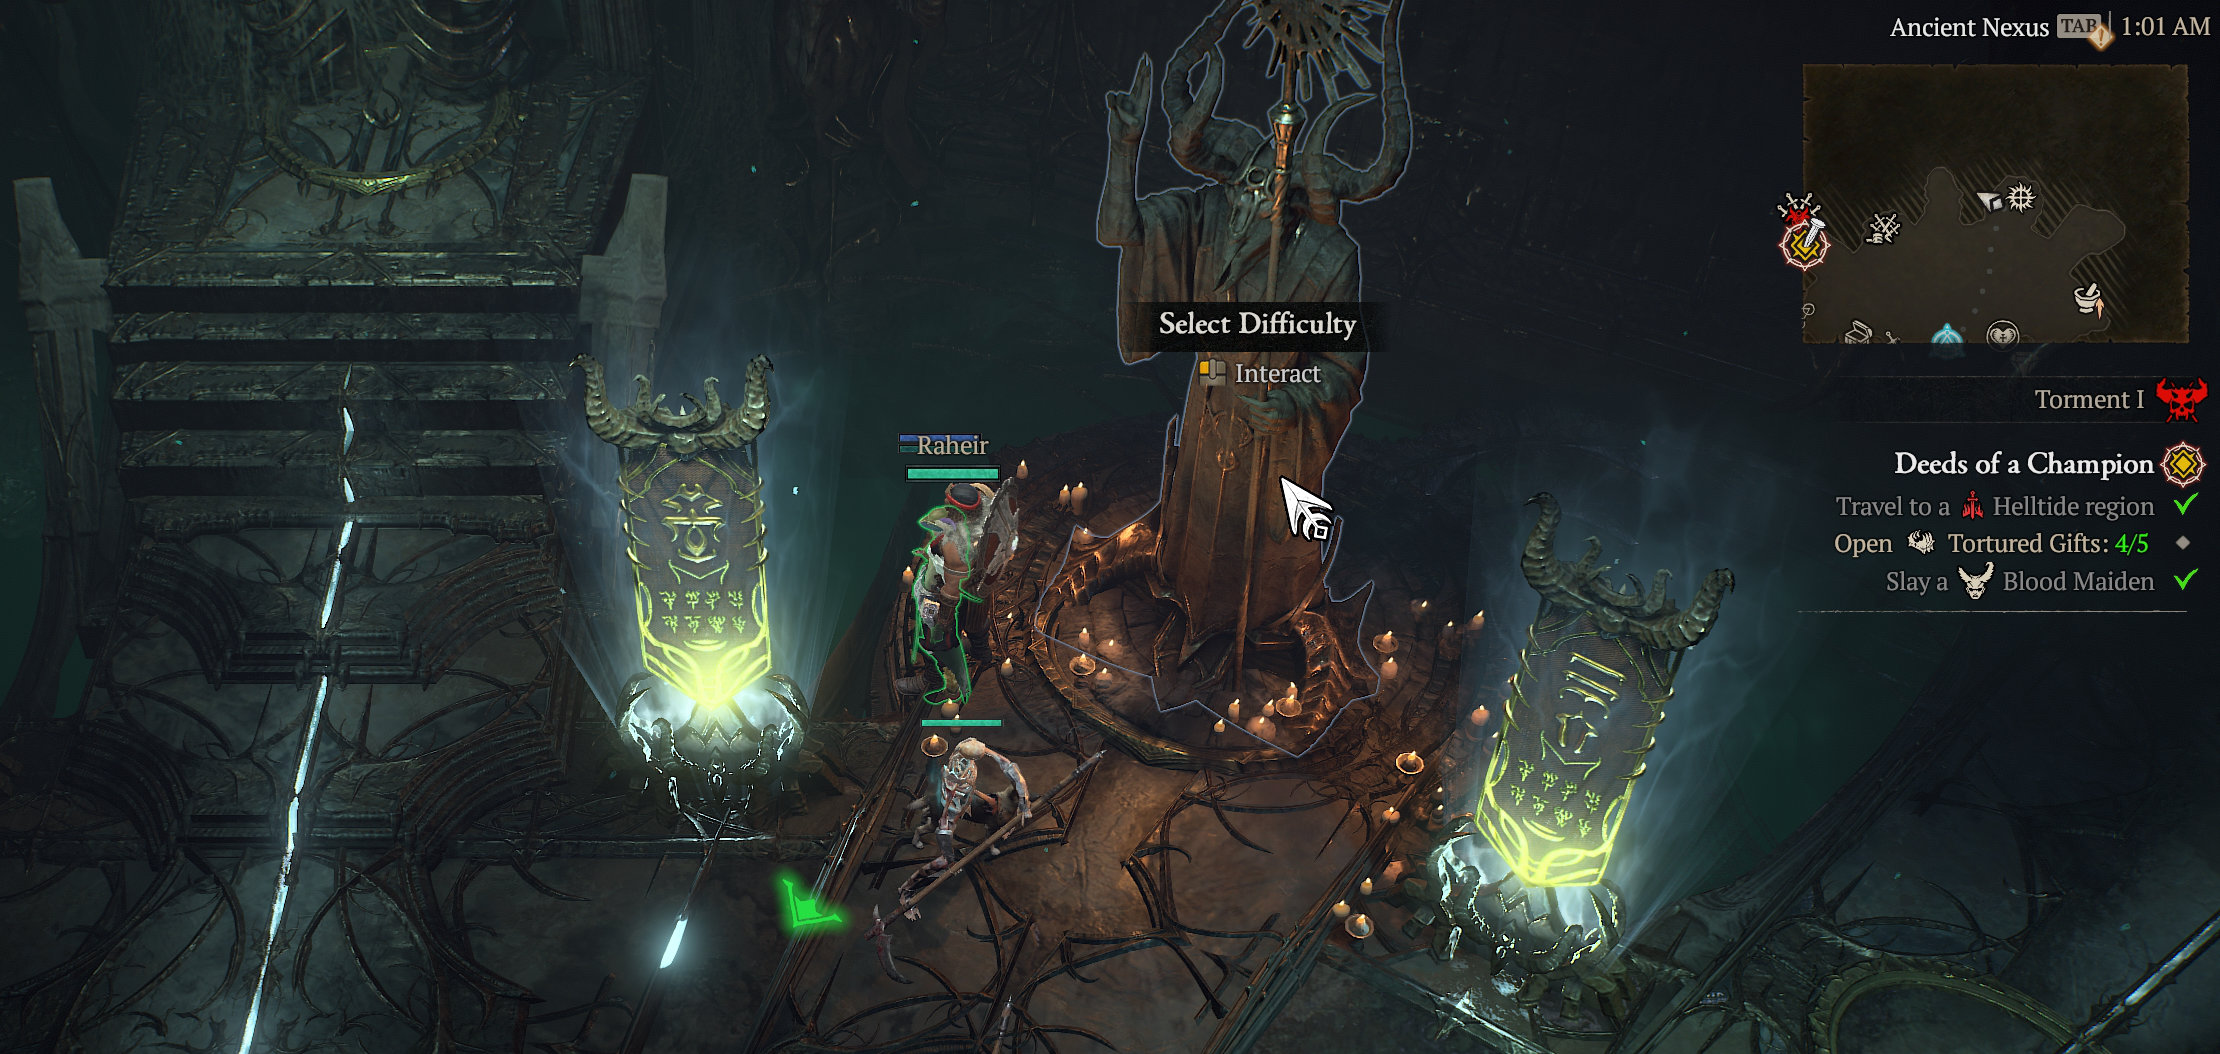
The Dark Citadel has three wings: Enclave of Strife, Labyrinth of Souls, and Dominion of Zagraal. Each has its own Portal which you can access from the Ancient Nexus (an instanced camp within the Dark Citadel entrance). This area has a Stash, Blacksmith, Weapon Vendor, Healer, Jewelcrafter, Alchemist, Occultist, the Dark Citadel vendor, a Waypoint, and the Khazra statue to switch Difficulty Mode.
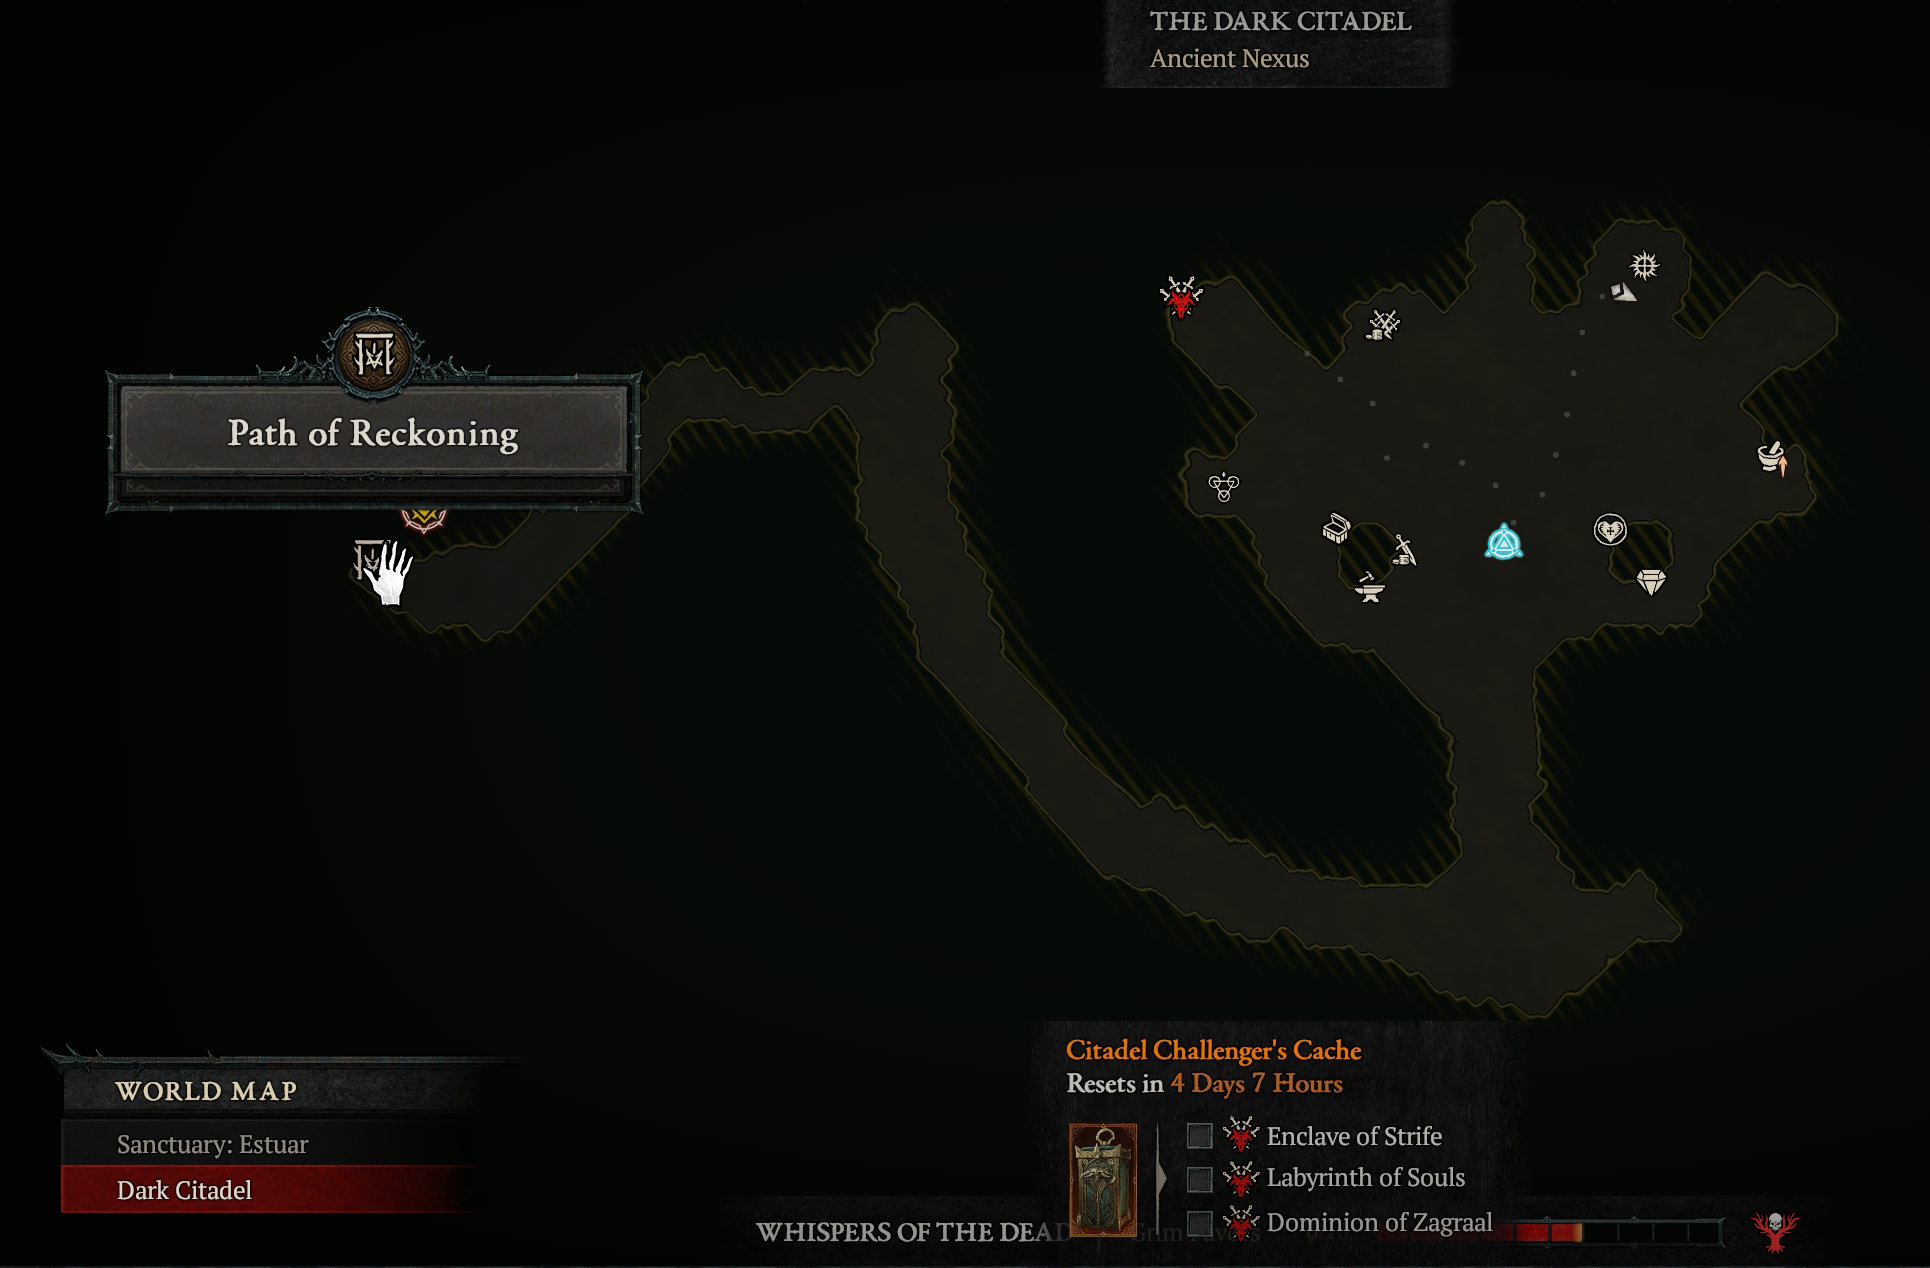
Each week, you can earn a Citadel Challenger’s Cache if you complete the three wings of the Dark Citadel.
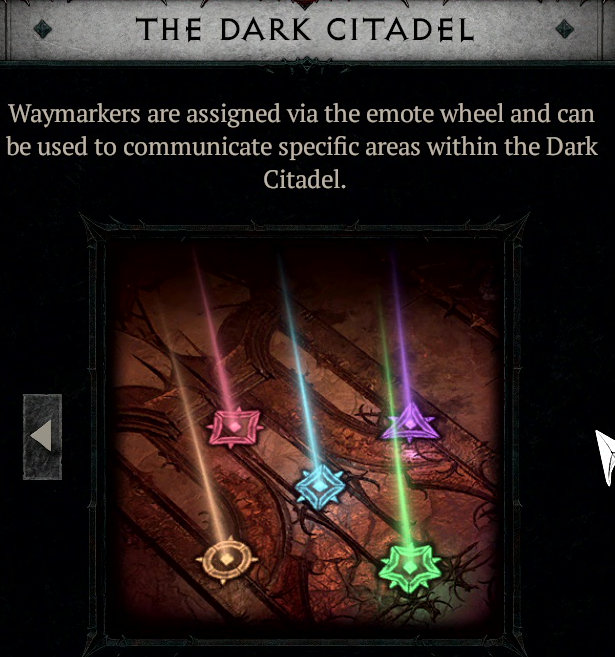
The Emote Wheel got a little update that is useful in the Dark Citadel. Waymarkers allow you to mark areas of interest to coordinate what to focus on and to mark where objectives are located.
No activity in Diablo 4 may fill you with more satisfaction and dread than the Dark Citadel. It is a massive fortress with overcrowded hallways filled with hundreds of Khazra enemies to slaughter.
The hallways have wide spaces you can use to your advantage to avoid AOE affixes. You should actively search all the hallways in search of Treasury Wardens — these drop Citadel Coins you can spend at the Dark Citadel Vendor Zyannya in the Ancient Nexus courtyard.

Killing all the Treasury Wardens in these two rooms yielded 890 Citadel Coins.
The Dark Citadel is a fun gameplay experience, but it is time-consuming with some level of difficulty due to puzzles that require communication between players. Think of the Dark Citadel as a co-op World of Warcraft: Shadowlands Torghast on steroids. It is a very long and massive map. There will be at least two color-coded trigger mechanisms that each player has to stand on to activate a teleport to another room or to open a barrier or door.
The Dark Citadel is a head-spinner as you have to teleport to different locations and make sense of what’s happening on the fly — with the added pressure of a countdown that leads to all players dying instantly when the time is over.
The Dark Citadel has three wings as separate dungeons. If you complete wing one, leave the wing and return to the Ancient Nexus area where the NPC services and vendors are. You can only enter wing 2 after completing the previous one. Once you complete all 3 raid dungeons, you unlock the weekly cache.
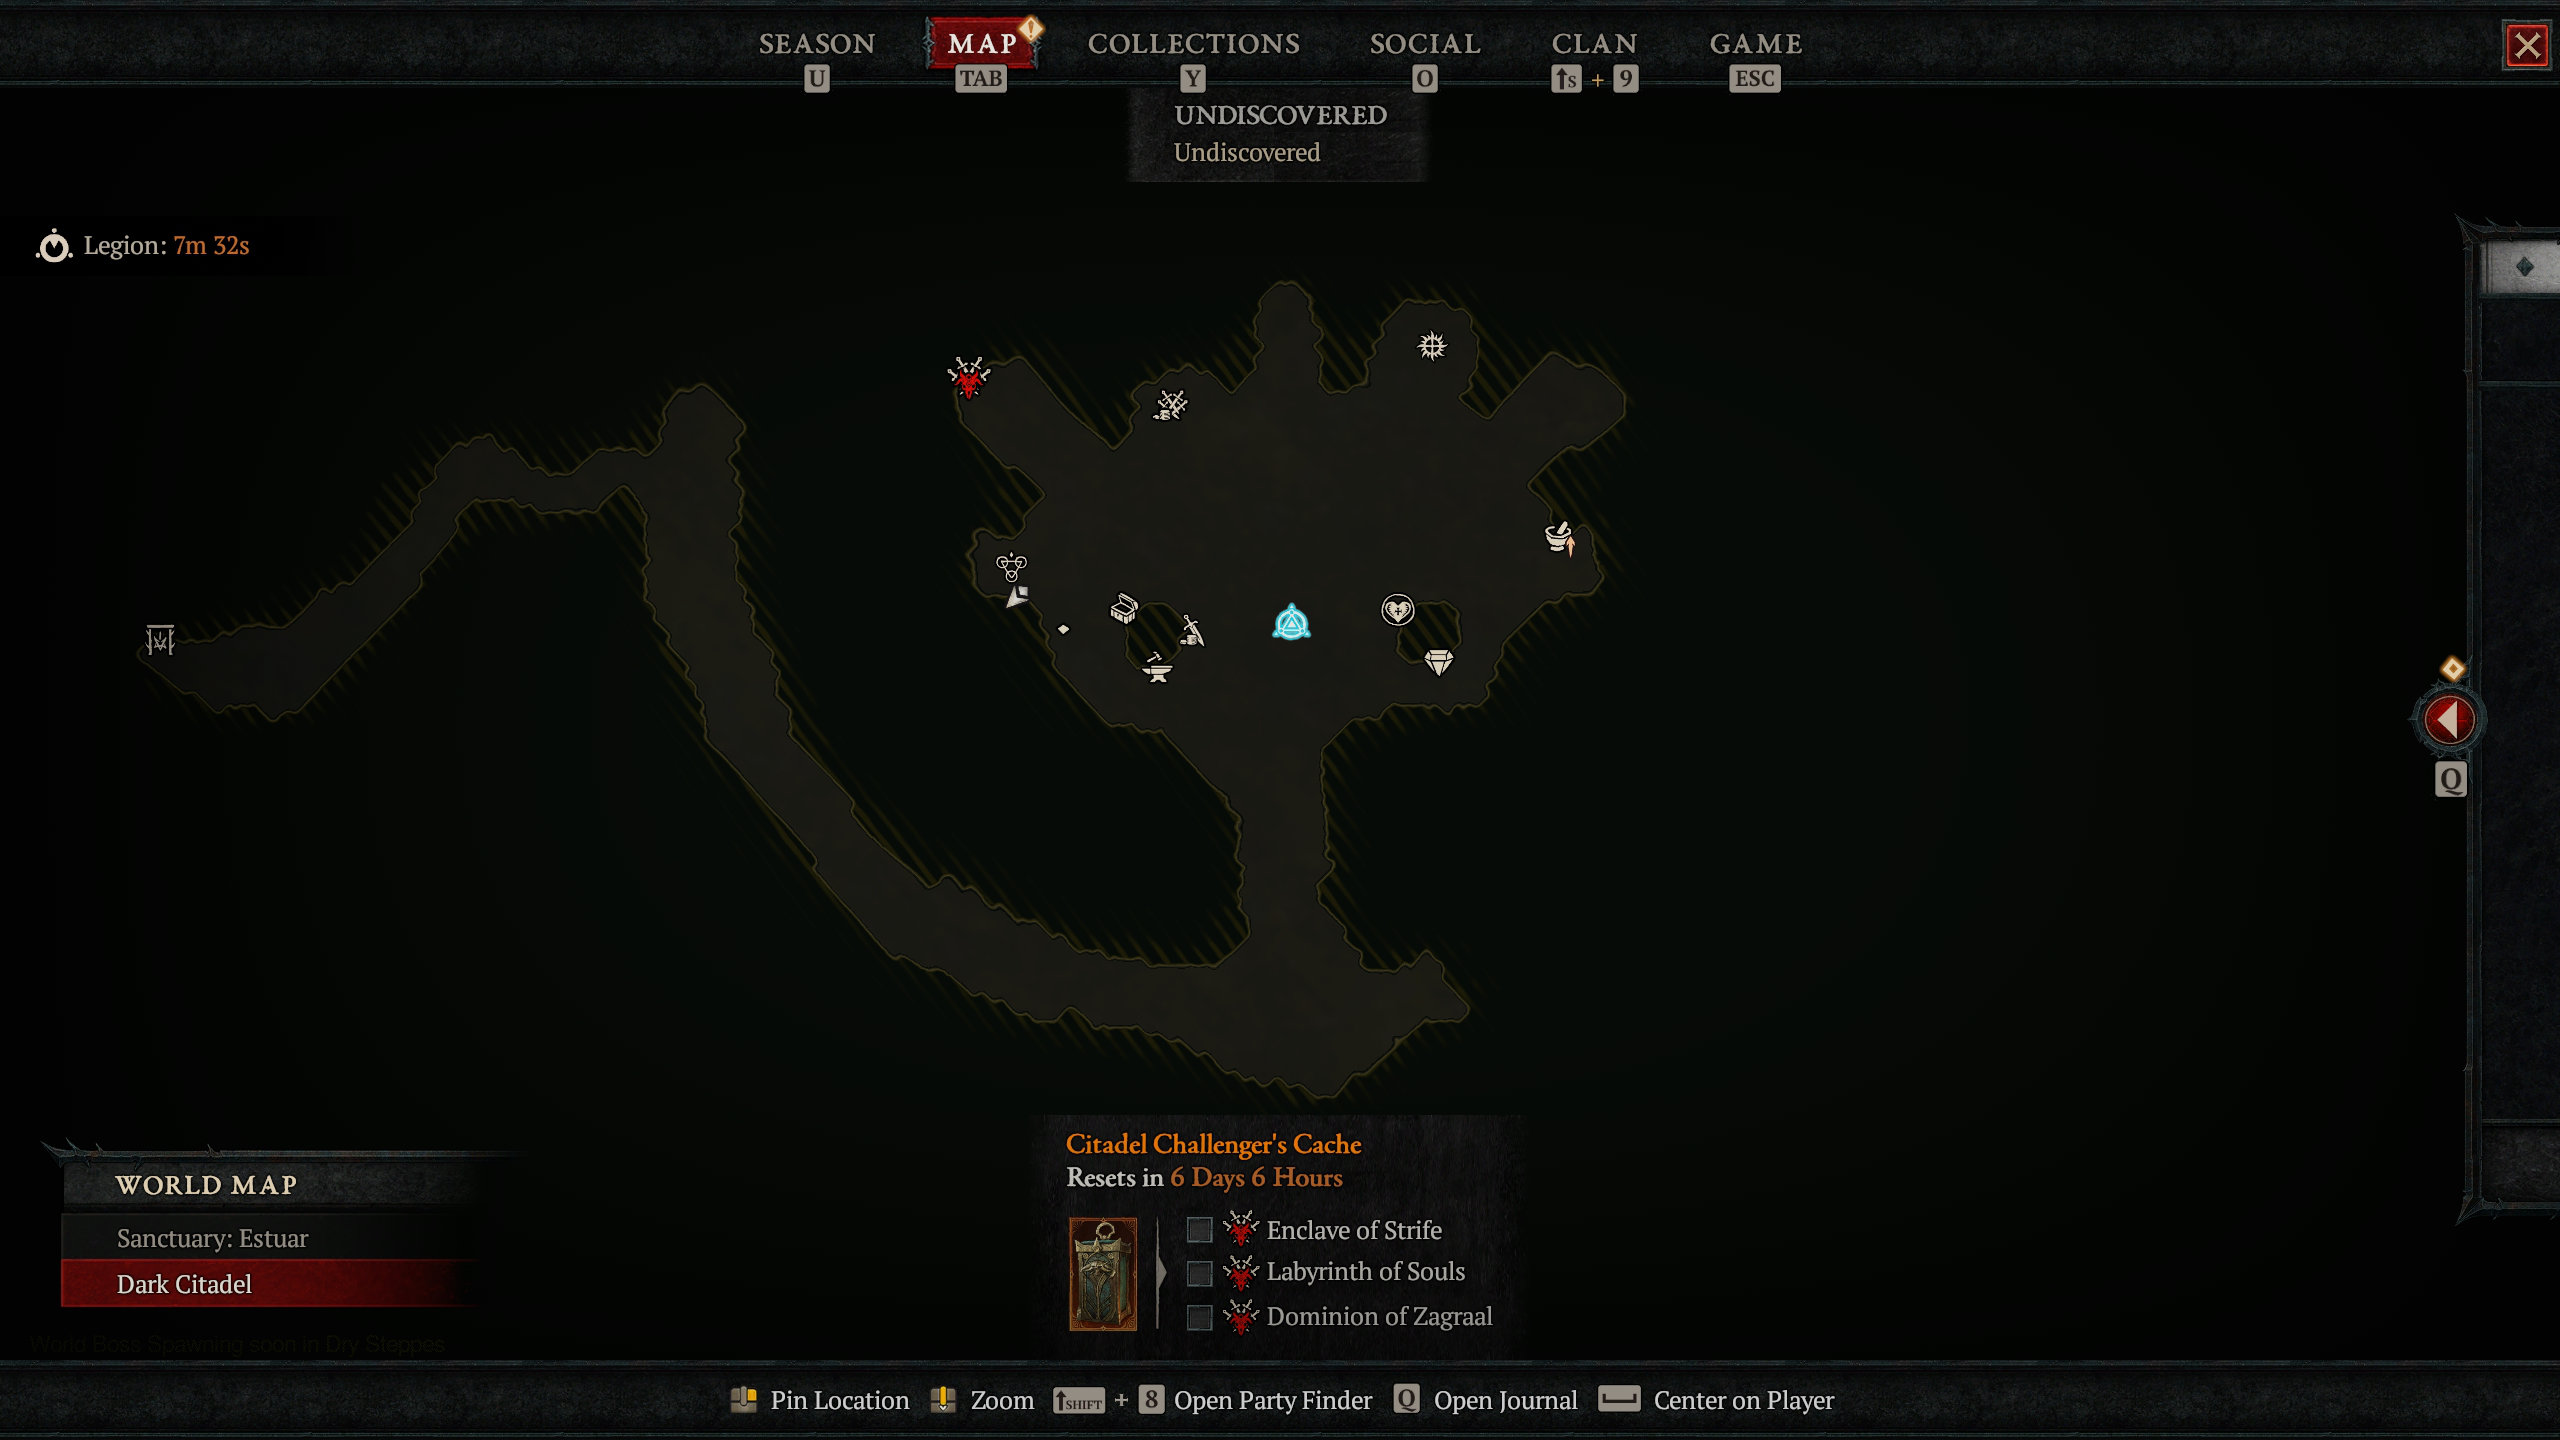
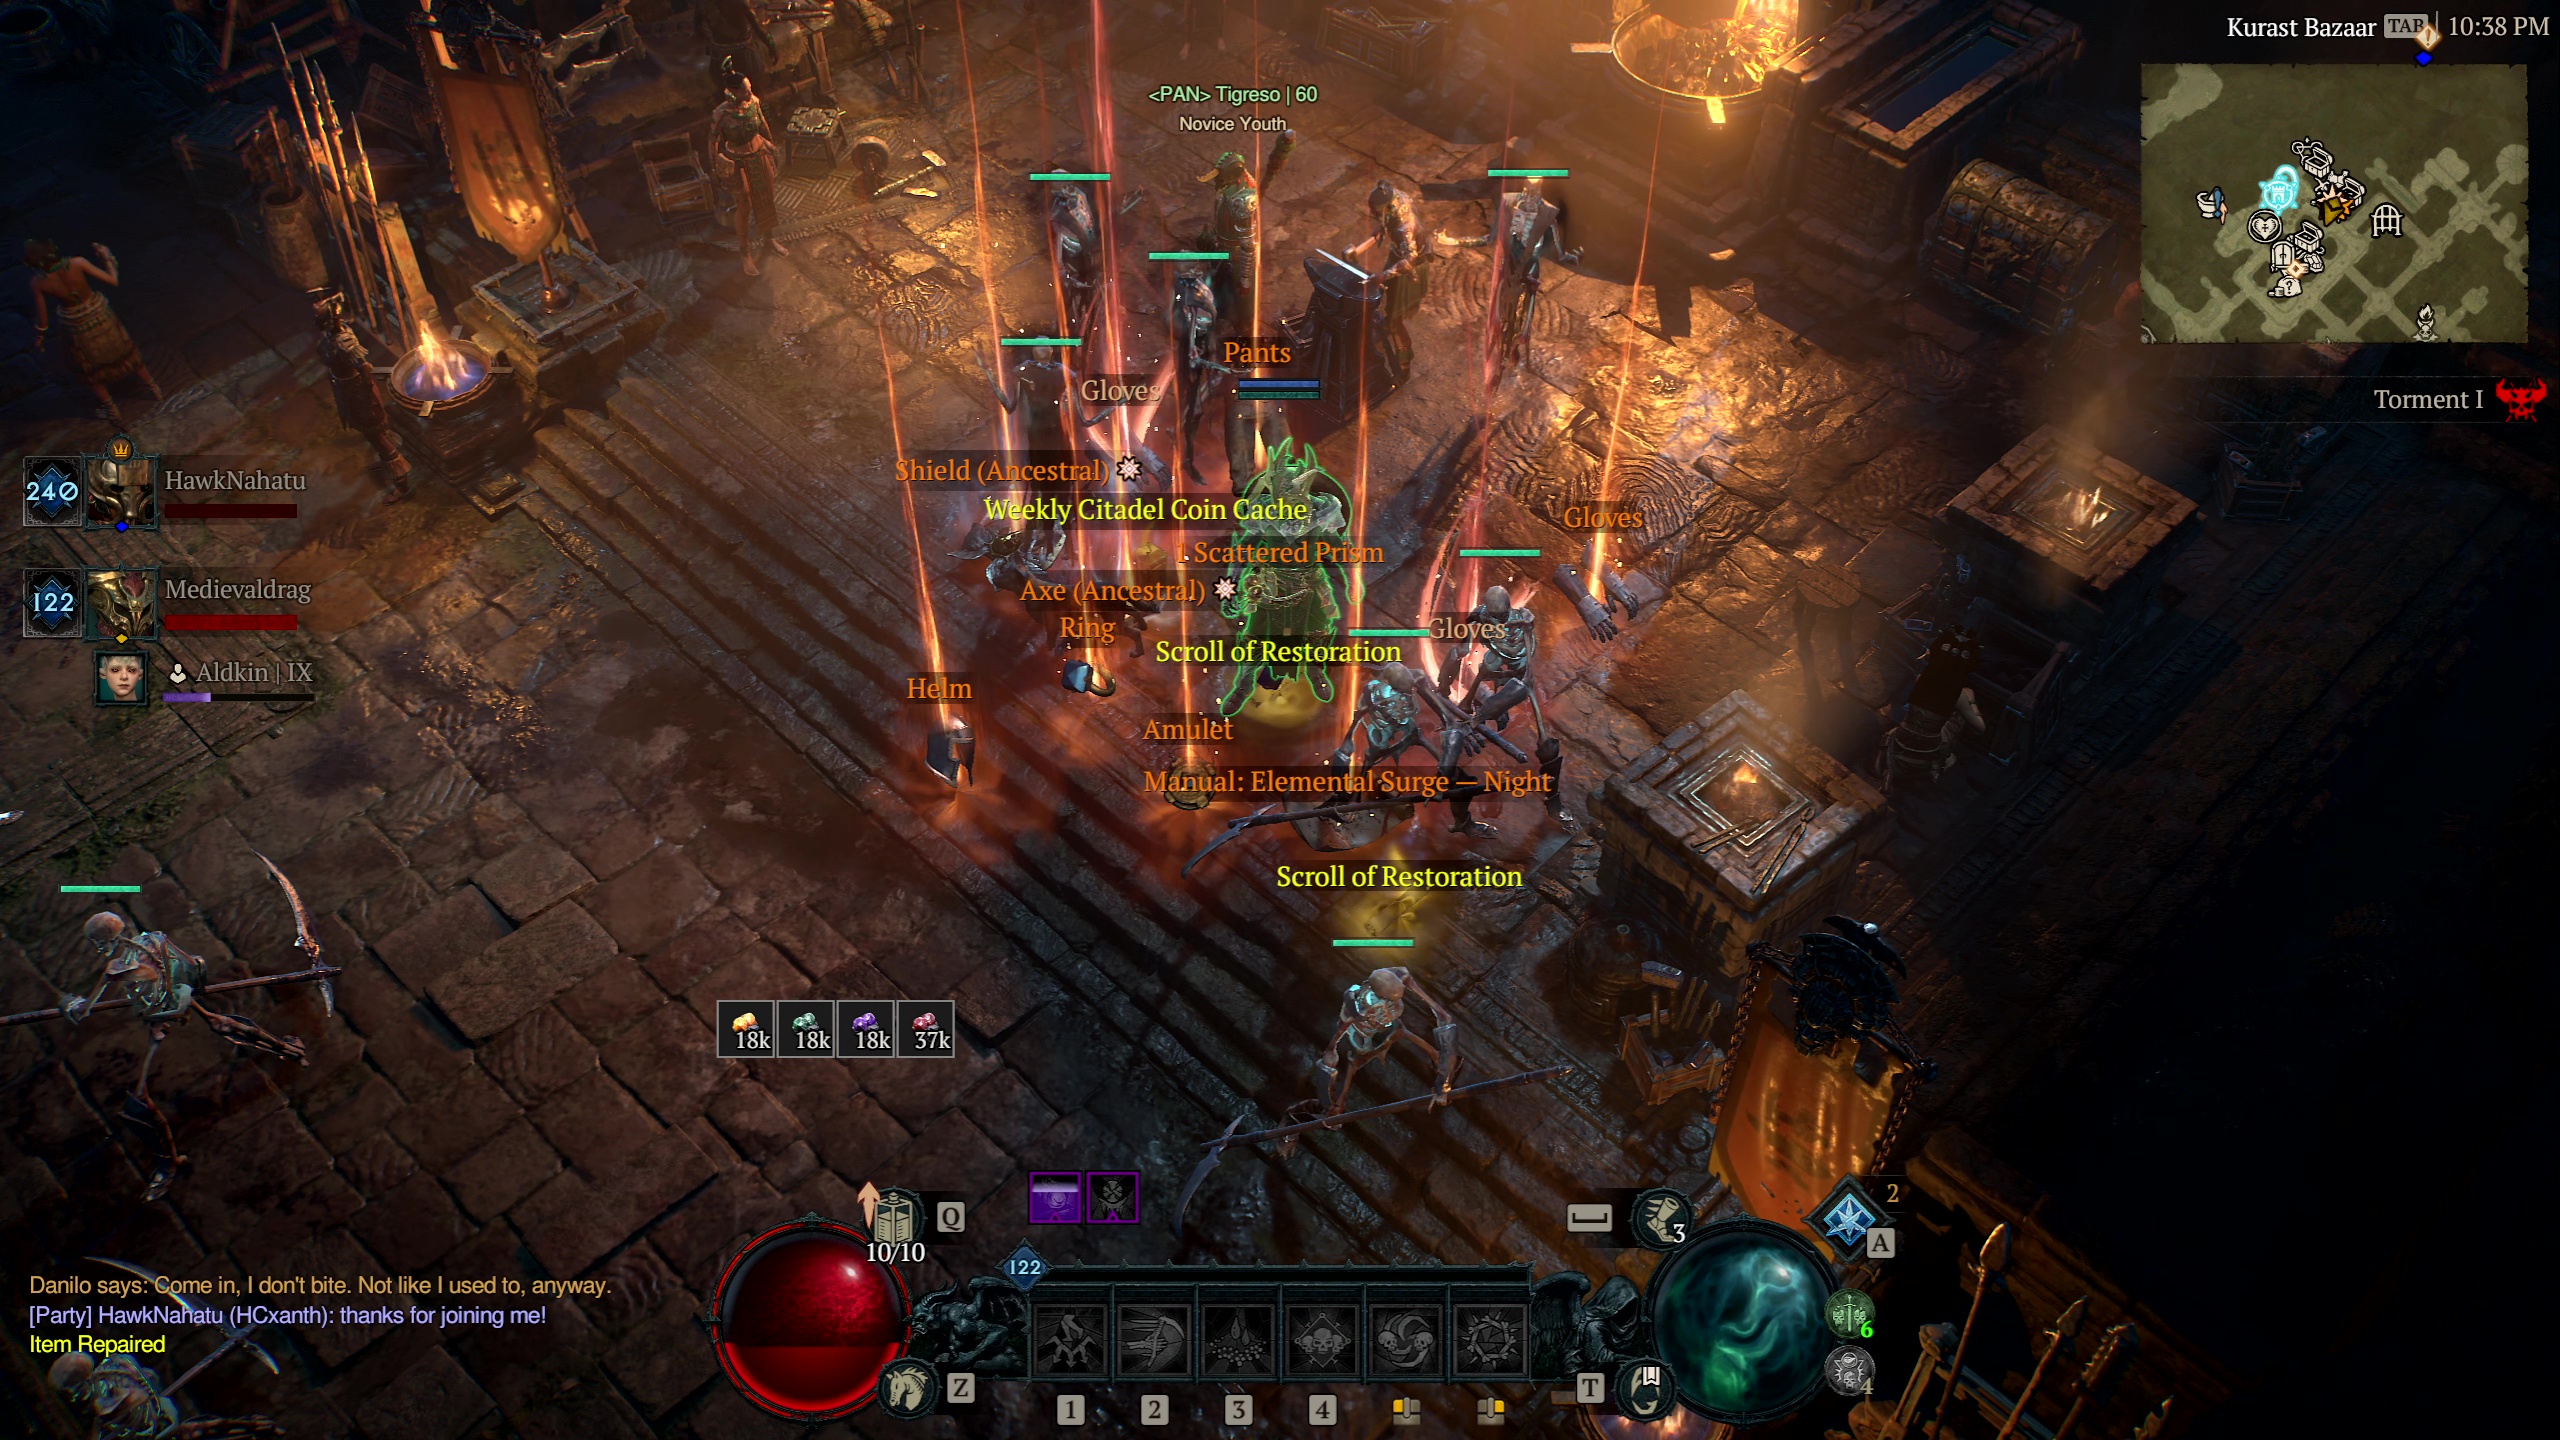
This Weekly Citadel Challenger’s Cache contains millions of gold, nearly 100 Obols, Legendary Items (some with Greater Affixes), a chance for Uniques x 2, Gem Fragments, Scroll of Restoration x 2, Scattered Prism x 1, Tempering Manual x 1, and a Weekly Citadel Coin Cache — which contains approximately 407 Citadel Coins you can spend at the Citadel Vendor in the Ancient Nexus.
WORLD BOSSES
There is a new World Boss area, known as Caen Adar, in the southeastern corner of Nahantu. Any of the World Bosses might spawn there. I soloed Ashava and he dropped Murmuring Obols, Gold, a Tempering Manual, a Scattered Prism (for adding sockets), Khazra Horns x 6, Legendary Items x 4, a Grand Cache, and two Runes: Noc and Cem. The Grand Cache contained Gold, Gem Fragments, a Legendary Item, and a Nightmare Sigil (to open a Nightmare Dungeon).
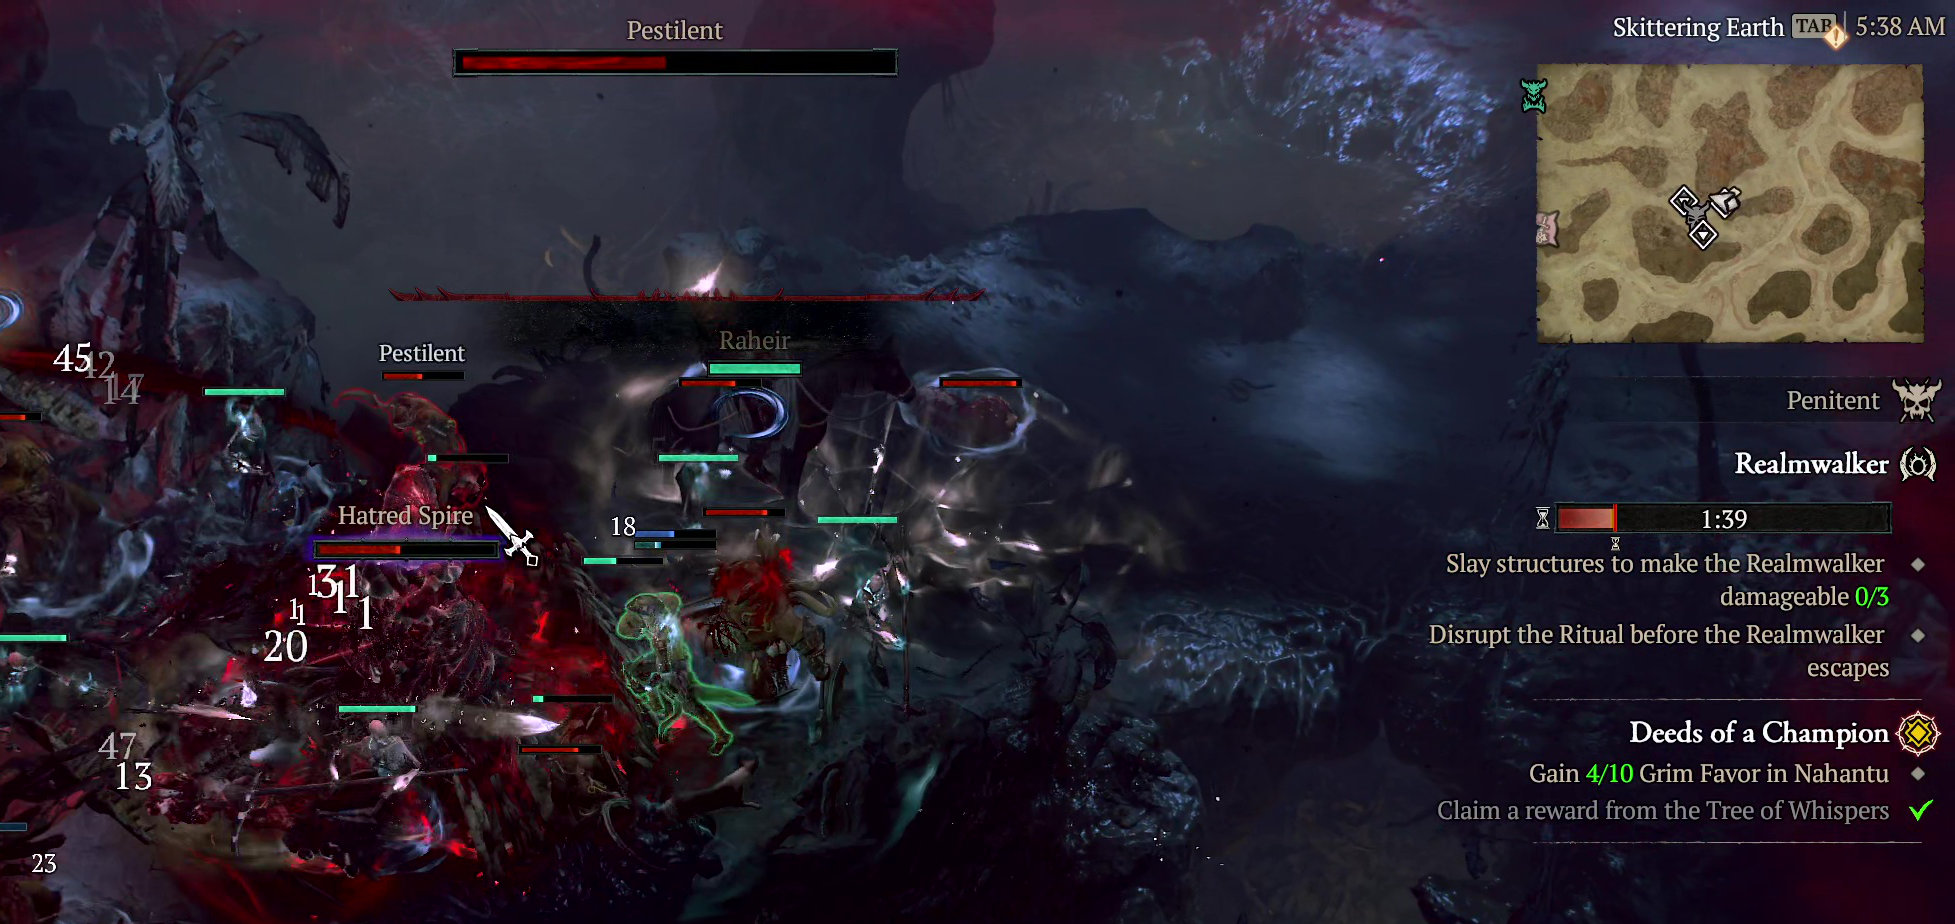
THE REALMWALKER
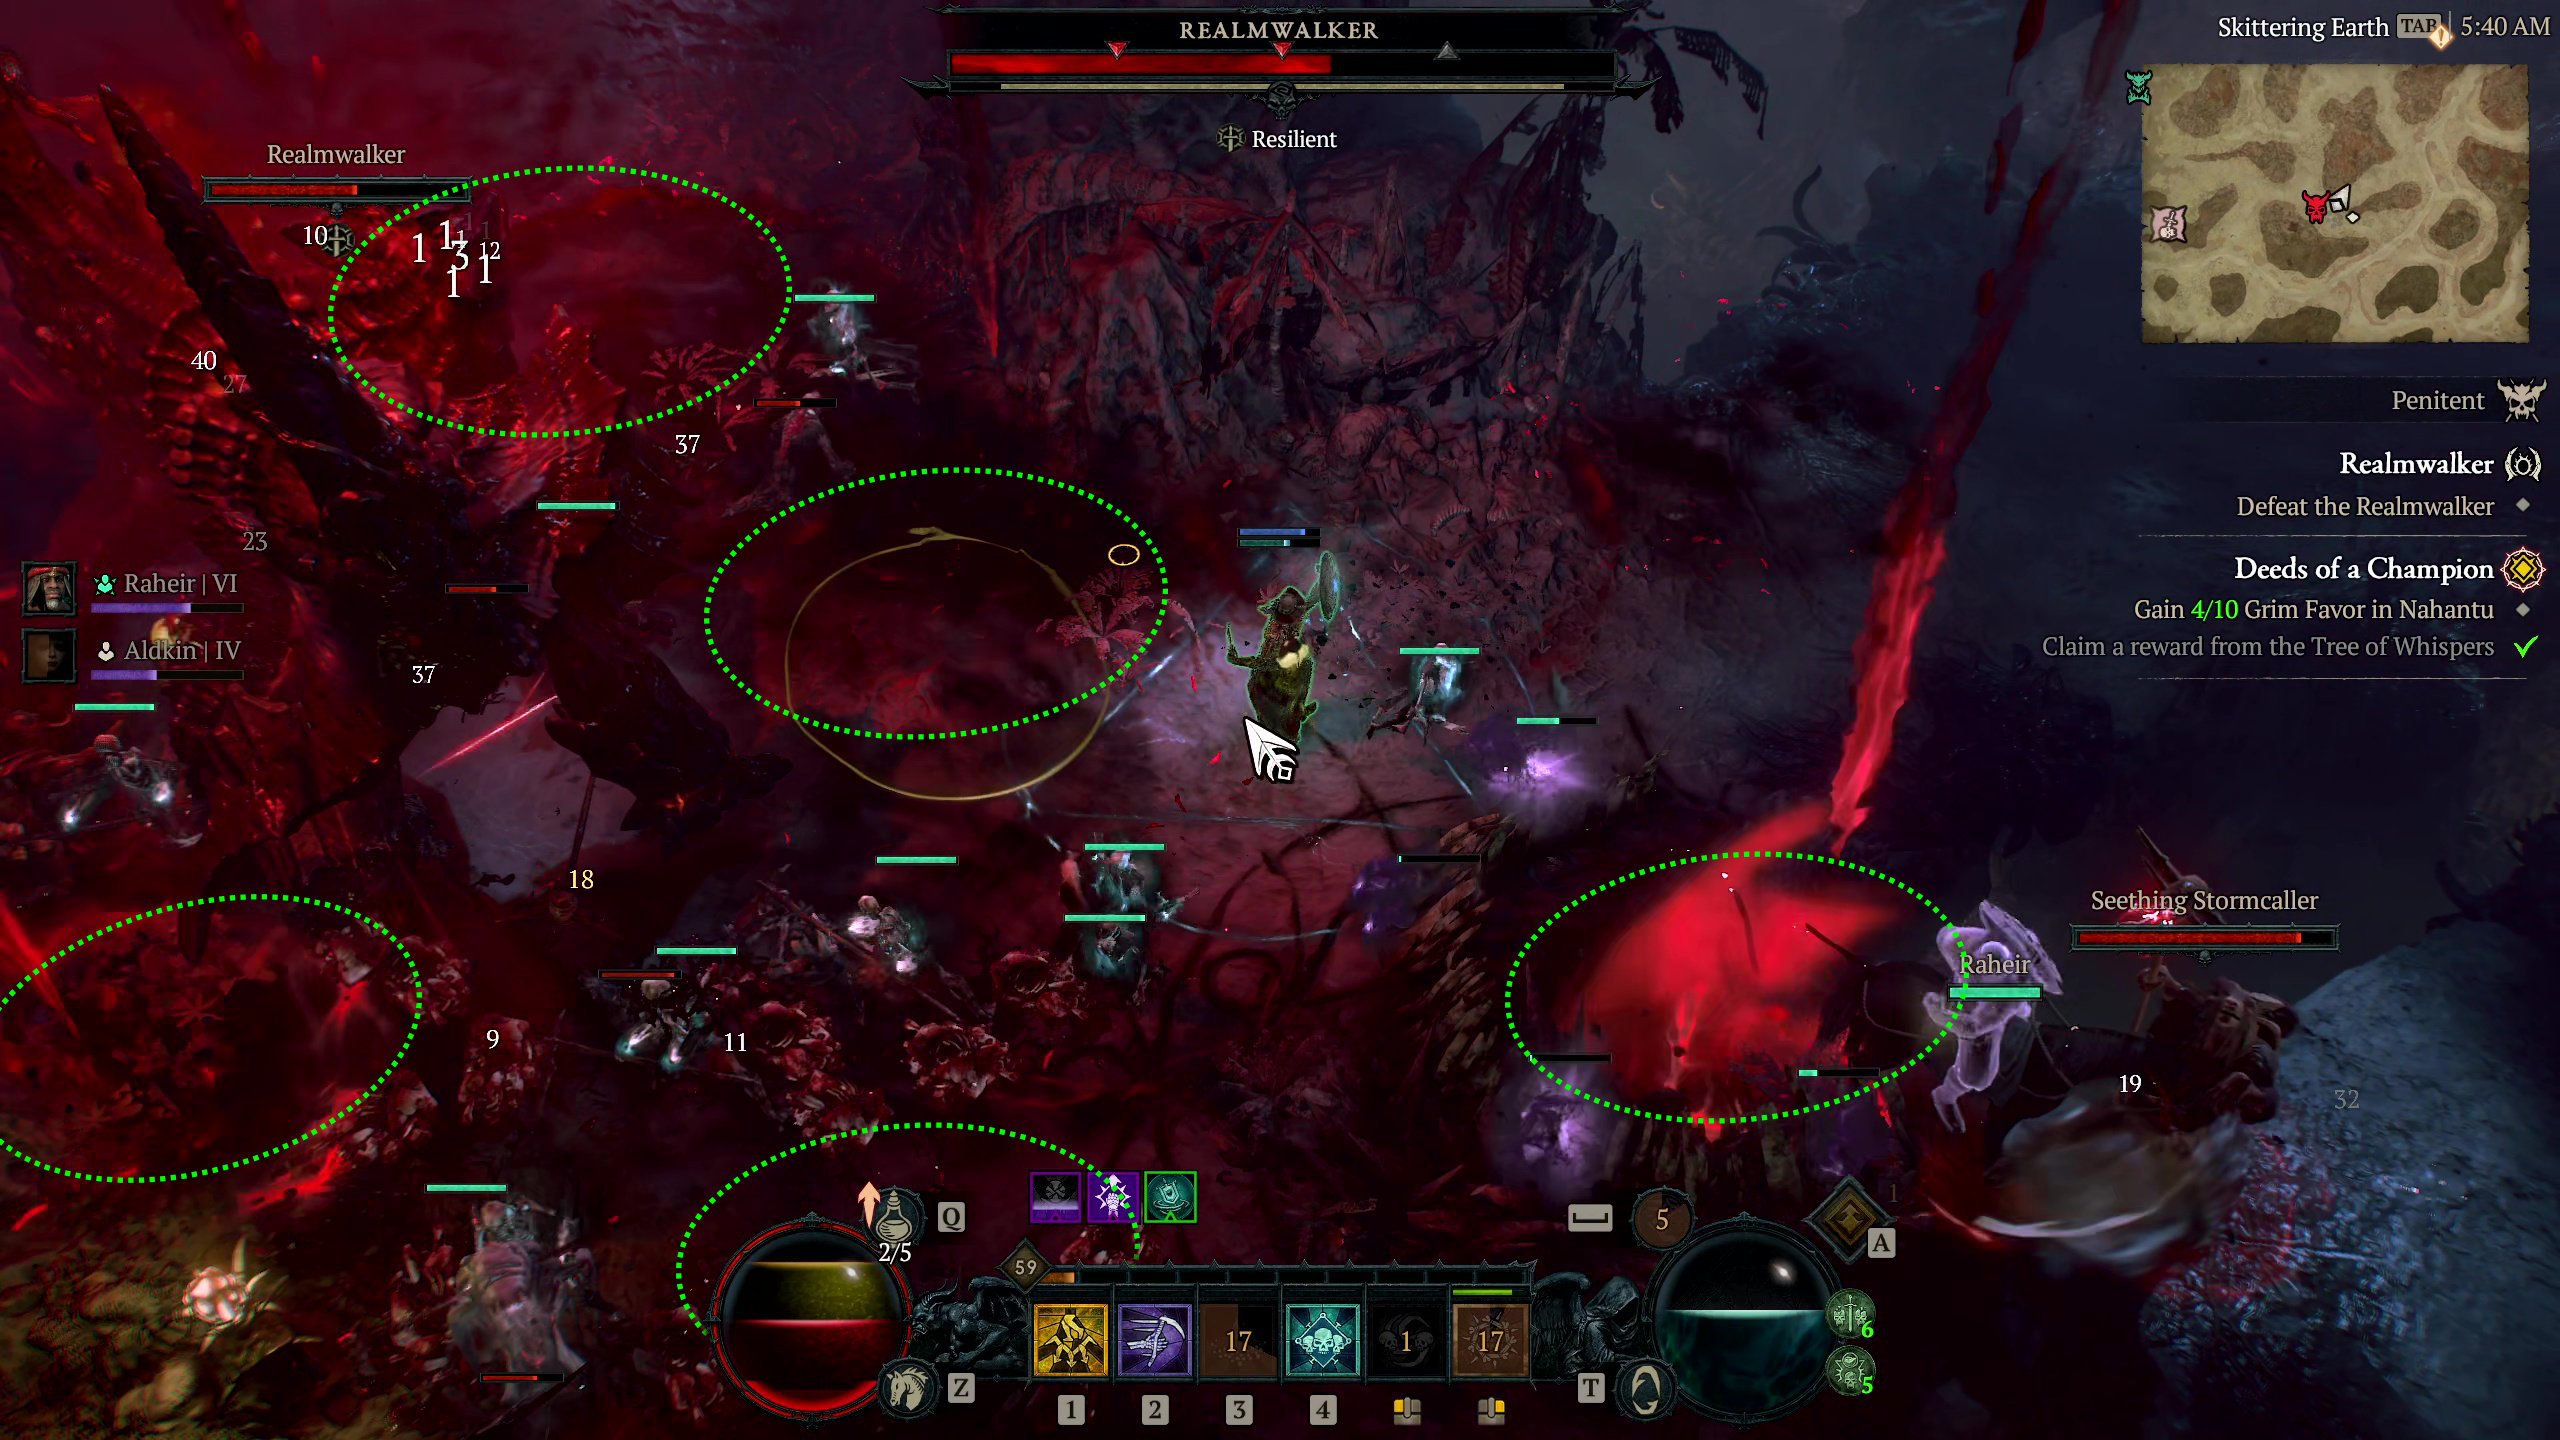
The Realmwalker is a Season of Hatred Rising event that spawns often throughout a random zone of Sanctuary. Wait for the countdown that alerts you when the Realmwalker event starts.
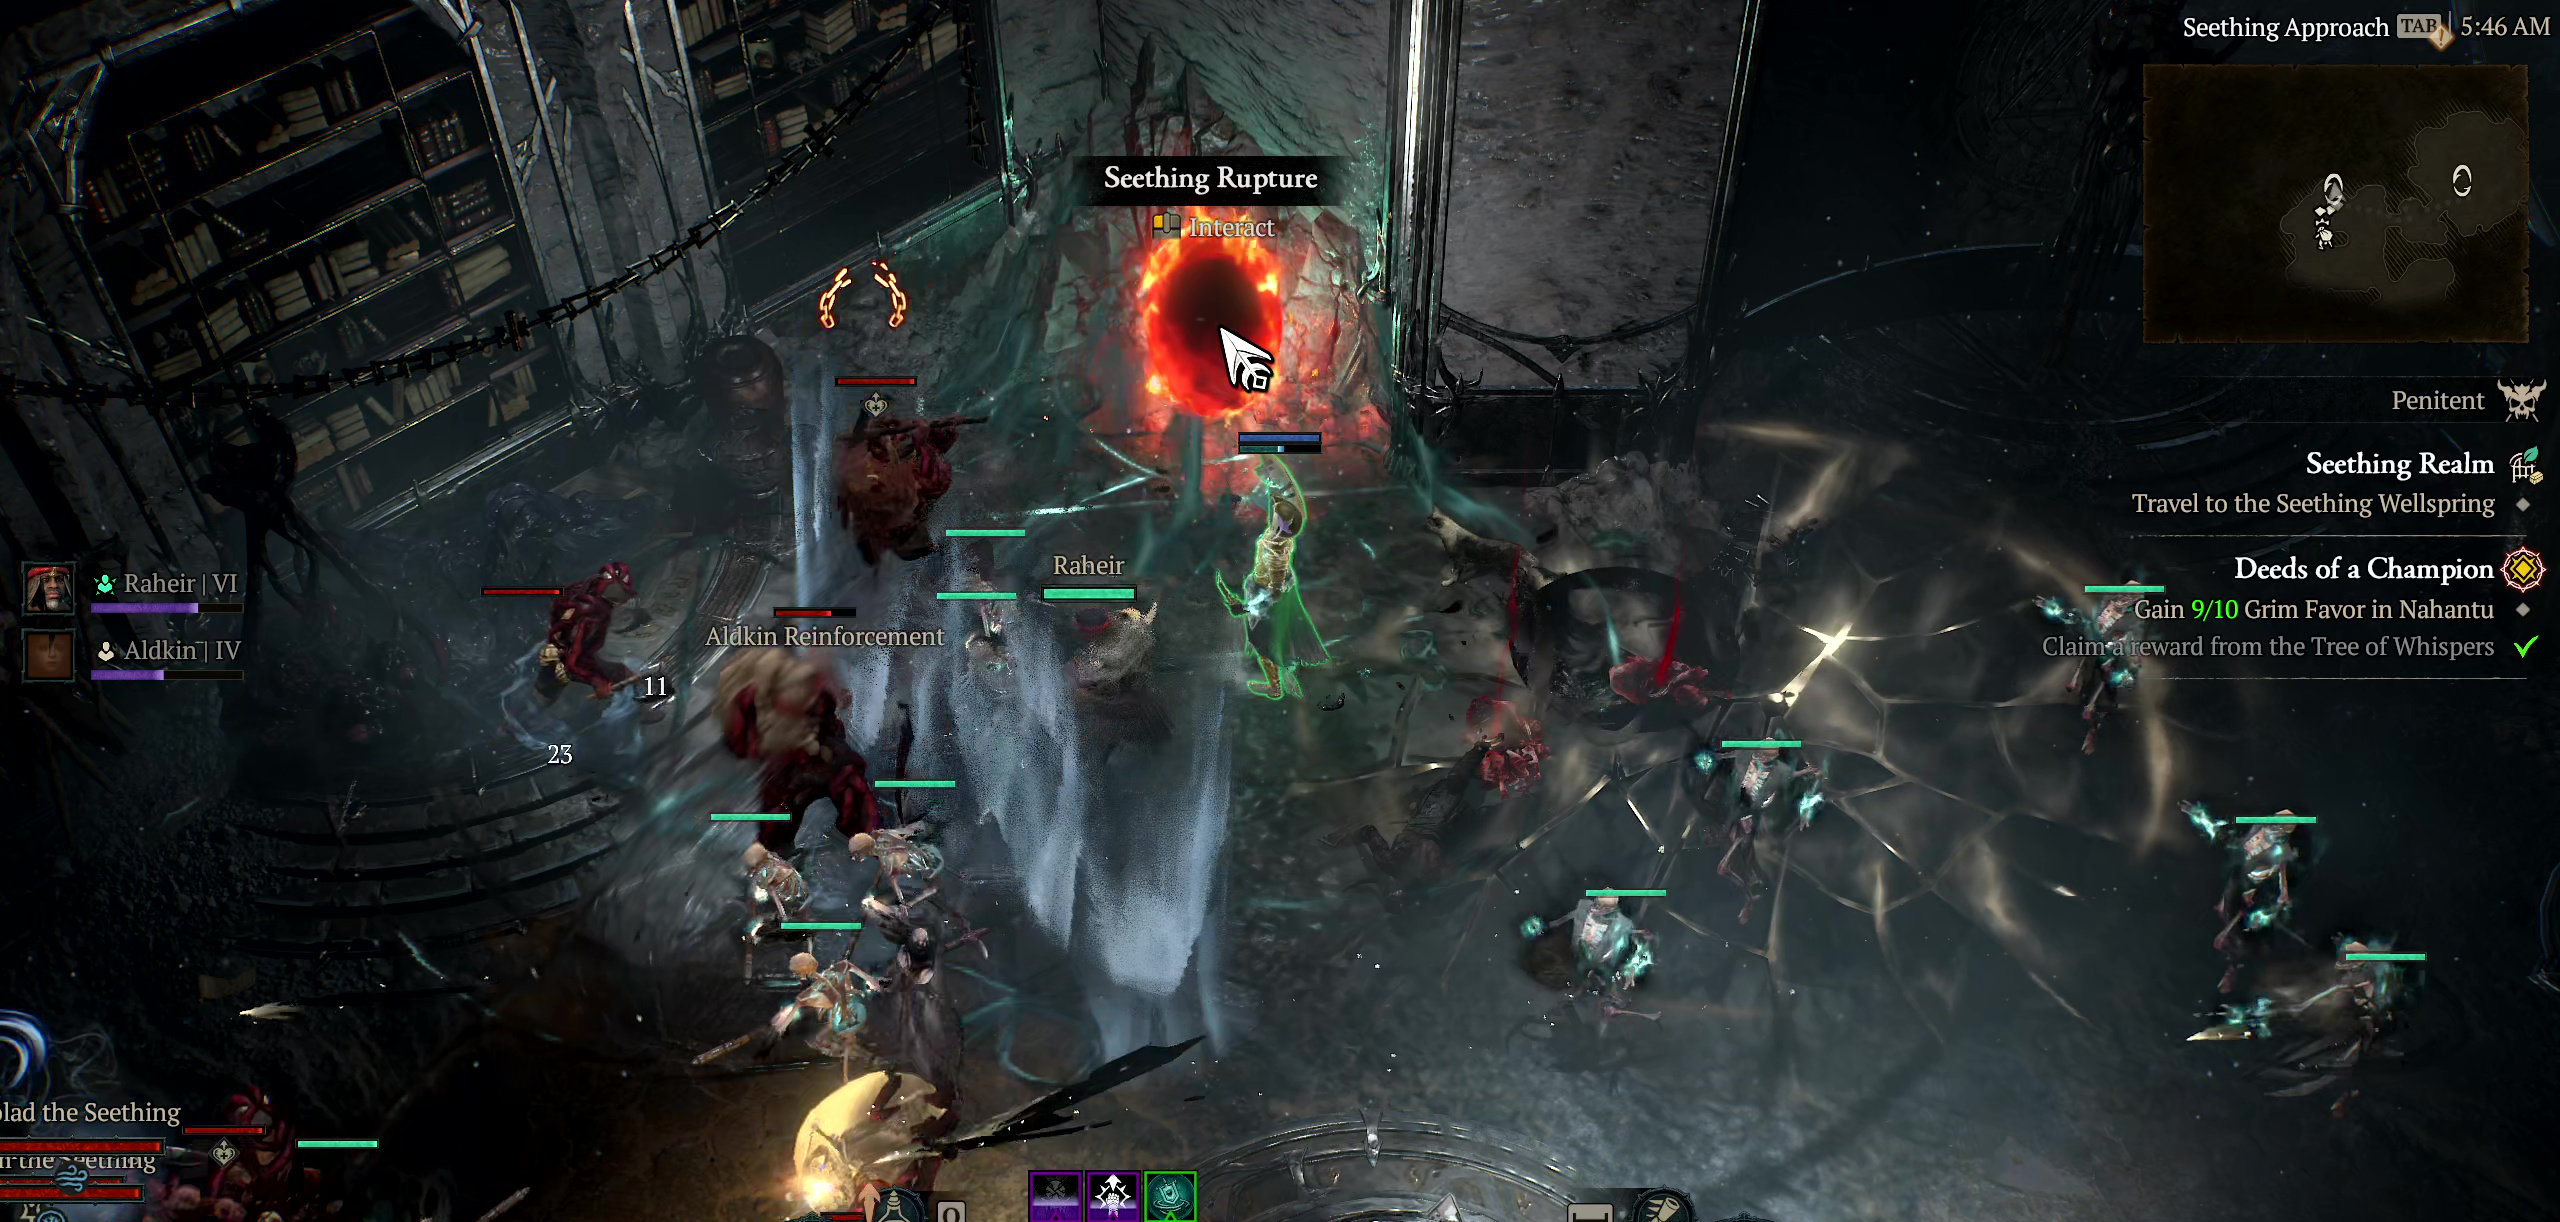
The moment the Realmwalker spawns, the objectives are updated and request that you follow the Realmwalker. It walks a long path and it is immune to damage until it reaches its destination. In the meantime, you have to kill enemies that spawn behind him as it continues its procession forward.
TIP: I prefer not to have Aldkin as a Mercenary while I engage in the Realmwalker event. Aldkin makes your enemies Vulnerable but also curses you with Vulnerable. The amount of enemies that spawn during this event is staggering. Some of the Elites that spawn can one-shot you while you are affected by Aldkin’s Vulnerable curse. (Cough, I died 5 times in a row solo)
Once the Realmwalker settles down at its destination, you have to destroy the 3 Hatred Spires that spawn around him. Their location appears in the minimap as white diamond outlines. Make sure to destroy these 3 Hatred Spires before the progress bar’s countdown reaches 0. Otherwise, the event despawns and no Realm Portal is opened. No loot.
Second Tip: Never stand in front of the Realmwalker. He stands up on his posterior legs and slams the ground with its frontal legs dealing a huge AOE radius damage and spawns some spine-goo that expands outward in a line-trajectory and chases you. There is another attack that is easy to miss. Looks like red stuff that rains down in the shape of red circles that explode and reduce your Health. You can see your Health Bar affected by a Poison effect. The Realmwalker also casts some type of Bloodwave.
After defeating the Realmwalker, that’s merely the beginning of your journey. The Realmwalker spawns a portal to the Seething Realm.
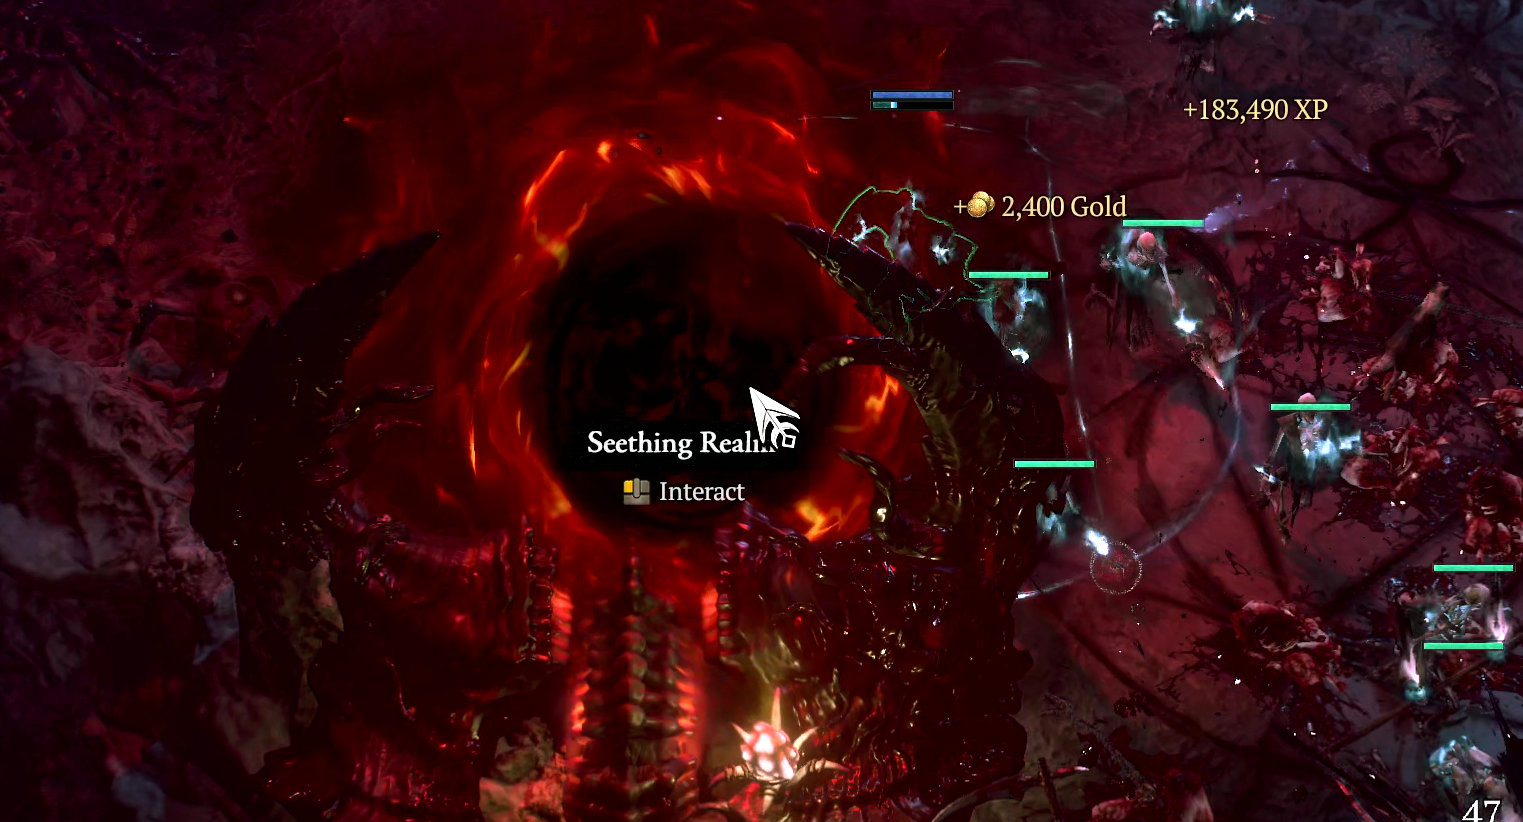
The Seething Realm looks like a Nahantu temple, at least the version I entered. Lots of treasure chests in this realm, and at least two portals to other areas to be explored. Killing enemies within the Seething Realm grants you +1 Zakarum Remnants — which increases your Seasonal reputation bar to level up and unlock Seasonal rewards at each level.
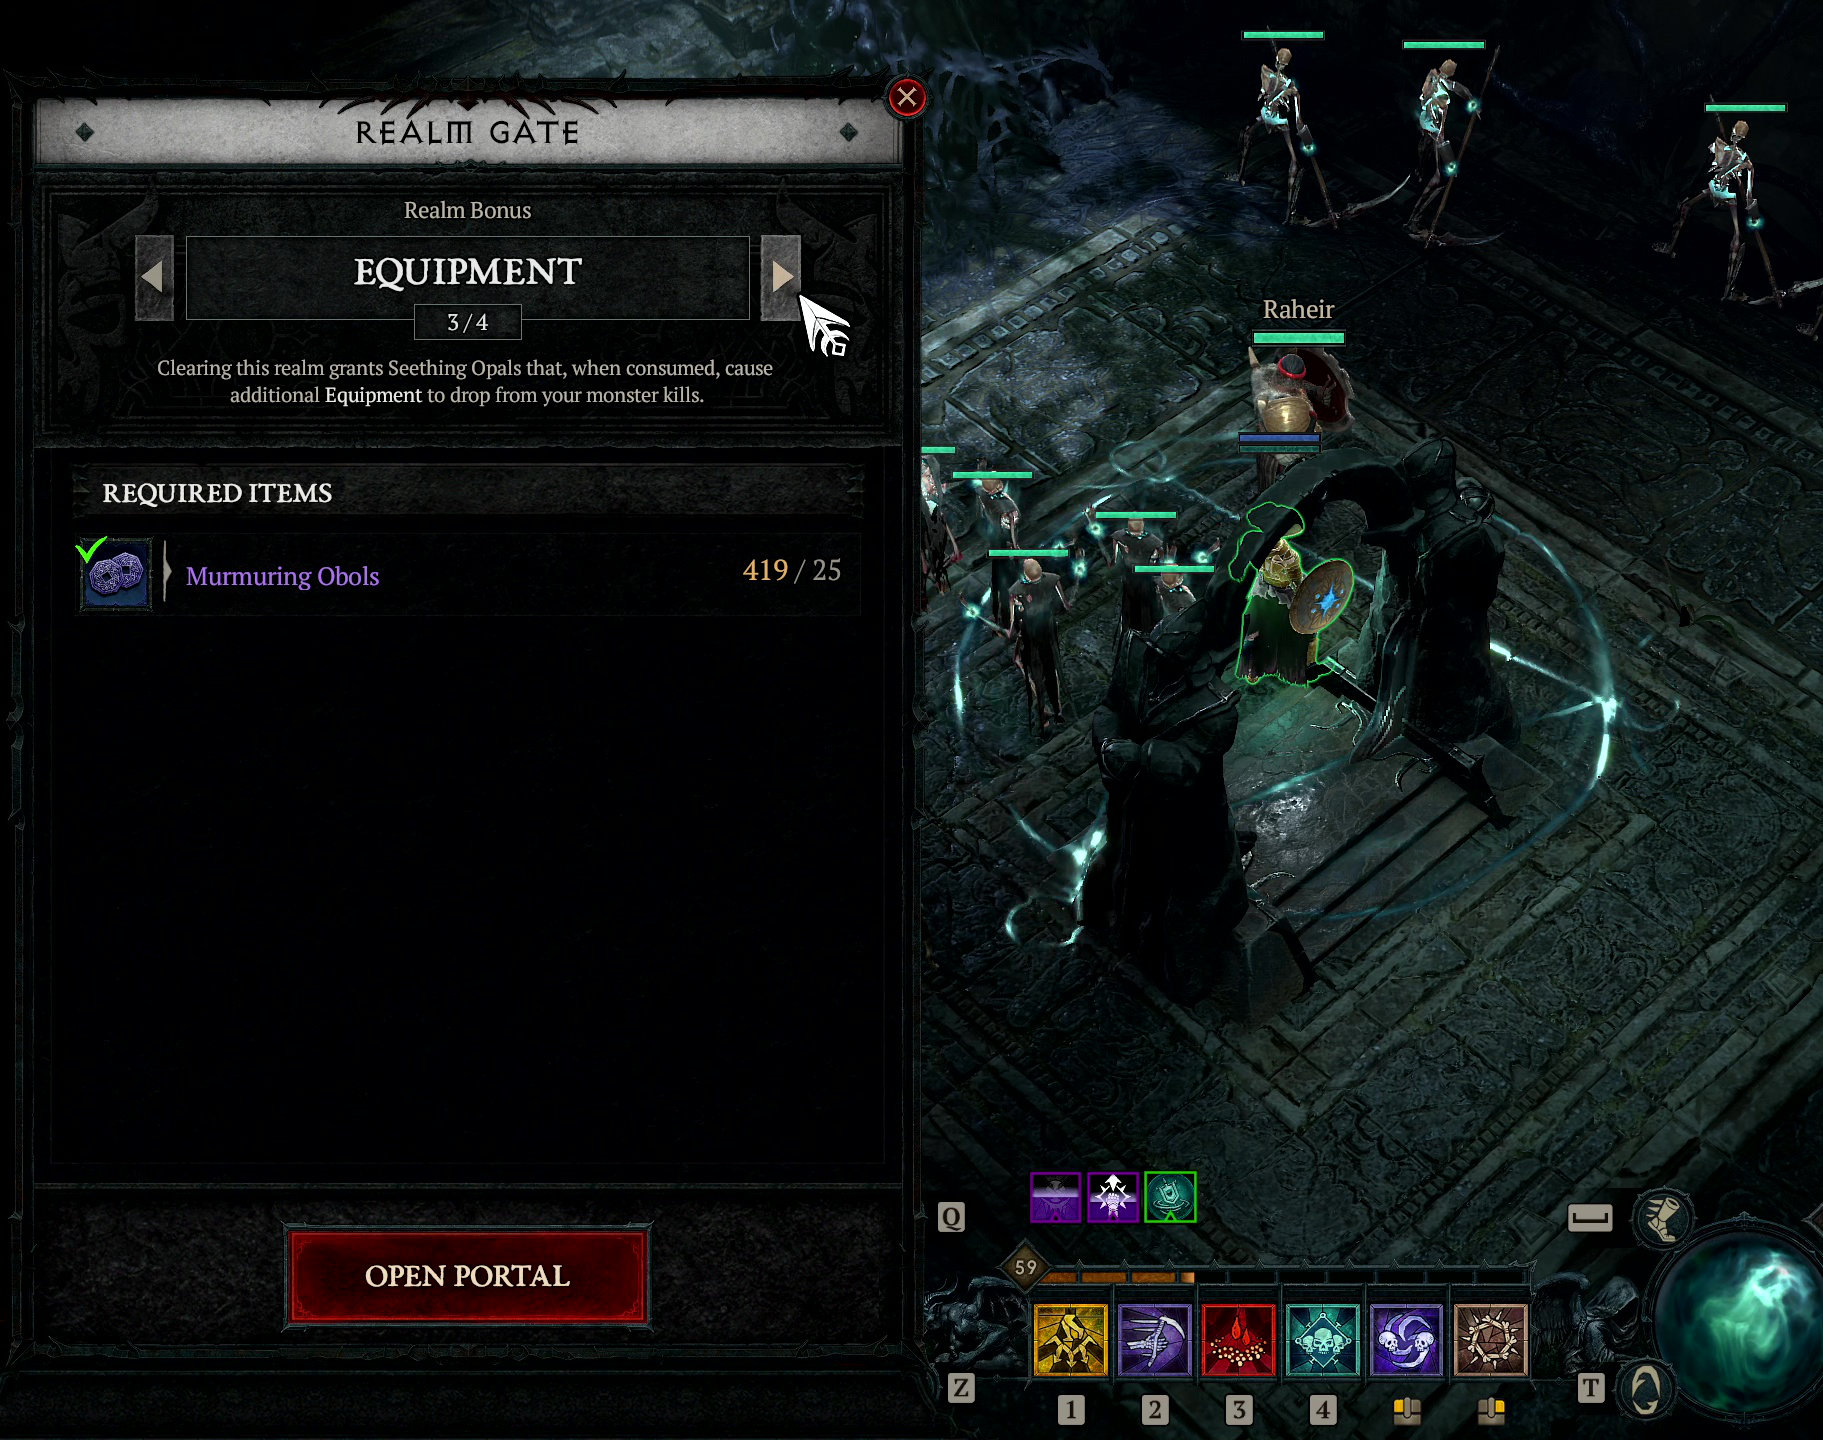
At the end of the Seething Realm, you will find a Realm Gate to choose your path forward. Your choice determines the rewards, including the type of Seething Opals dropped at the end.
Seething Opals are similar to Elixirs, but provide another type of benefit. When you click this Realm Gate, it doesn’t teleport you right away. Instead, a UI opens that allows you to choose the type of rewards you want before teleporting away.
- Socketables: Clearing this realm grants Seething Opals that, when consumed, cause additional Gem Fragments and Runes to drop from your monster kills. (Required Items: Angelbreath x 3) — TIP: Angelbreath can be found in the world as herbs, or farmed in Cellars, Tortured Gifts in Helltide, or Cache Rewards from The Tree of Whispers. At the moment, Angelbreath is a material for upgrading Potions or crafting elixirs & incense at the Alchemist.
- Gold: Clearing this realm grants Seething Opals that, when consumed, cause additional Gold to drop from your monster kills. (Required Items: Iron Chunk x 1) — You can obtain Iron Chunk from Ore Veins, Salvaging Weapons or Jewelry at the Blacksmith, Cellars, or kill Elite monsters. The impact is that this material is used by the Blacksmith, Occultist, and Jeweler for item upgrades.
- Equipment: Clearing this realm grants Seething Opals that, when consumed, cause additional Equipment to drop from your monster kills. (Required Items: Murmuring Obols x 25) — This currency drops from World Bosses, Dungeon Events, and Public Events. The impact is that this currency is used to gamble at the Purveyor of Curiosities.
- Materials: Clearing this realm grants Seething Opals that, when consumed, cause additional Herbs and Crafting Materials to drop from your monster kills.
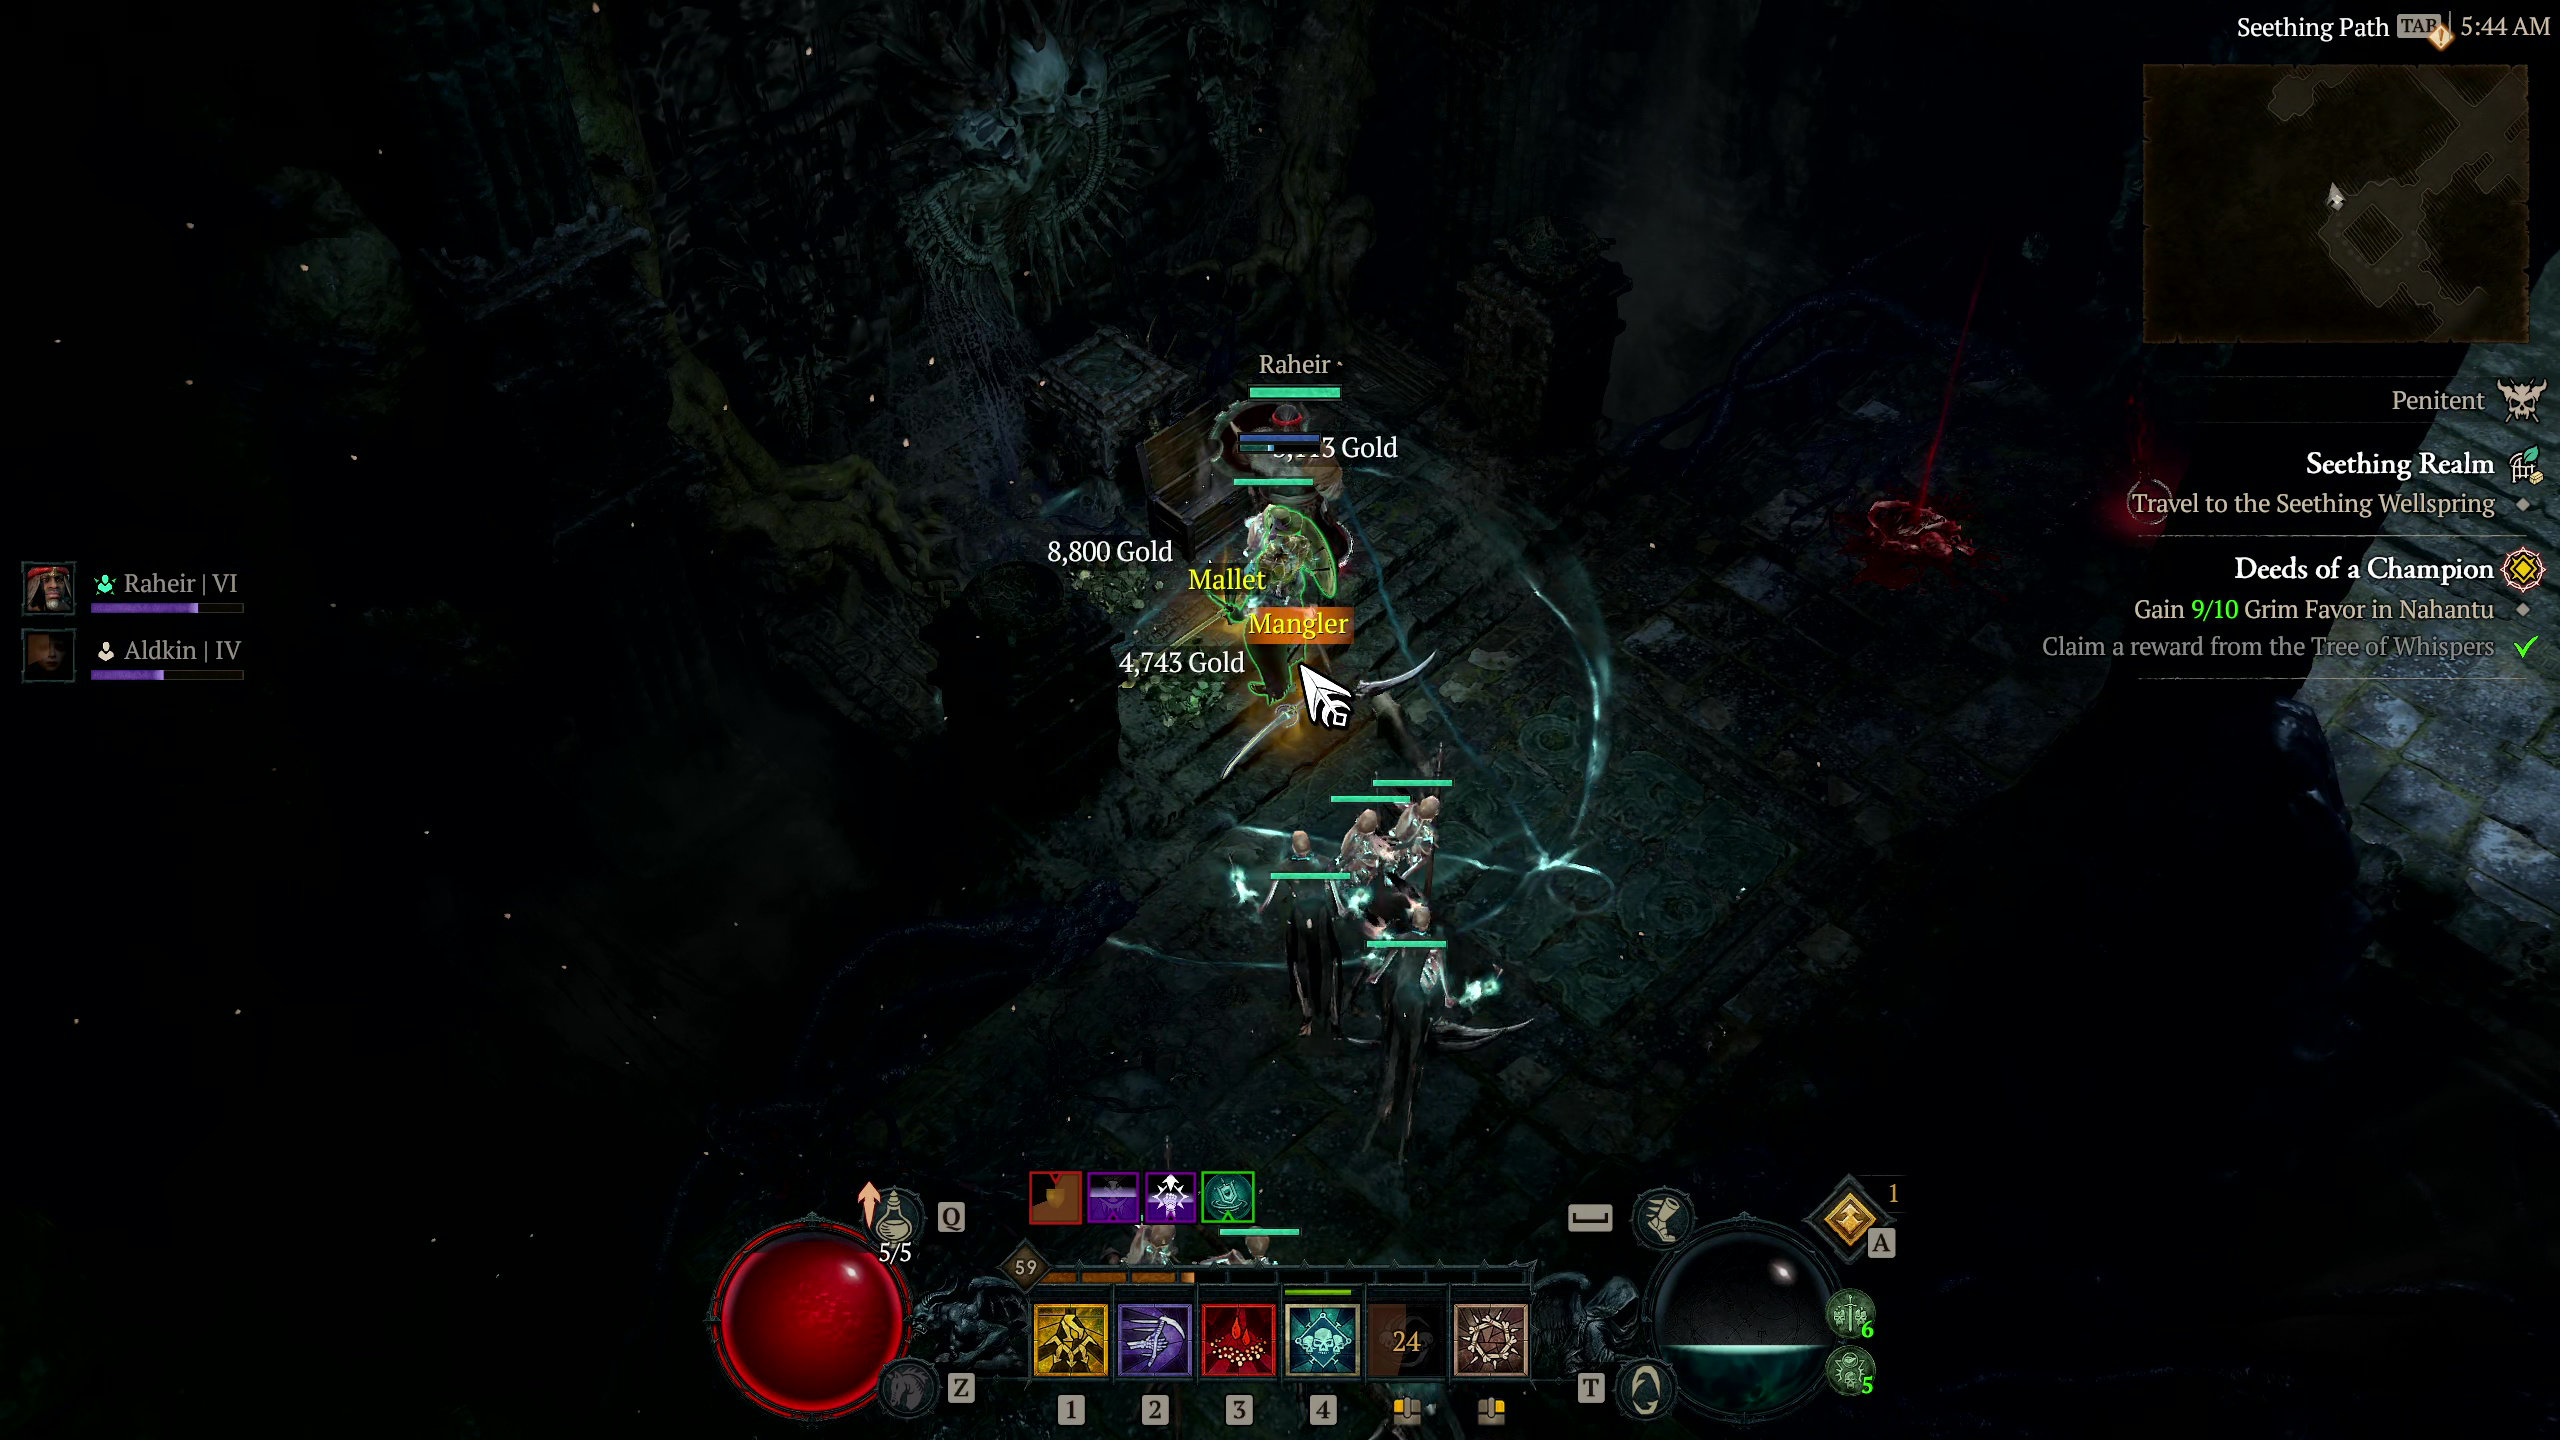
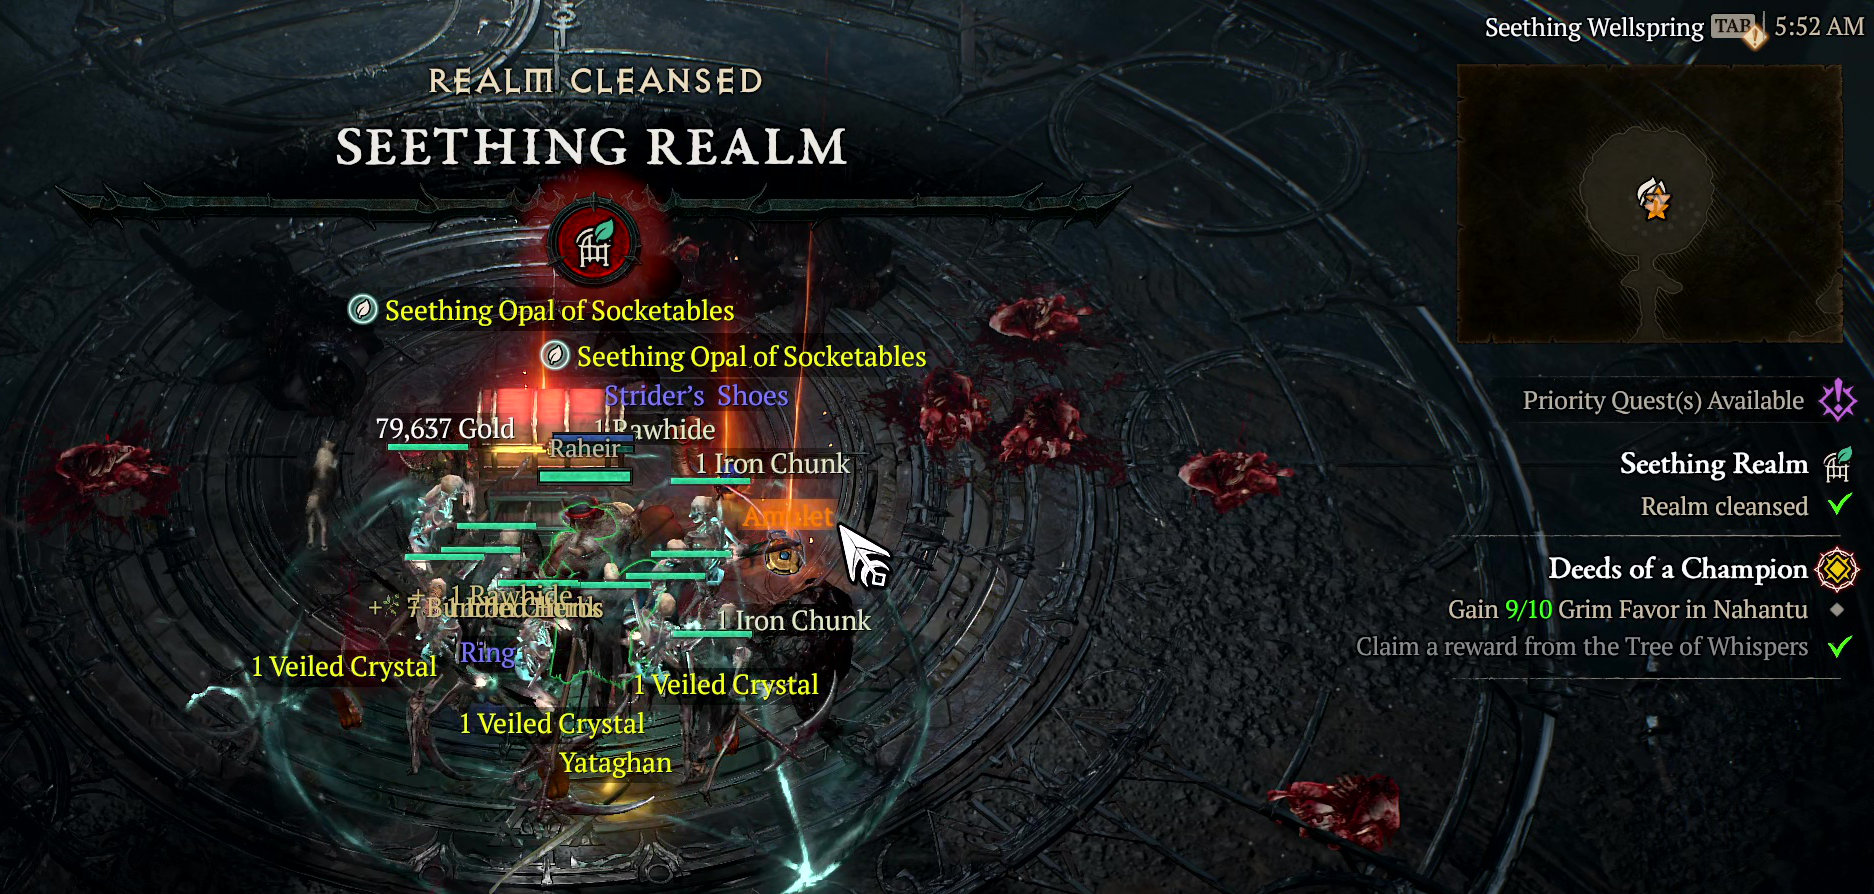
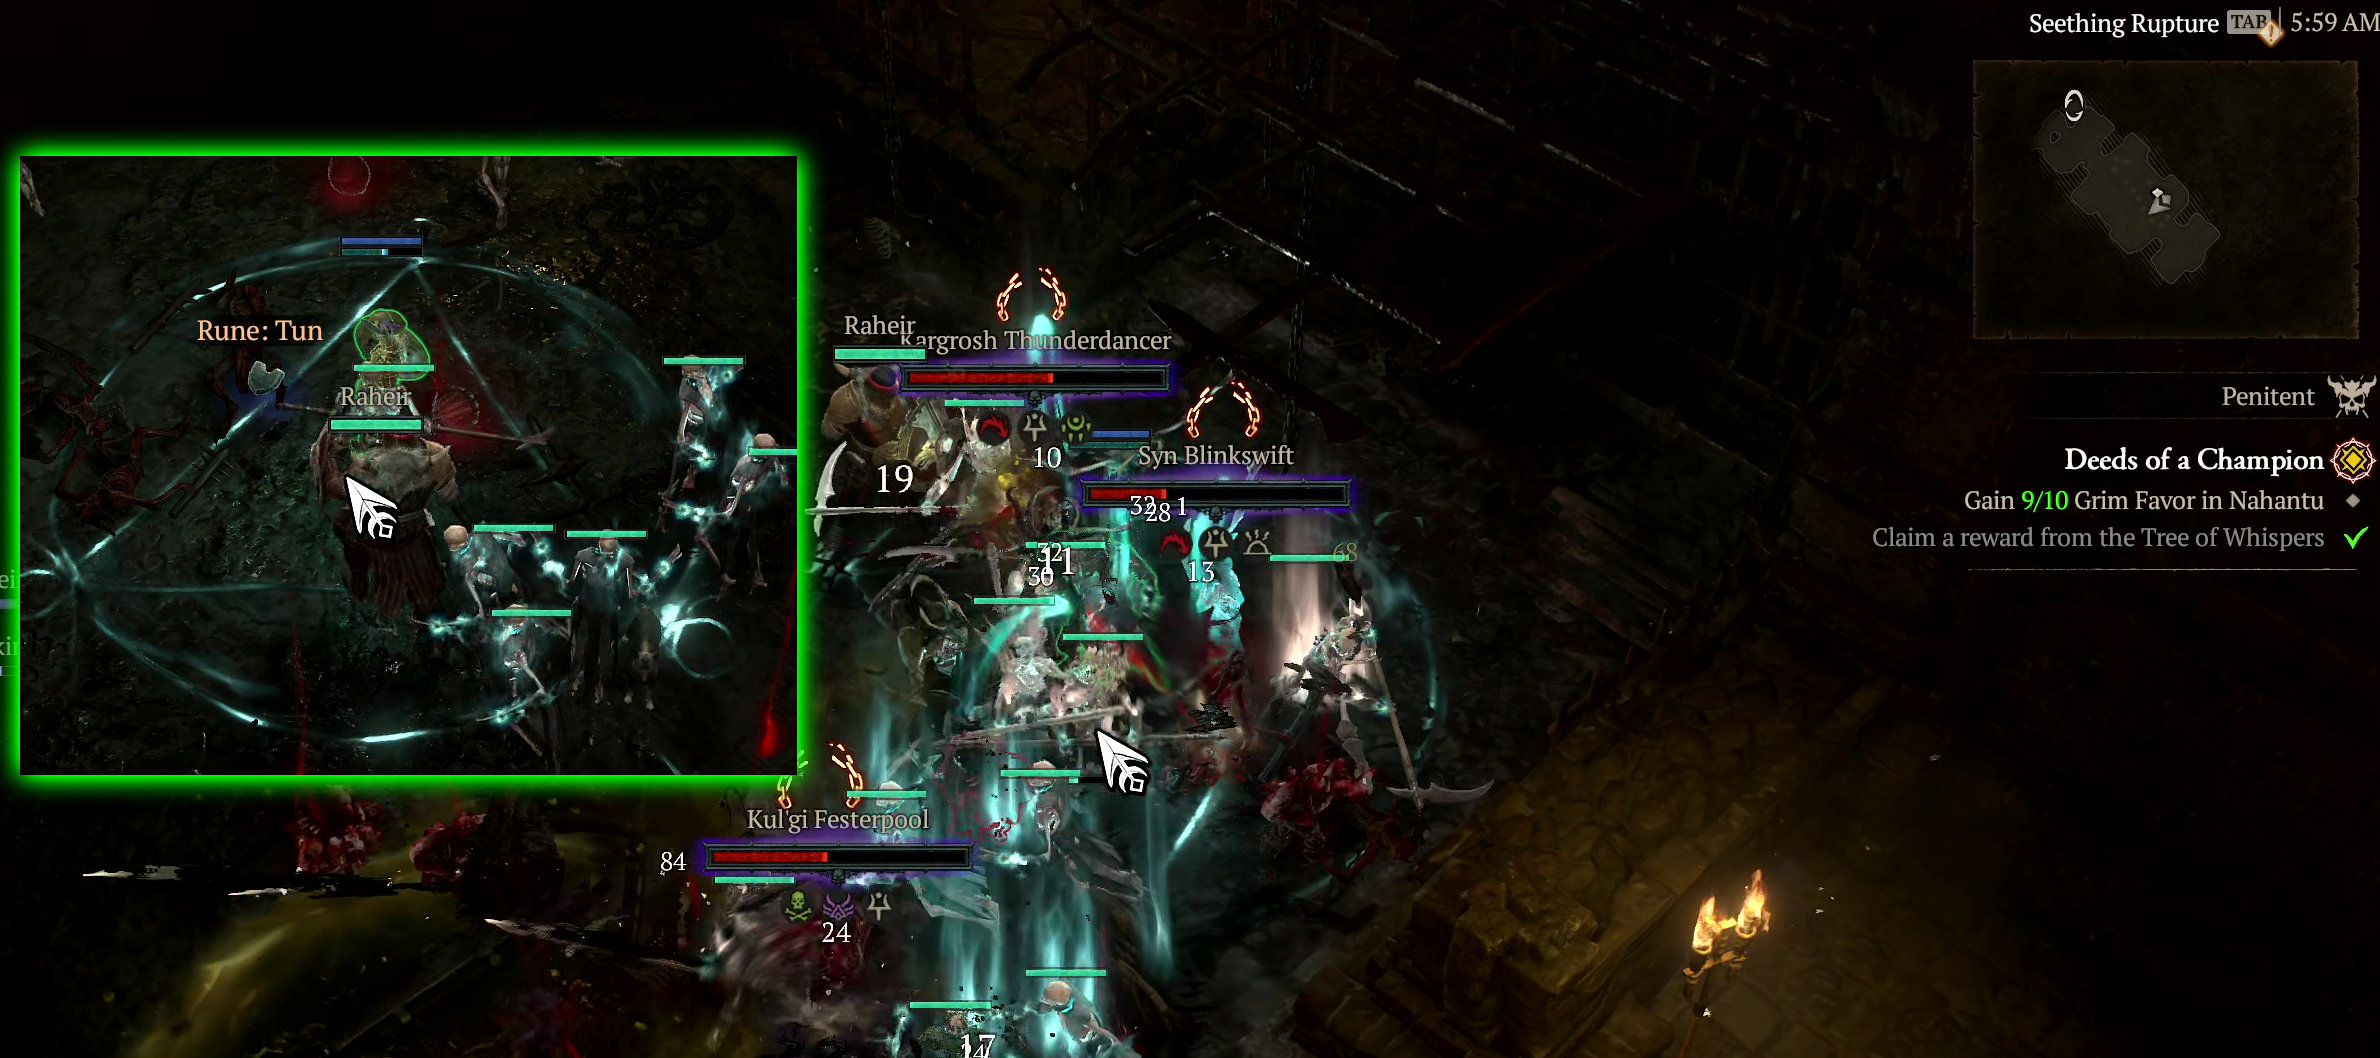
Taking the Equipment Realm Gate, sent me to the Seething Approach which uses the Y’shari Library tileset. Locations and tilesets might be random, though. Within this new realm, I found at least two Seething Ruptures (red portals to other areas) and found Seething Goblin x 2.
At the end of the Seething Approach, I found a boss room known as the Seething Wellspring with a Resplendent Treasure Chest. When I clicked it, a pack of 4 Elite Sentinel Guardians spawned. Uncertain if I got a second chest to spawn for killing the Seething Goblin, but a Radiant Chest spawned.
- Seething Opal of Socketables
- Over, 79,000 Gold
- Bundled Herbs x 7
- Rawhide x 2
- Veiled Crystal x 3
- Iron Chunk x 3
- Tempering Manual x 1
- Abstruse Sigil x 1
- Random quality gear items.
The Resplendent Chest dropped:
- over 150,000 Gold
- Iron Chunk x 3
- Abstruse Sigil x 1
- Rawhide x 2
- Veiled Crystal x 2
- Coiling Ward x 1
- Tempering Manual
- Random quality of gear items.
Exploring the remaining rooms in the Seething Approach, I found something familiar. A Spiritborn Field Notes, Entry One (teal item) that started a voiceover audio. You might remember the Notes you had to farm from Dungeon Vaults during the Season of Constructs.

The Seething Ruptures (those 2 portals you see on the map above) lead to small rooms with Elite Packs. These have a chance to drop Gem Fragments and Runes. In my run, they dropped Rune: Tun.
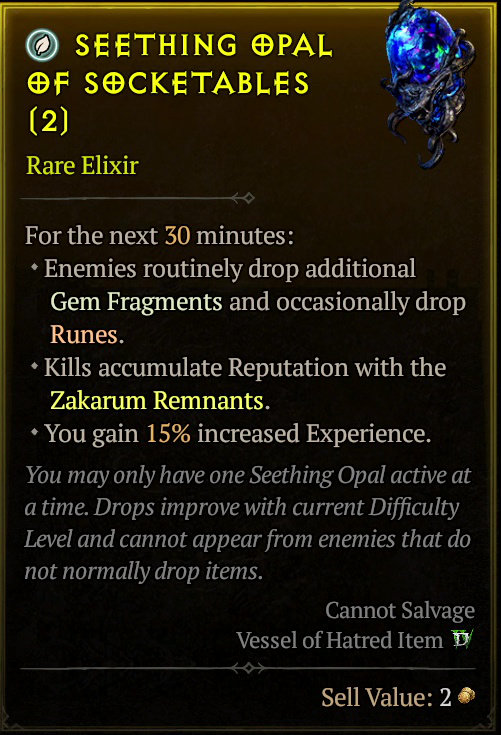
In the end, the Realmwalker run rewarded me with a Seething Opal of Socketables. A Rare Elixir that lasts for 30 seconds when consumed, and routinely allows additional Gem Fragments and Runes to drop from monster kills. It also grants bonus Zakarum Remnants to level up the reputation for the Seasonal vendor rewards; and a juicy 15% increased Experience. This also increases your Mercenary and Reinforcement’s Rapport experience. About 3,000 Mercenary Rapport per Nightmare Dungeon or The Pit run.
The Seasonal Event has the Zakarum Remnant reputation grind. You can find Crusader Damond, the Zakarum Remnants Quartermaster, in Zarbinzet, Hawezar.
You only have to worry about 12 Ranks to grind. These are the rewards for unlocking each Rank:
- Rank 1: Abnormal Weapon: Emits a weak, but otherworldly energy. Contains a Weapon and Elixirs. Use this cache to receive your rewards.
- Rank 2: Eerie Samples: An assortment of biological materials that shouldn’t be related to each other. Contains Baneful Hearts and Seething Opals.
- Rank 3: Antique Case: A heavy box that seems to have belonged to a smith. Contains Weapons and Crafting Materials.
- Rank 4: Aromatic Case: A light box giving off a peculiar fragrance. Contains a Weapon, Elixirs, and Crafting Materials.
- Rank 5: Gift of the Realms: Radiates a familiar, yet otherworldly glow. Contains Gem Fragments, a Scattered Prism, and two Uniques for your Class.
- Rank 6: Que-Hegan Steel: Legendary Reputation Cache. A Royal reserve to prepare for war. Contains Legendaries, Infernal Compasses, Baneful Hearts, and crafting materials.
- Rank 7: Protectors’ Warmth: A medical reserve to care for explorers. Contains Legendaries, Boss Summoning Materials, Artificer’s Stones, and Crafting Materials.
- Rank 8: Kurast Refinery: An old but shiny case of minerals. Contains Legendaries, Obducite, Gem Fragments, and Scattered Prisms.
- Rank 9: Legacy of Disgrace: Forbidden objects left behind by a stained history. Contains Uniques, Artificer’s Stones, and Boss Summoning Materials.
- Rank 10: Window to Creation: Somehow both intangible and filled with infinite possibility. Contains Ancestral Legendaries and a vast amount of Crafting Materials.
- Rank 11: Spoils of the Realm Conqueror: Remnants of a traveler said to have triumphed across otherworldly planes. Contains Ancestral Legendaries, Boss Summoning Materials, and Stygian Stones.
- Rank 12: Severed Hand of the Zakarum: An innocuous strongbox from a bygone age, whose nolmalcy begets a strange discomfort. Contains Ancestral Legendaries, Ancestral Uniques, and a vast amount of Materials.
UBER BOSSES
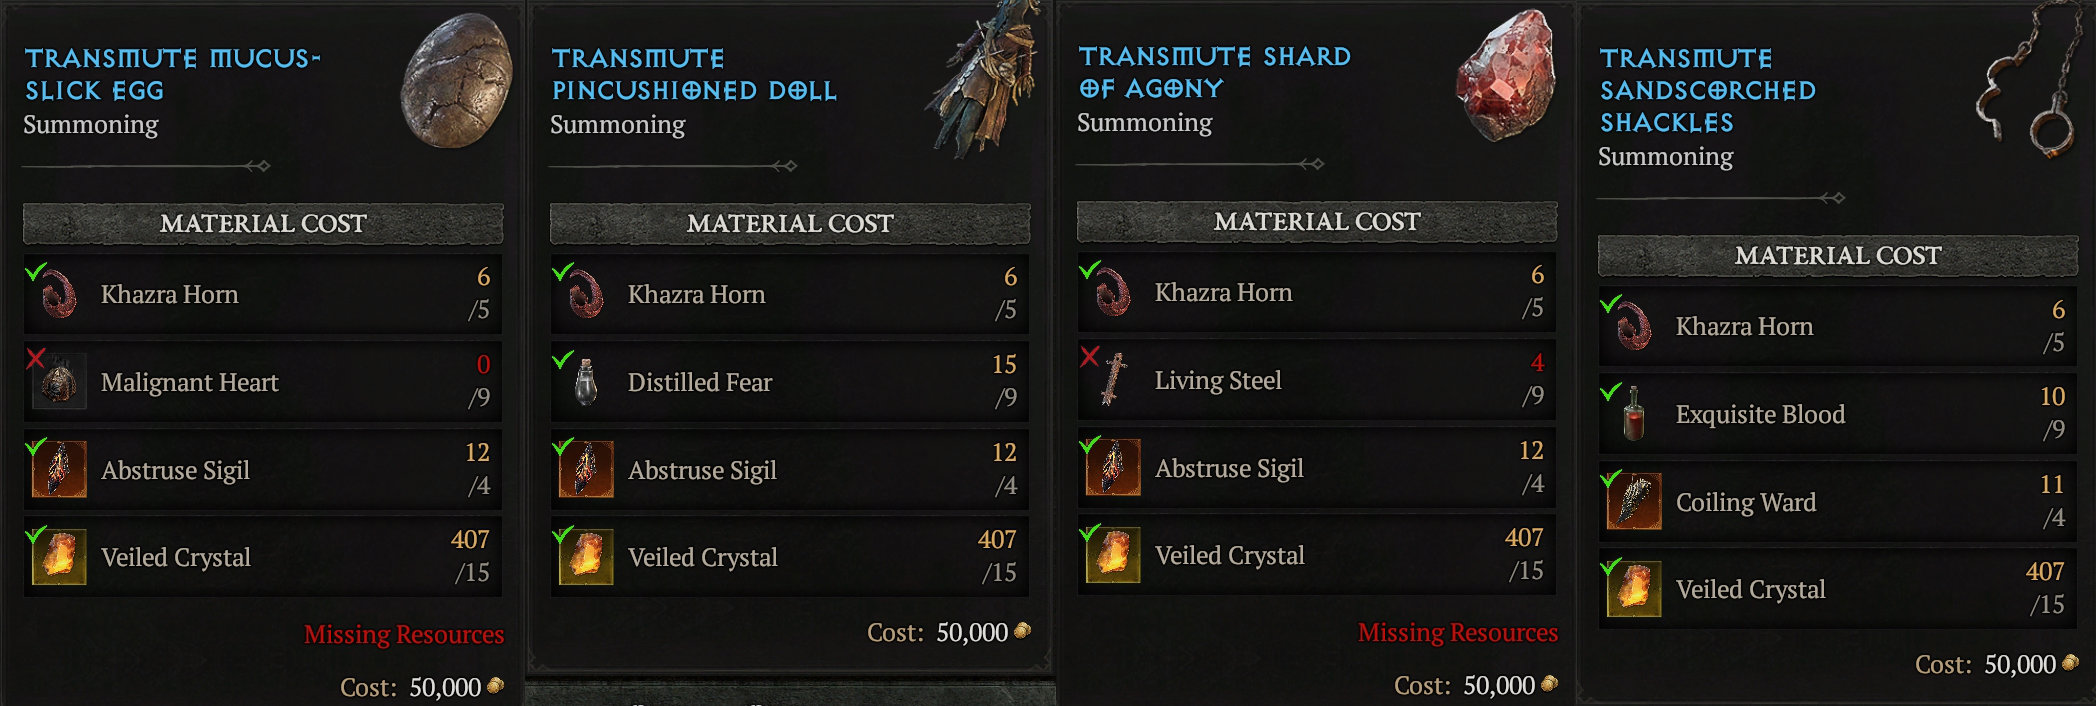
Uber Bosses have new Summoning Material requirements.
- Beast in the Ice: Distilled Fear x 12 — found in Torment difficulties: Nightmare Dungeons, Tree of Whispers Cache, Elite Monsters, World Bosses, Undercity of Kurast, and Bartering at the Mercenary Den.
- Tormented Varshan: Requires Malignant Heart x 4 — found in Torment difficulties from Tree of Whispers Cache, Elite monsters, World Bosses, Undercity of Kurast and Bartering in the Mercenary Den.
- Tormented Grigoire, The Galvanic Saint: Requires Living Steel x 12 — found in Torment difficulties from Tree of Whispers Cache, Elite Monsters, World Bosses, Tortured Gifts cache in Helltide, Undercity of Kurast, and Bartering at the Mercenary Den.
- Tormented Duriel: Mucus -Slick Egg (0/2) – Acquired from Echo of Varshan within the Malignant Burrow in Torment Difficulties only by the one who performs the summoning. Rarely found in World Bosses. Shard of Agony (0/2) – Acquired from Grigoire within Hall of the Penitent in Torment difficulties only by the one who performs the summoning. Rarely found from World Bosses.
- Tormented Andariel: Sandscorched Shackles (0/2): Acquired from Lord Zir within The Darknened Wa in Fractured Peaks in Torment difficulties only by the one who performs the summoning. Rarely found from World Bosses. Pincushioned Doll (0/2) — Acquired from The Beast in the Ice within the Glacial Fissure in Fractured Peaks in Torment difficulties only by the one who performs the summoning. Rarely found from World Bosses.
- Tormented Lord Zir: Exquisite Blood x 12: Found in Torment difficulties from Tree of Whispers Cache, Elite monsters, World Bosses and Legion Events, Blood Maiden in Helltide, Undercity of Kurast, and Bartering at the Mercenary Den.
In Diablo IV: Vessel of Hatred, I summoned these bosses to take a look at their loot tables.
BEAST IN THE ICE
- Veiled Crystal x 4-6
- Iron Chunk x 2-5
- Over 200,000 Gold
- Baleful Fragment x 1
- Abstruse Sigil x 1
- Coiling Ward x 1-2
- Gem Fragments (Emerald or Topaz)
- Rawhide x 1-6
- Khazra Horns x 2
- 2 Uniques
- Pincushioned Doll x 1
- Elixir
- Rune x 1 — Rune: Thul or Zan) (Not guaranteed to drop any)
TORMENTED ECHO OF VARSHAN
- Veiled Crystal x 4-6
- Iron Chunk x 3-4
- Over 200 ,000 Gold
- Baleful Fragment x 1
- Forgotten Soul x 1
- Coiling Ward x 1-2
- Abstruse Sigil x 1 (not guaranteed)
- Khazra Horns x 3
- Gem Fragments (Topaz) x 1200
- Rawhide x 3
- Unique Item x 1-2
- Tribute of Titans
- Mucus-Slick Egg (not guaranteed)
TORMENTED GRIGOIRE
- Veiled Crystal x 4-10
- Iron Chunk x 5
- Over 200,000 Gold
- Coiling Ward x 2
- Baleful Fragment x 1 (not guaranteed)
- Shard of Agony x 1
- Gem Fragments (Topaz) x 1200
- Rawhide x 7
- Unique Items x 2
- Khazra Horns x 2-3 (not guaranteed)
- Rune x 1 (not guaranteed) — Rune: WAT
TORMENTED DURIEL
- Veiled Crystal x 2
- Iron Chunk x 10
- Rawhide x 6
- Coiling Ward x 2
- Forgotten Soul x 1
- Over 400,000 Gold
- Gem Fragments (Amethyst) x 1200
- Unique Items x 2
- Rune x 1 (Rune: Tal)
TORMENTED ANDARIEL
- Iron Chunk x 4
- Over 400,000 Gold
- Rawhide x 4
- Veiled Crystal x 2
- Abstruse Sigil x 2
- Baleful Fragment x 2
- Gem Fragments (Emerald) x 1200
- Unique Items x 2
- Elixir
- Rune x 1 (XAL)
TORMENTED LORD ZIR
- Veiled Crystal x 6 (Not guaranteed)
- Iron Chunk x 1-5
- Rawhide x 3-7
- Baleful Fragment x 2
- Abstruse Sigil x 1
- Coiling Ward x 1
- Forgotten Soul x 1 (Not guaranteed)
- Over 200,000 Gold
- Gem Fragments (Emerald) x 1200 (Sometimes Skull or Emerald)
- Gem Fragments (Skull) x 1200 (Sometimes Skull or Emerald)
- Sandscorched Shackles x 1
- Unique Items x 2
- Rune x 1 (Rune: QUE) (not guaranteed)
GAME DIFFICULTIES
The old World Tier system no longer exists. They are now known as Difficulties. There are no longer capstone dungeons, either. From Level 1-59, you can switch difficulties with little restrictions. You can switch from Normal to Hard, and to unlock Expert difficulty, you must equip at least one Legendary Item. Easy to obtain from a Treasure Goblin.
At level 60, you get the opportunity to switch between Torment 1-4 difficulties by conquering specific Pit levels.
The beauty of this is that I didn’t have to tumble through The Pit Tier 1 all the way to Tier 20. When I opened the Pit UI, Tier 20 was pre-selected for me. I conquered it with ease and switched to Torment I difficulty.

The statue of Inarius in Kyovashad is no longer the only place you can switch Difficulties. You can switch Difficulties within the Dark Citadel by clicking the Khazra statue.
You can also switch difficulty within the Upper Kurast City at the statue of Akkarat.
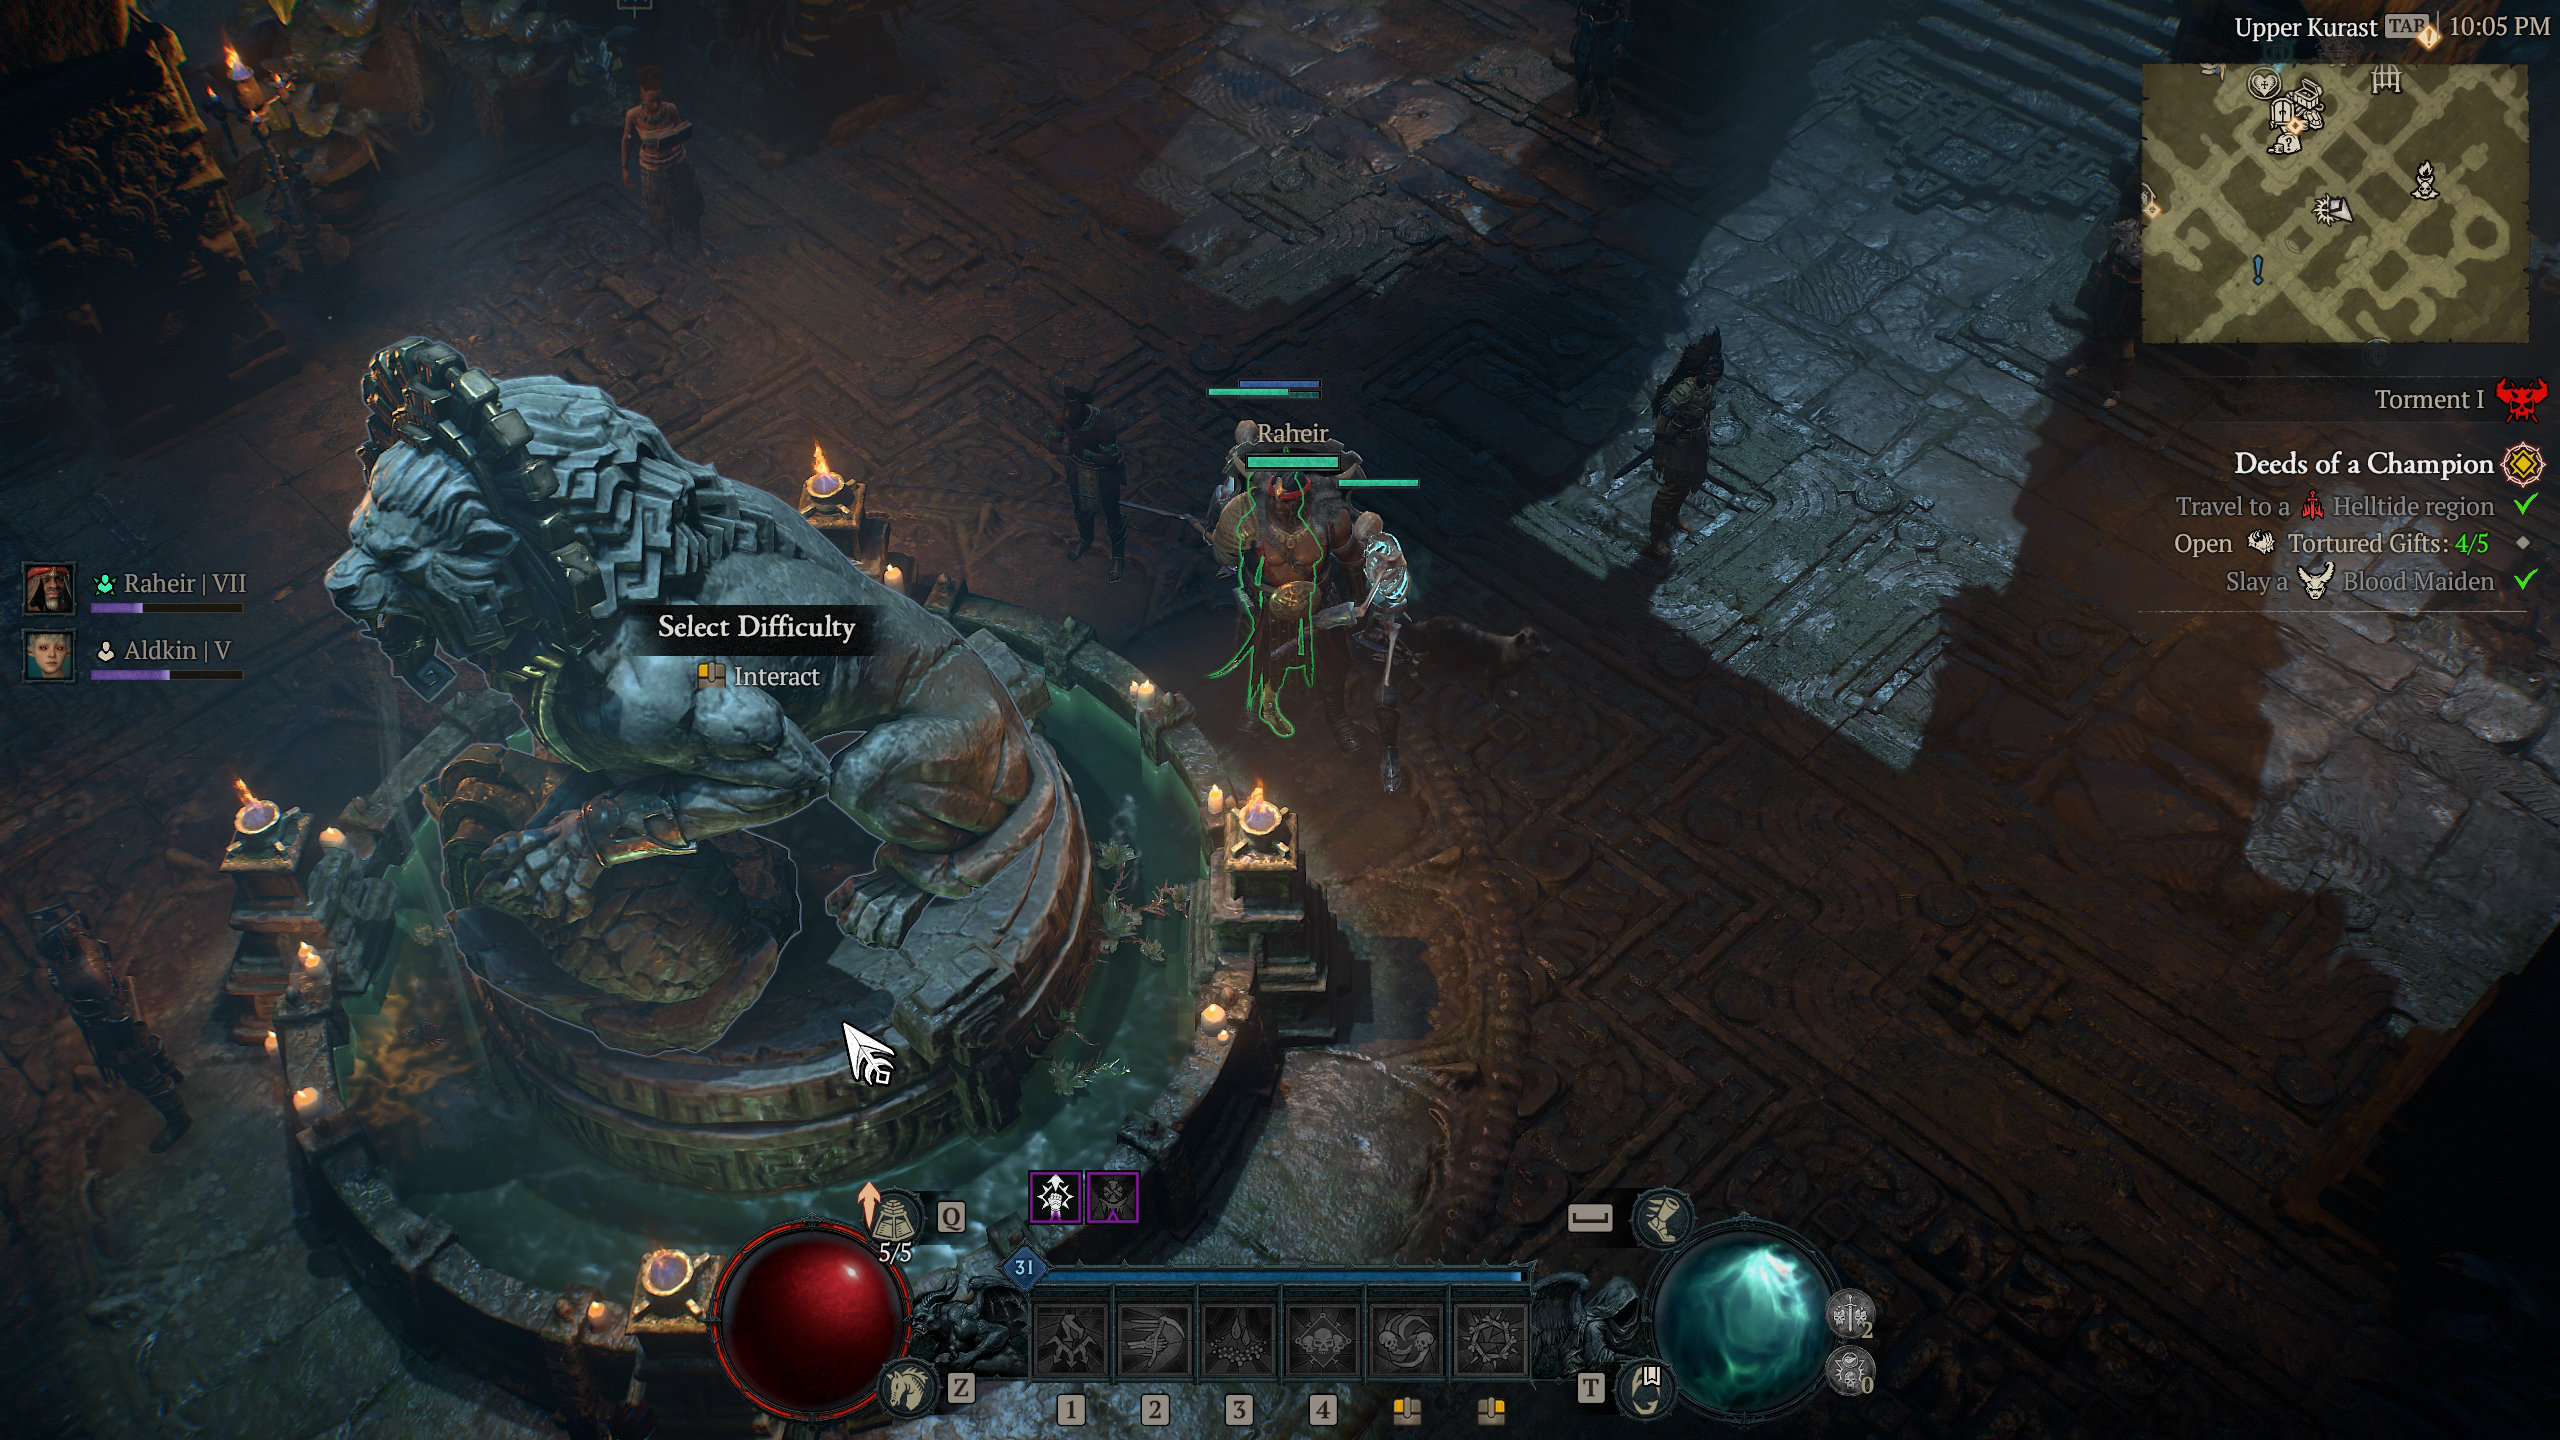
The desecrated statue of the Druid heroes in Cerrigar is now used to switch Difficulty Mode as well. Click any of those 4 statues to open the Difficulty Mode UI — where you can choose:
- Normal: Standard Diablo IV experience. Super easy mode.
- Hard: Monster kills grant 75% more Experience and drop 75% more gold.
- Expert: Monster kills grant 125% more Experience and drop 125% more Gold. Requires Legendary Items equipped.
- Penitent: Monster kills grant 175% more Experience and drop 175% more Gold. Requires Legendary items equipped and enhanced by Tempering.
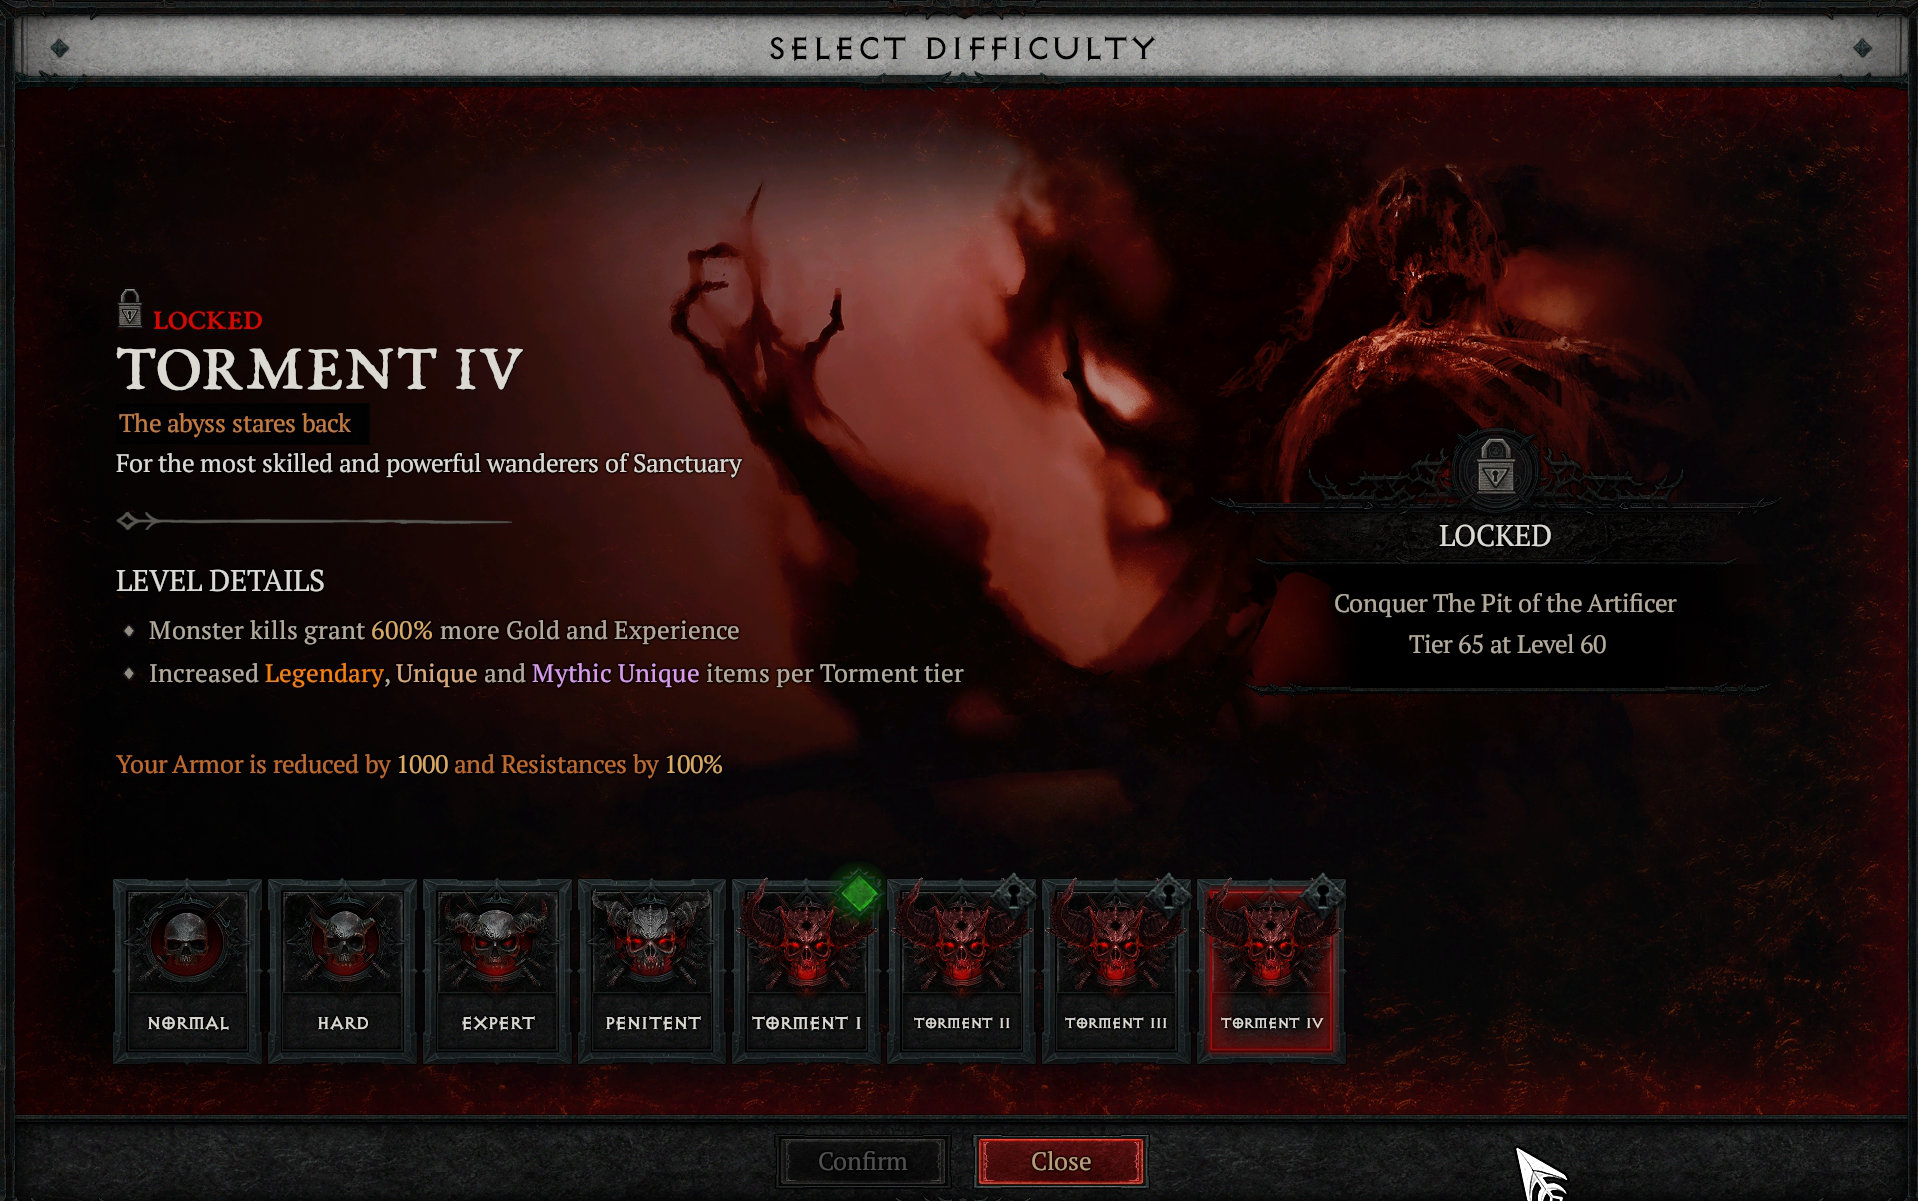
- Torment I: Endgame (Level 60 max cap). Monster kills grant 300% more Gold and Experience. Ancestral items drop. Increased number of items drop in Legendary, Unique, and Mythic Unique qualities. Penalty: -250 Armor and -25% Resistances. Requires Tempering and Masterworking at least one item. Pit Tier 20 at level 60.
- Torment II: Monster kills grant 400% more Gold and Experience. Increased Legendary, Unique, and Mythic Unique items. Penalty: -500 Armor and -50% Resistances. Requires: Pit Tier 35 at level 60.
- Torment III: Monster kills grant 500% more Gold and Experience. Increased Legendary, Unique, and Mythic Unique items. Penalty: -750 Armor and -75% Resistances. Requires: Pit Tier 50 at Level 60.
- Torment IV: Monster kills grant 600% more Gold and Experience. Increased Legendary, Unique, and Mythic Unique items. Penalty: -1000 Armor and -100% Resistances. Requires: Pit Tier 65 at Level 60.
NIGHTMARE DUNGEONS
You now have a reason to farm Nightmare Dungeons. This is your place to farm for Obducite — the material used for Masterworking your gear. However, you can farm Obducite in Undercity of Kurast and the Infernal Hordes, too. Obducite no longer drops in The Pit. The other two materials, Ingolith and Neathiron, which you used to farm at The Pit no longer exist anywhere in the game (both were deprecated). All you need now is obducite to upgrade your Masterworking. You can no longer upgrade Paragon Glyphs in Nightmare Dungeons. This is done at The Pit instead.
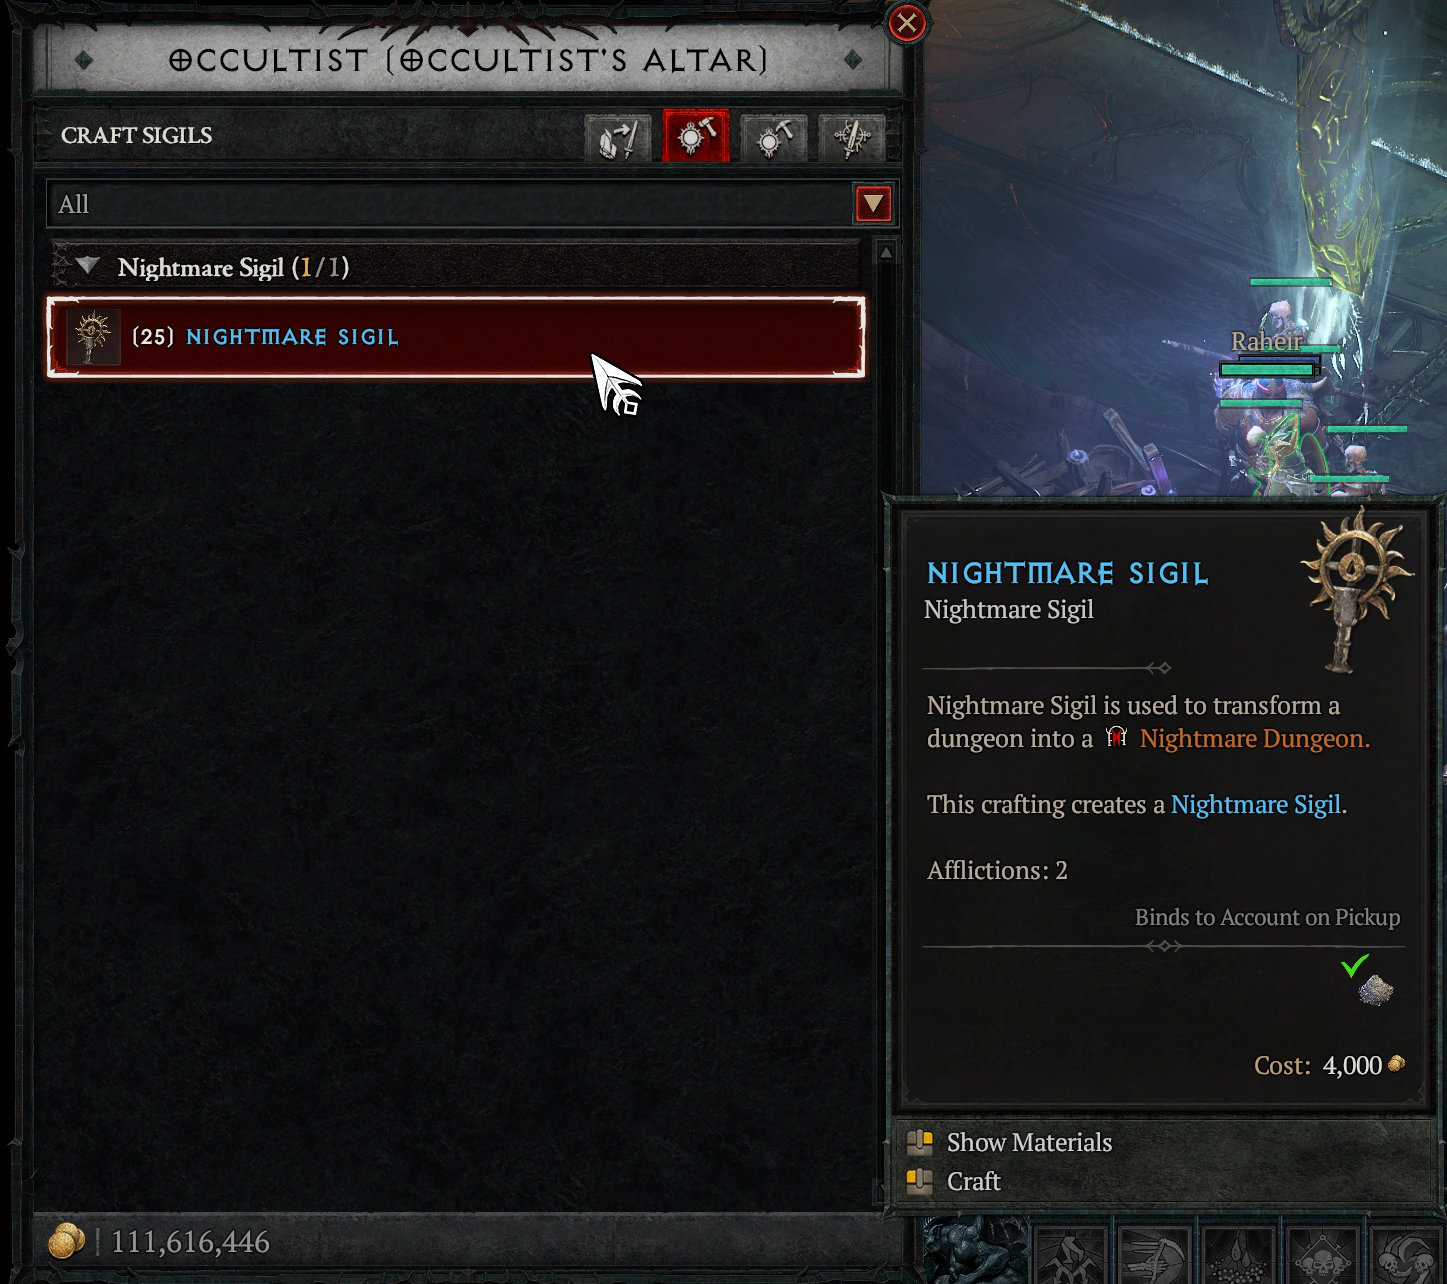
An important thing to know about Nightmare Dungeons is that Tiers no longer exist. Do you have the Sigil Powder? Craft a Nightmare Sigil with no restrictions. No Tiers to worry about. Only one recipe to craft Nightmare Sigils for 4,000 Gold and Sigil Powder x 60.
Things you might get for completing a Nightmare Dungeon:
- Over 161,000 Gold
- +7,405 XP (or more depending on whether you consumed an Opal rare elixir and a normal elixir)
- +40 Zone Reknown
- Iron Chunk x 5
- Rawhide x 2
- Coiling Ward x 1
- Veiled Crystal x 2
- Tempering Manual
- Abstruse Sigil x 1
- Sigil Powder x 30
- Nightmare Sigil
- Up to 7 items of varying quality
THE PIT OF THE ARTIFICER
The Capstone Dungeons were removed from the game. The only requirement to switch between Normal, Hard, Expert, and Penitent Difficulties is equipping a Legendary Item. The Penitent Difficulty Mode requires a Tempered item. The Pit is now the new capstone requirement to switch between Torment Difficulty Modes.
- Torment I requires to complete a Pit Tier 20.
- Torment II requires to complete a Pit Tier 35.
- Torment III requires to complete a Pit Tier 50.
- Torment IV requires to complete a Pit Tier 65.
The Pit has a 14:59 minute countdown the moment you spawn within it. Death Penalty: 30 seconds are removed from the countdown if you die. The Pit now has a max cap of Tier 100. The Pit is probably the best place to increase your Mercenary Rapport. Defeating the Guardian in the Pit grants +658 Mercenary Rapport and +429 Reinforcement Rapport. Things that dropped in my run:
- Glyph: Warrior
- 3,150,000 XP
- 112,400 Gold
- 6 items of varying quality
- 90 Murmuring Obols
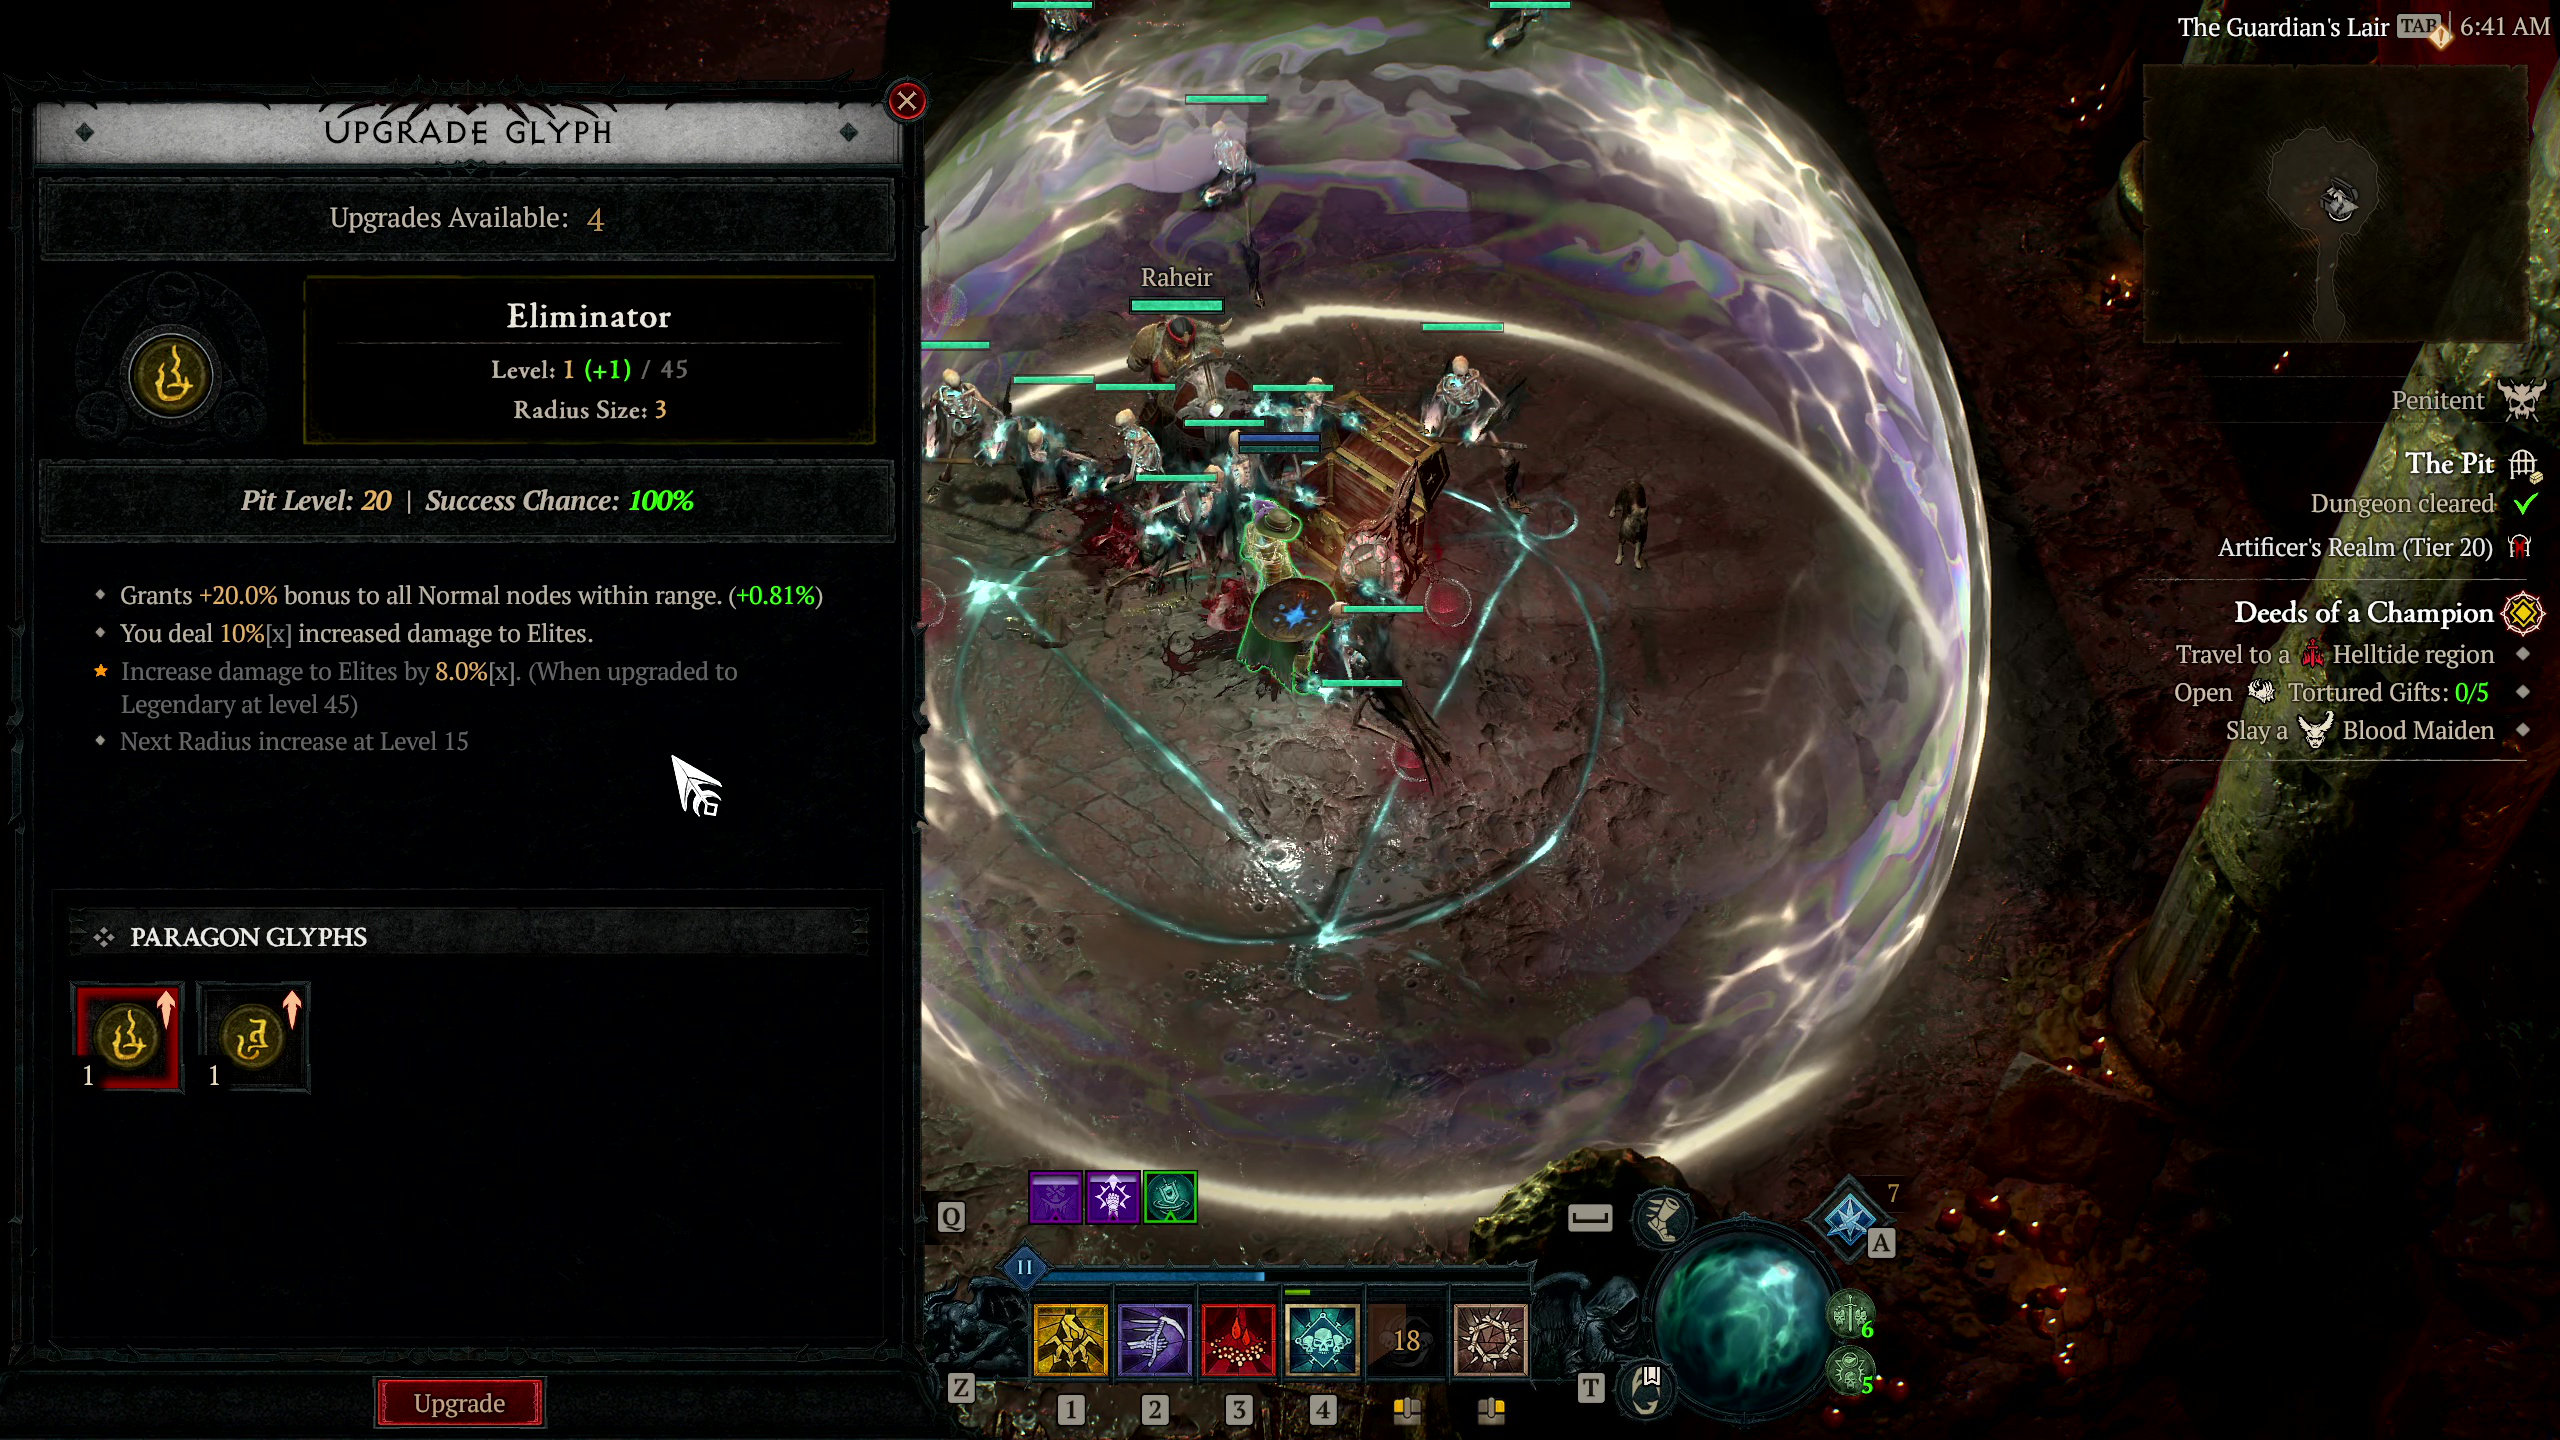
The Pit’s Guardian Lair is where you can upgrade your Paragon Glyphs at the Awakened Glyphstone. Depending on different factors, you can obtain more Glyph upgrades. You can upgrade Glyph Levels in The Pit much faster than when you used to upgrade them in Nightmare Dungeons. Having to upgrade only 5 Glyphs with the Board Limit is a better grind commitment as well.
PUBLIC EVENTS
Public Events are now available in Nahantu as well. Not sure if there is any difference in terms of rewards. I will simply mention what I saw in the game in Torment 1 Difficulty (Level 60) for a Whisper of the Dead Public Event.
- 111,081 XP
- 2,440 Gold
- 1,200 Gem Fragments (each) for two Gem types
- Veiled Crystals x 4
- Iron Chunks x 3
- Distilled Fear x 2
- Paragon Glyph
The Public Event’s Chest dropped the following rewards:
- 51 Murmuring Obols
- 1,200 Gem Fragments (each) for two Gem Types
- Veiled Crystal x 10
- Iron Chunk x 6
- Rawhide x 1
- Distilled Fear x 3
Public Events on their own are lucrative, but double-dipping Public Event + Whispers of the Dead Public Event objectives is a pretty good time investment whenever those are available.
CELLARS
I didn’t see anything different in Cellars, but I will share what dropped from the chest there so you can compare it with Live Realms.
- Bundled Herbs x 15
- Veiled Crystal x 6
- Rawhide x 2
- 39664 Gold
At a glance, a very good source of Veiled Crystals. Public Events and Cellars are the activities to farm for Veiled Crystals.
TREE OF WHISPERS
After I turned in Whispers of the Dead (10/10 Grim Favors), I was rewarded with +500 Mercenary Rapport and +250 Reinforcement Rapport. The Whispers Cache rewarded me:
- 30 Sigil Powder
- Nightmare Sigil x 1
- 740,541 XP
- 18,750 Gem Fragments
- Legendary Tempering Manual
- Veiled Crystals x 6
- Angelbreath x 1
- Bundled Herbs x 3
- 5 items of varying quality
- Malignant Heart x 1
- Artificer’s Stones x 3
- Coiling Wards x 5
- 2,304,424 Millions of Gold
PARAGON
It is impossible to talk about every Paragon Board for every class in a single review or article, but the best news is that the Starting Paragon Board has 10 more Normal Nodes. There is a Board Limit of 5/5 (this limit includes the Starting Board, which means you can only add 4 Boards after the Starting Board).
The maximum level of a Glyph has been increased from 21 to 100. At Glyph Level 45, a Rare Glyph can be upgraded to a Legendary Glyph using Gem Fragments with the following bonuses:
- The Glyph’s Radius Size has increased from 4 to 5.
- The Glyph gains an additional affix.
You can now spend 300 Paragon Points total (used to be 200).
INFERNAL HORDES
The Infernal Hordes feel much easier to complete. Infernal Compasses drop from the Tree of Whispers Cache, and can also drop from Helltide, Nightmare Dungeons, and The Pit. You can no longer upgrade the Infernal Compass Tier. In Vessel of Hatred, Infernal Compasses will scale with your Torment Level.
If you wish to tackle an Infernal Hordes Tier 4, you should switch to Torment IV Difficulty — but that requires you to have completed The Pit Level 65.
OTHER
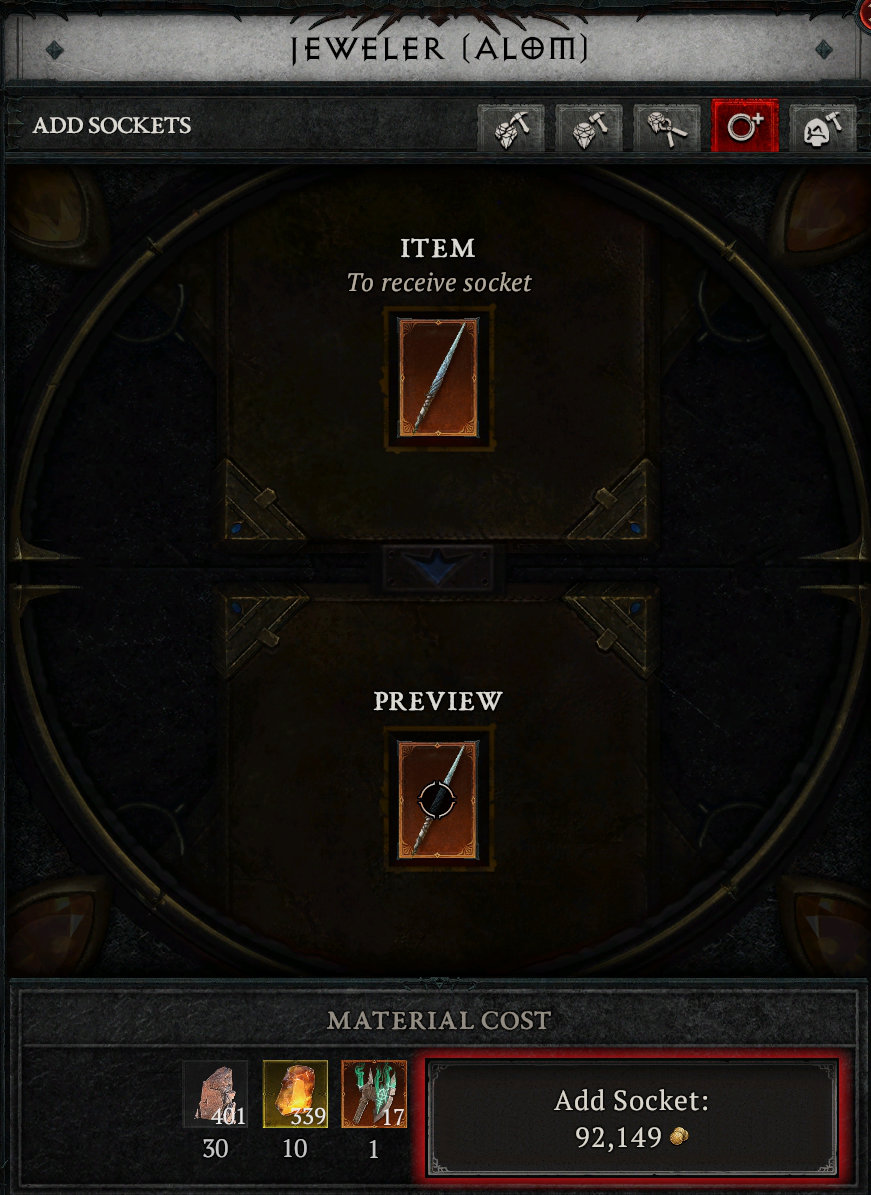
Scattered Prism still drops in the game from Legion Events and other activities, however not all slot items require a Scattered Prism to add a socket at the Jewelcrafter. As seen in the image below, mundane materials were used to add a socket to an item: Baleful Fragment x 1, Veiled Crystals x 10, and Iron Chunk x 30. Material Costs vary from item to item. This is merely an example.
CONCLUSION
Playing Diablo IV: Vessel of Hatred was a blast, and the daily grind felt much better than the base game. We can compare Vessel of Hatred with what Reaper of Souls did for the Diablo III base game. Vessel of Hatred makes Diablo IV more fun to play, adds more alternatives to target-farm certain Masterworking, Tempering, and Occultist materials, Jewelcrafting materials, Unique Items are now dropping from a specific Mythic Boss rather than more than one.
Crafting and many of the Services Costs will be reduced in the Launch Patch, after PTR and NDA Testing’s Feedback. The Dark Citadel is going to be exciting to many players, as well as the Undercity challenge with Tributes and Bargains that give you a lot of agency on what you wish to loot.
Season 6 also gives a lot of content to jumpstart you into Torment I and beyond with that juicy Seething Opal elixir that gives +15% Experience and other lucrative benefits.
You have lots of Caches to look forward to obtaining with Citadel Coins and Mercenary Bartering. These can help you to quickly acquire Masterworking materials.
I can’t wait for Vessel of Hatred to arrive in a few days to start grinding my way into the Dark Citadel and all the new content to hunt for Mythic Uniques. I also look forward to leveling up a Spiritborn at some point. My main is a Necromancer and that’s how I roll. But I never say no to trying an interesting new Class.
I hope you feel as excited as I am for Diablo IV: Vessel of Hatred.
You can pre-purchase Diablo IV: Vessel of Hatred at https://diablo4.blizzard.com
PARTIAL FIXES
Taking a look at the NDA press kit, the developers wish to share some of the changes coming at Launch.
Please note that the information below is not fully encompassing of all changes coming to Vessel of Hatred at launch – Full patch notes will be shared publicly for launch
General Updates
- Added ability to swap runes and gems without having to go to a jeweler
- Added tutorial for swapping runes and gems
- Added paragon level display to nameplates
- Fixed a number of stability and performance issues
Animation
- Fixed an issue where the Spiritborn may not turn properly when beginning dialogue with an NPC
- Fixed an issue where player characters could get stuck in a looping transition animation when standing still
- Fixed an issue where the Harbinger of Hatred turning animations would stutter instead of playing smoothly
Balance
- Fixed an issue where certain enemies in the Chakir stronghold were doing too much damage, making it difficult to conquer the Stronghold
- Fixed some issues with monster balance in local events
- Fixed an issue where some quest bosses weren’t tuned properly and were overly difficult on lower difficulties
- Fixed an issue where Seething Opals could grant too many experience points
- Fixed an issue where revive count in Infernal Hordes was scaling with difficulty level
- Fixed issues related to items, runes, and materials not dropping in places they should be
- Increased experience point gain from some quests
- Removed legendary cost for Tempering and Enchanting below level 60
- Reduced Imprinting cost by 3 times on Common and Rare materials.
- Reduced the cost of Ancestral to be a multiplier of 1.5 (from 3)
- Dungeon bosses now drop a large amount of common/rare crafting materials and scale with torment level.
- Infernal Horde and Whispers now reward a healthy amount of crafting materials and scale with torment level.
- Impairment Resistance has been removed from the pool of affixes
- Adjusted reward scaling for Infernal hordes and increased material chest rewards
- Added runes as rewards to Whisper caches, World Bosses, and Stronghold bosses
- Added runes as guaranteed drops for defeated certain campaign bosses for the first time
- Reduced hp of Elites, Uniques, Super Unique, and Boss monsters at lower levels
- Reduced damage of Super and Super Unique monsters to match elite monster damage scaling on hard difficulty
- Final pass on Rune balance
Class Skills & Paragon
- Fixed an issue where Dance of Knives could be unable to be cast if you spammed the skill too quickly
- Fixed an issue where the Druid Paragon nodes Earthen Devastation and Thunderstruck weren’t working properly
- Fixed an issue where Lighting Storm’s double damage tempering wasn’t working with Nature’s Fury
- Fixed an issue where stacks of Advanced Flurry could be lost after performing certain actions
- Fixed an issue where Max Life paragon nodes were giving too much life
- Fixed an issue where there was a discrepancy between actual damage numbers and tooltip numbers
Cosmetics
- Fixed some issues with clipping on some armor sets
- Fixed some texture issues on some armor sets
- Fixed some issues with cloth simulation on some armor sets
Dark Citadel
- Fixed an issue with the Teleport Guardian in Spiritcallers’ Sanctum where he may not despawn when he is meant to
- Fixed an issue where Vorshok and Hurstt would not always correctly trigger their invulnerable phase
- Fixed an issue where incorrectly matching Ritual Sigils was not progressing the wipe timer
- Fixed an issue where corpses could be used to trigger pressure pads
- Fixed an issue where Zagraal may not be able to be defeated if you reflect the Soul Orb right as the Impending Doom timer ends
- Fixed an issue where players may not get correctly teleported during the Faeroc encounter if they have too many minions in their party
- Fixed an issue where the Spell Guardian wouldn’t always get stunned when the boss is staggered
- Fixed an issue where the boss in Altar of Immolation could sometimes target stealthed characters
- Quicklist and join in Party Finder added to Citadel map icon
Dungeons
- Fixed some issues that could cause the Animus objective in dungeons to break
Mercenaries
- Fixed an issue where Mercenaries could kill player characters if they were bloodmarked
- Fixed an issue where Mercenary sound effects could be heard while in cinematics
- Fixed an issue where moving between zones could cause a duplicate mercenary to appear
- Fixed an issue where Mercenaries could get stuck repeatedly teleporting back to the player
- Fixed an issue where Varyana’s massacre UI could get stuck on screen even when she’s not with you
- Fixed an issue where Mercenaries were being considered as pets/minions in some scenarios
- Fixed an issue where Aldkin could get stuck repeatedly casting his Inferno ability
Quests
- Fixed issues related to map pins or objective areas not drawing correctly on the map for some quests
- Fixed an issue where mounts may not correctly unlock for new players
- Fixed various potential progression issues in campaign and side quests that could occur under certain circumstances
Realmwalker
- Fixed some issues related to Realmwalker icons showing on the map
- Updated Seething Opal’s loot bonus to work with Realmwalker reward chests
Strings, Voice, and Localization
- Updated some text strings that were still using placeholder text to use final text
- Updated some placeholder audio when hovering over objects to use final audio
Undercity
- Fixed an issue where monsters may not fully reset when players fail an Undercity run
- Fixed an issue where players may not always get removed from the Undercity once the timer expires
- Fixed an issue where progression may get blocked if you enter a portal right as the timer expires
- Fixed some issues with the boss fight in the Bug Cave district
- Fixed an issue where icons may not show up on the map for reward chests
- Adjusted time bonuses granted from elites and super elites in Undercity, and removed certain monster affixes from the pool
- A stash chest will now appear after the Undercity boss is killed so you can transfer loot
- Enabled usage and dropping of Ancestral and Mythic Tributes in all torment tiers
- Added a separate Runes tribute for pre-torment difficulties
- Removed the Class Uniques tribute
Whispers
- Fixed an issue where Bounties in Upper Kurast could disappear from the map
- Fixed an issue where the Lord Zir Bounty could not be completed

 Diablo 4: Vessel of Hatred